
Home tips, industry trends, and our latest featured projects.

Living Comfortably Through Home Renovation — Benson Homes
Today we’re here to share some of the renovation wisdom we’ve picked up along the way as we share the “secret sauce” to not just surviving but thriving during your home's remodeling journey.
Have you finally decided to embark on the home renovation you’ve been dreaming up for so long? Moving forward with renovation plans can be such an exciting time, but can also bring some stress along with it as you face the inevitable “controlled chaos” that construction brings into your home - especially if you’re planning on still living in it during your renovation. In fact, many of our clients cite the inevitable discomfort of construction as one of the main reasons they put off their dream renovations before finally committing.

3D rendering design of Norfolk, VA kitchen by Benson Homes.
Thankfully, we have a lot of experience in that arena. At Benson Homes, we're not just about construction; we're about helping your family have a peaceful experience, even amidst the whirlwind of renovation. With over three decades spent honing our craft, we've mastered the art of blending comfort with chaos for homeowners in the midst of renovation, and have a few tricks up our sleeves to make the process go smoother for all involved. Today we’re here to share some of the renovation wisdom we’ve picked up along the way as we share the “secret sauce” to not just surviving but thriving during your home's remodeling journey.
1. Anticipate and Prepare for the Construction Phase
Before the hammer meets the nail, it’s important to take a step back and strategize. Our initial consultation isn't just about blueprints and budgets; it's about preparing you and your household for the adventure ahead. Expectations set? Check. Game plan in motion? Double-check. We have found that setting expectations upfront helps to minimize surprises and ensures that everyone is on the same page before construction begins. During our initial consultation with clients, we create a game plan so we can turn your vision into reality with as few disruptions to your life's rhythm as possible.

Flat lay of materials used in Norfolk, VA kitchen renovation by Benson Homes.
2. Create a Comfortable Living Environment Amidst the “Storm”
Hoping that somehow you will still have a peaceful retreat amidst the construction chaos? We've got you covered. We make living through a renovation more manageable for our clients by creating as comfortable a living environment as possible during the construction phase. A few tried and true things we do to achieve this are:
Sectioning off rooms with magnetic doors to minimize dust and noise.
Setting up a temporary kitchenette so that you can still prepare meals.
Creating designated entrances and walkways for our workers to provide you with privacy and minimize disruptions to your daily routine.
No renovation is going to be completely disruption-free, but we do our best to protect your peace and keep your household running despite the construction.
We set up a temporary hot water heater and kitchenette for our client during her kitchen renovation.
3. Prioritize Effective Communication and Coordination
Communication isn't just a buzzword; it's our lifeline during every renovation project. We always assign a dedicated project manager to oversee your project from start to finish. Your project manager isn't just a title; they are your bridge to clarity and peace of mind during your renovation. You can expect regular updates, a listening ear, and solutions tailored to your evolving needs. Our primary goal is to keep you informed and involved in the process every step of the way.
4. Maintain Safety and Security At All Times
Safety isn't negotiable; it's our top priority on any construction site. During your renovation, our team implements various safety measures to protect you, your home, and your family, including:
Ensuring that construction areas are properly secured to prevent accidents.
Minimizing hazards such as exposed wiring or sharp objects.
Securing the property and your belongings to prevent theft or damage.
5. Remain Flexible and Adaptable
Life can be unpredictable, and home renovations are no exception! While we do our best to stick to the timeline, we understand that unexpected challenges can arise during any renovation. Our team has learned to embrace the unexpected as we pivot, adapt, and conquer hurdles together. Our commitment? Turning setbacks into stepping stones, ensuring your dream home remains within reach, no matter the detours. If changes need to be made to the plan, we'll work with you in real time to find solutions that meet your needs and budget.

Before and after of a full kitchen renovation by Benson Homes in Norfolk, VA.
Navigating your home renovation isn't just about survival - it's about controlling the chaos, minimizing the stress, and emerging with the home of your dreams. With the right planning, communication, and support from a trusted contractor like Benson Homes, you can navigate the process with ease. If you're considering a home renovation project in Coastal Virginia or the greater Hampton Roads area, we're ready to help bring your vision to life. Contact us today to schedule a complimentary consultation!
If you want to learn more about the kitchen renovation featured in this article, you can view the project spotlight here.

Bold Kitchen, Laundry & Bathroom Remodel — Benson Homes
We have worked on hundreds of home remodel projects over the years and every once in a while one will come along that our whole team gets especially excited about. This kitchen, laundry room and powder bathroom remodel featuring unique and bold designs was one of those projects!
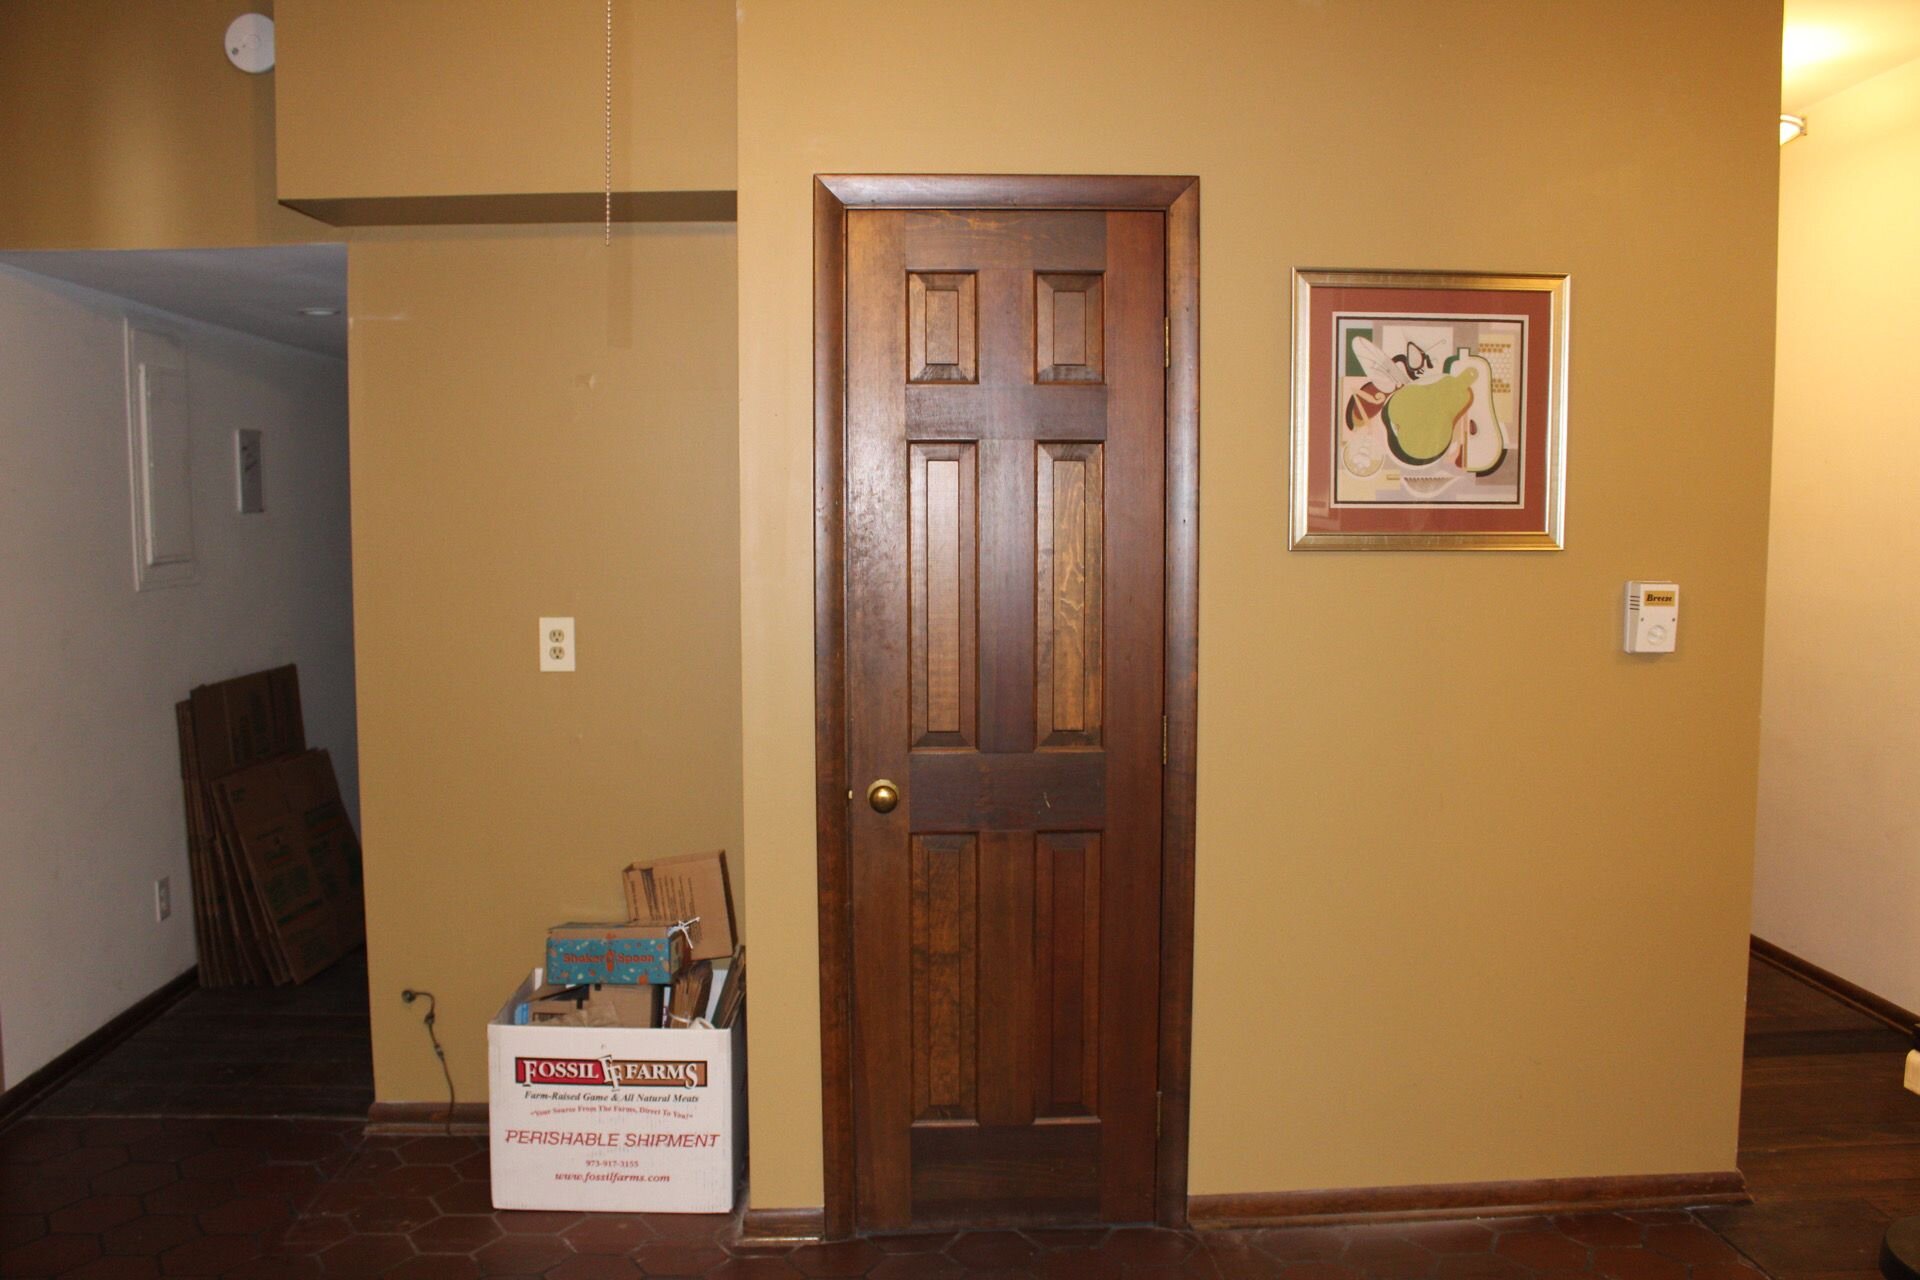
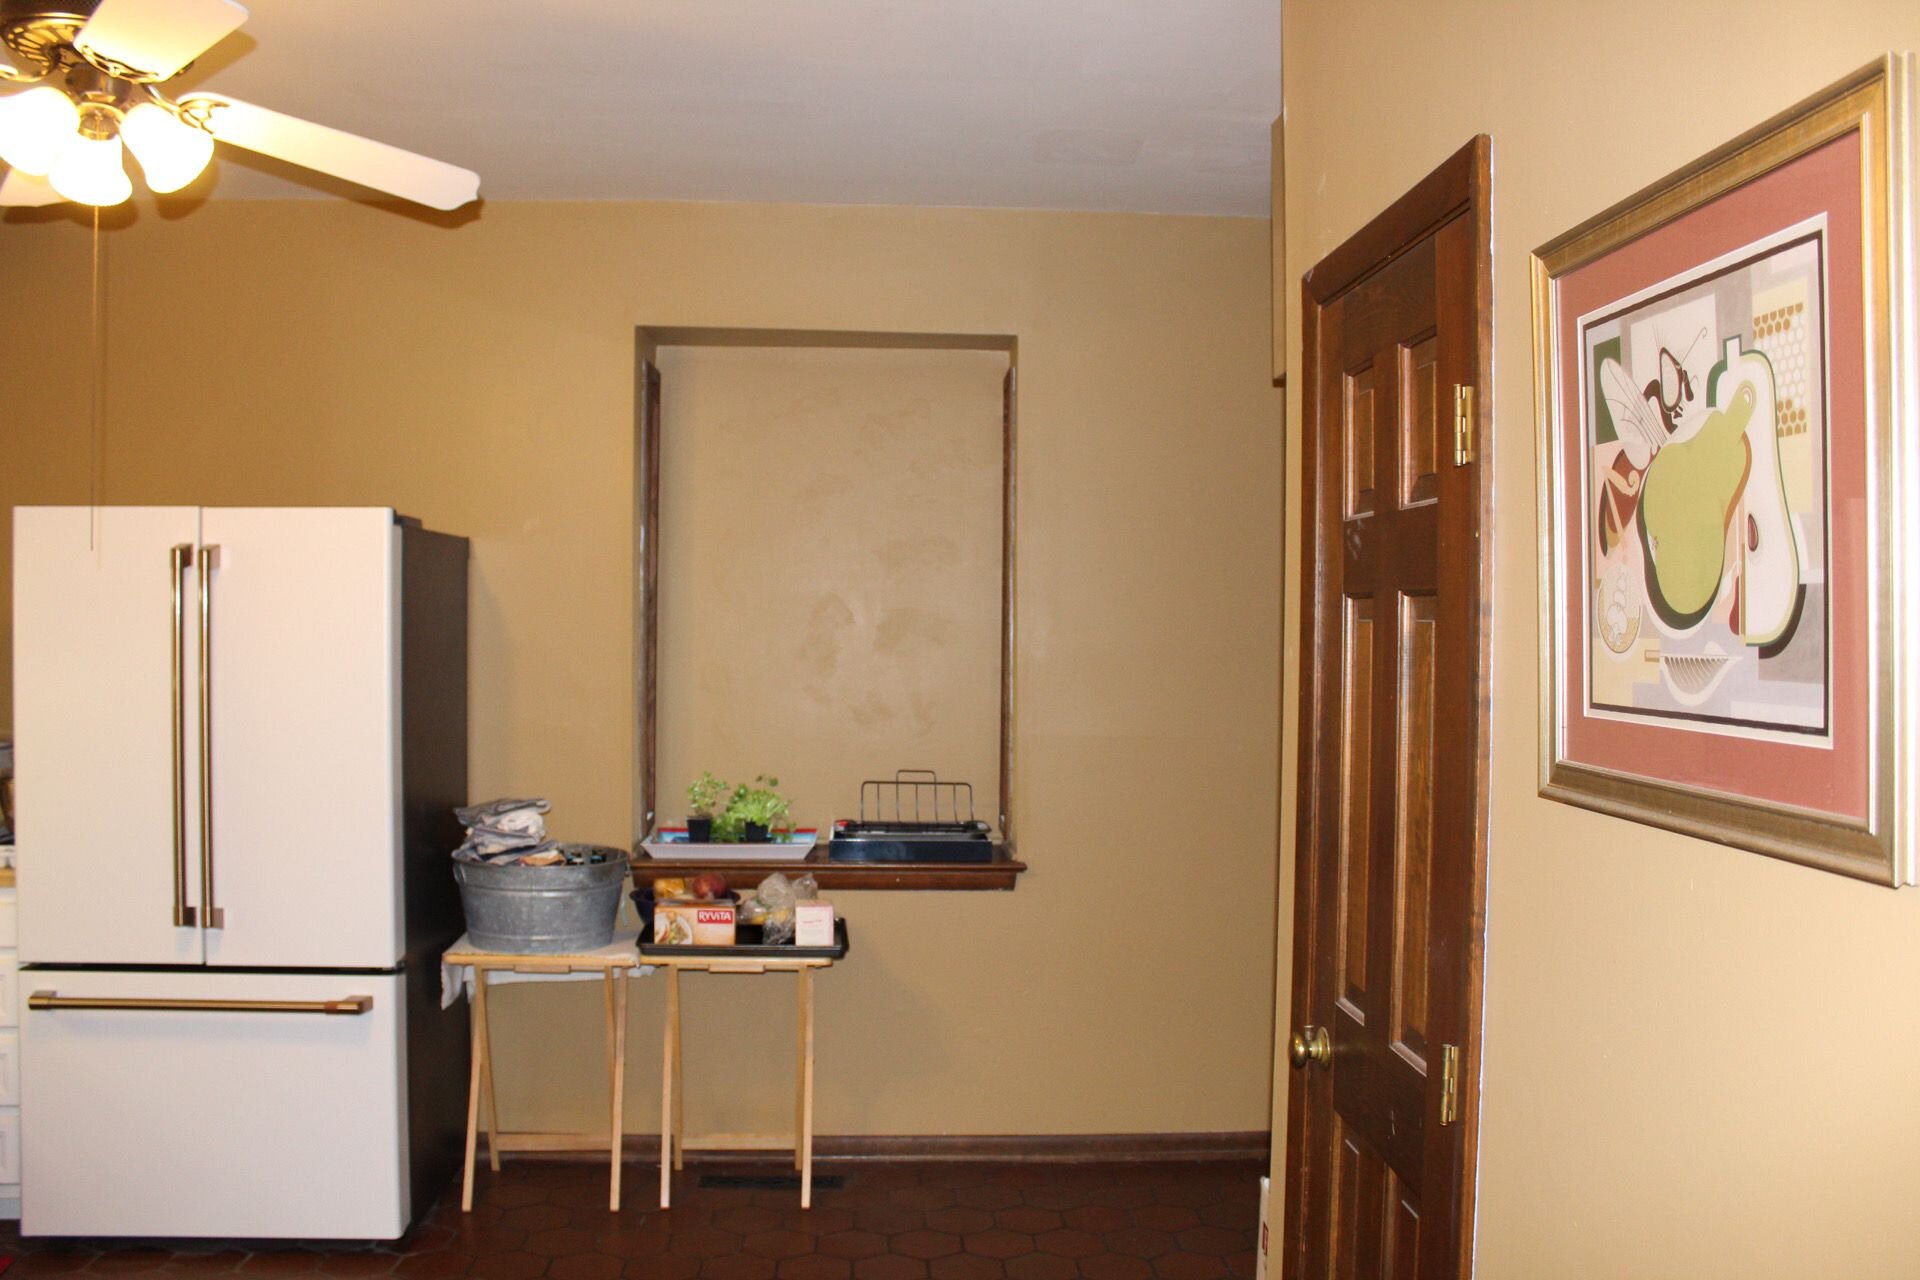
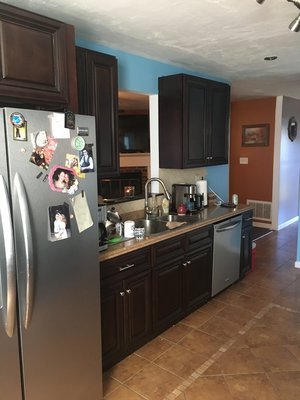
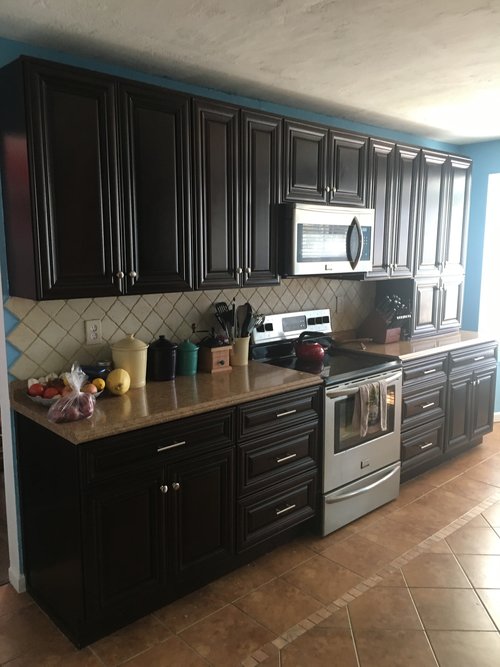
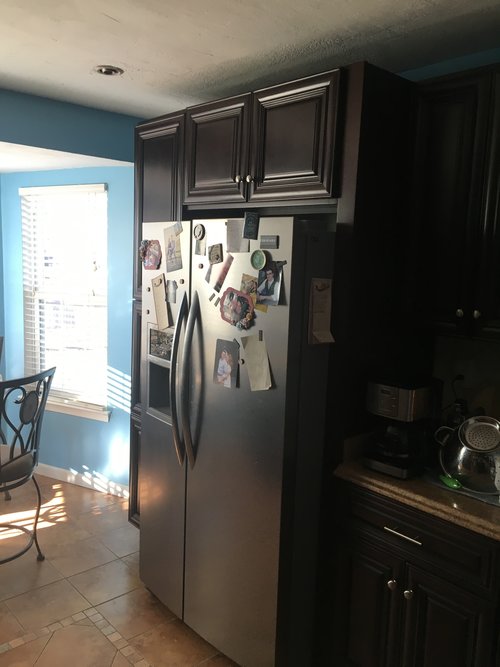
Kitchen Before


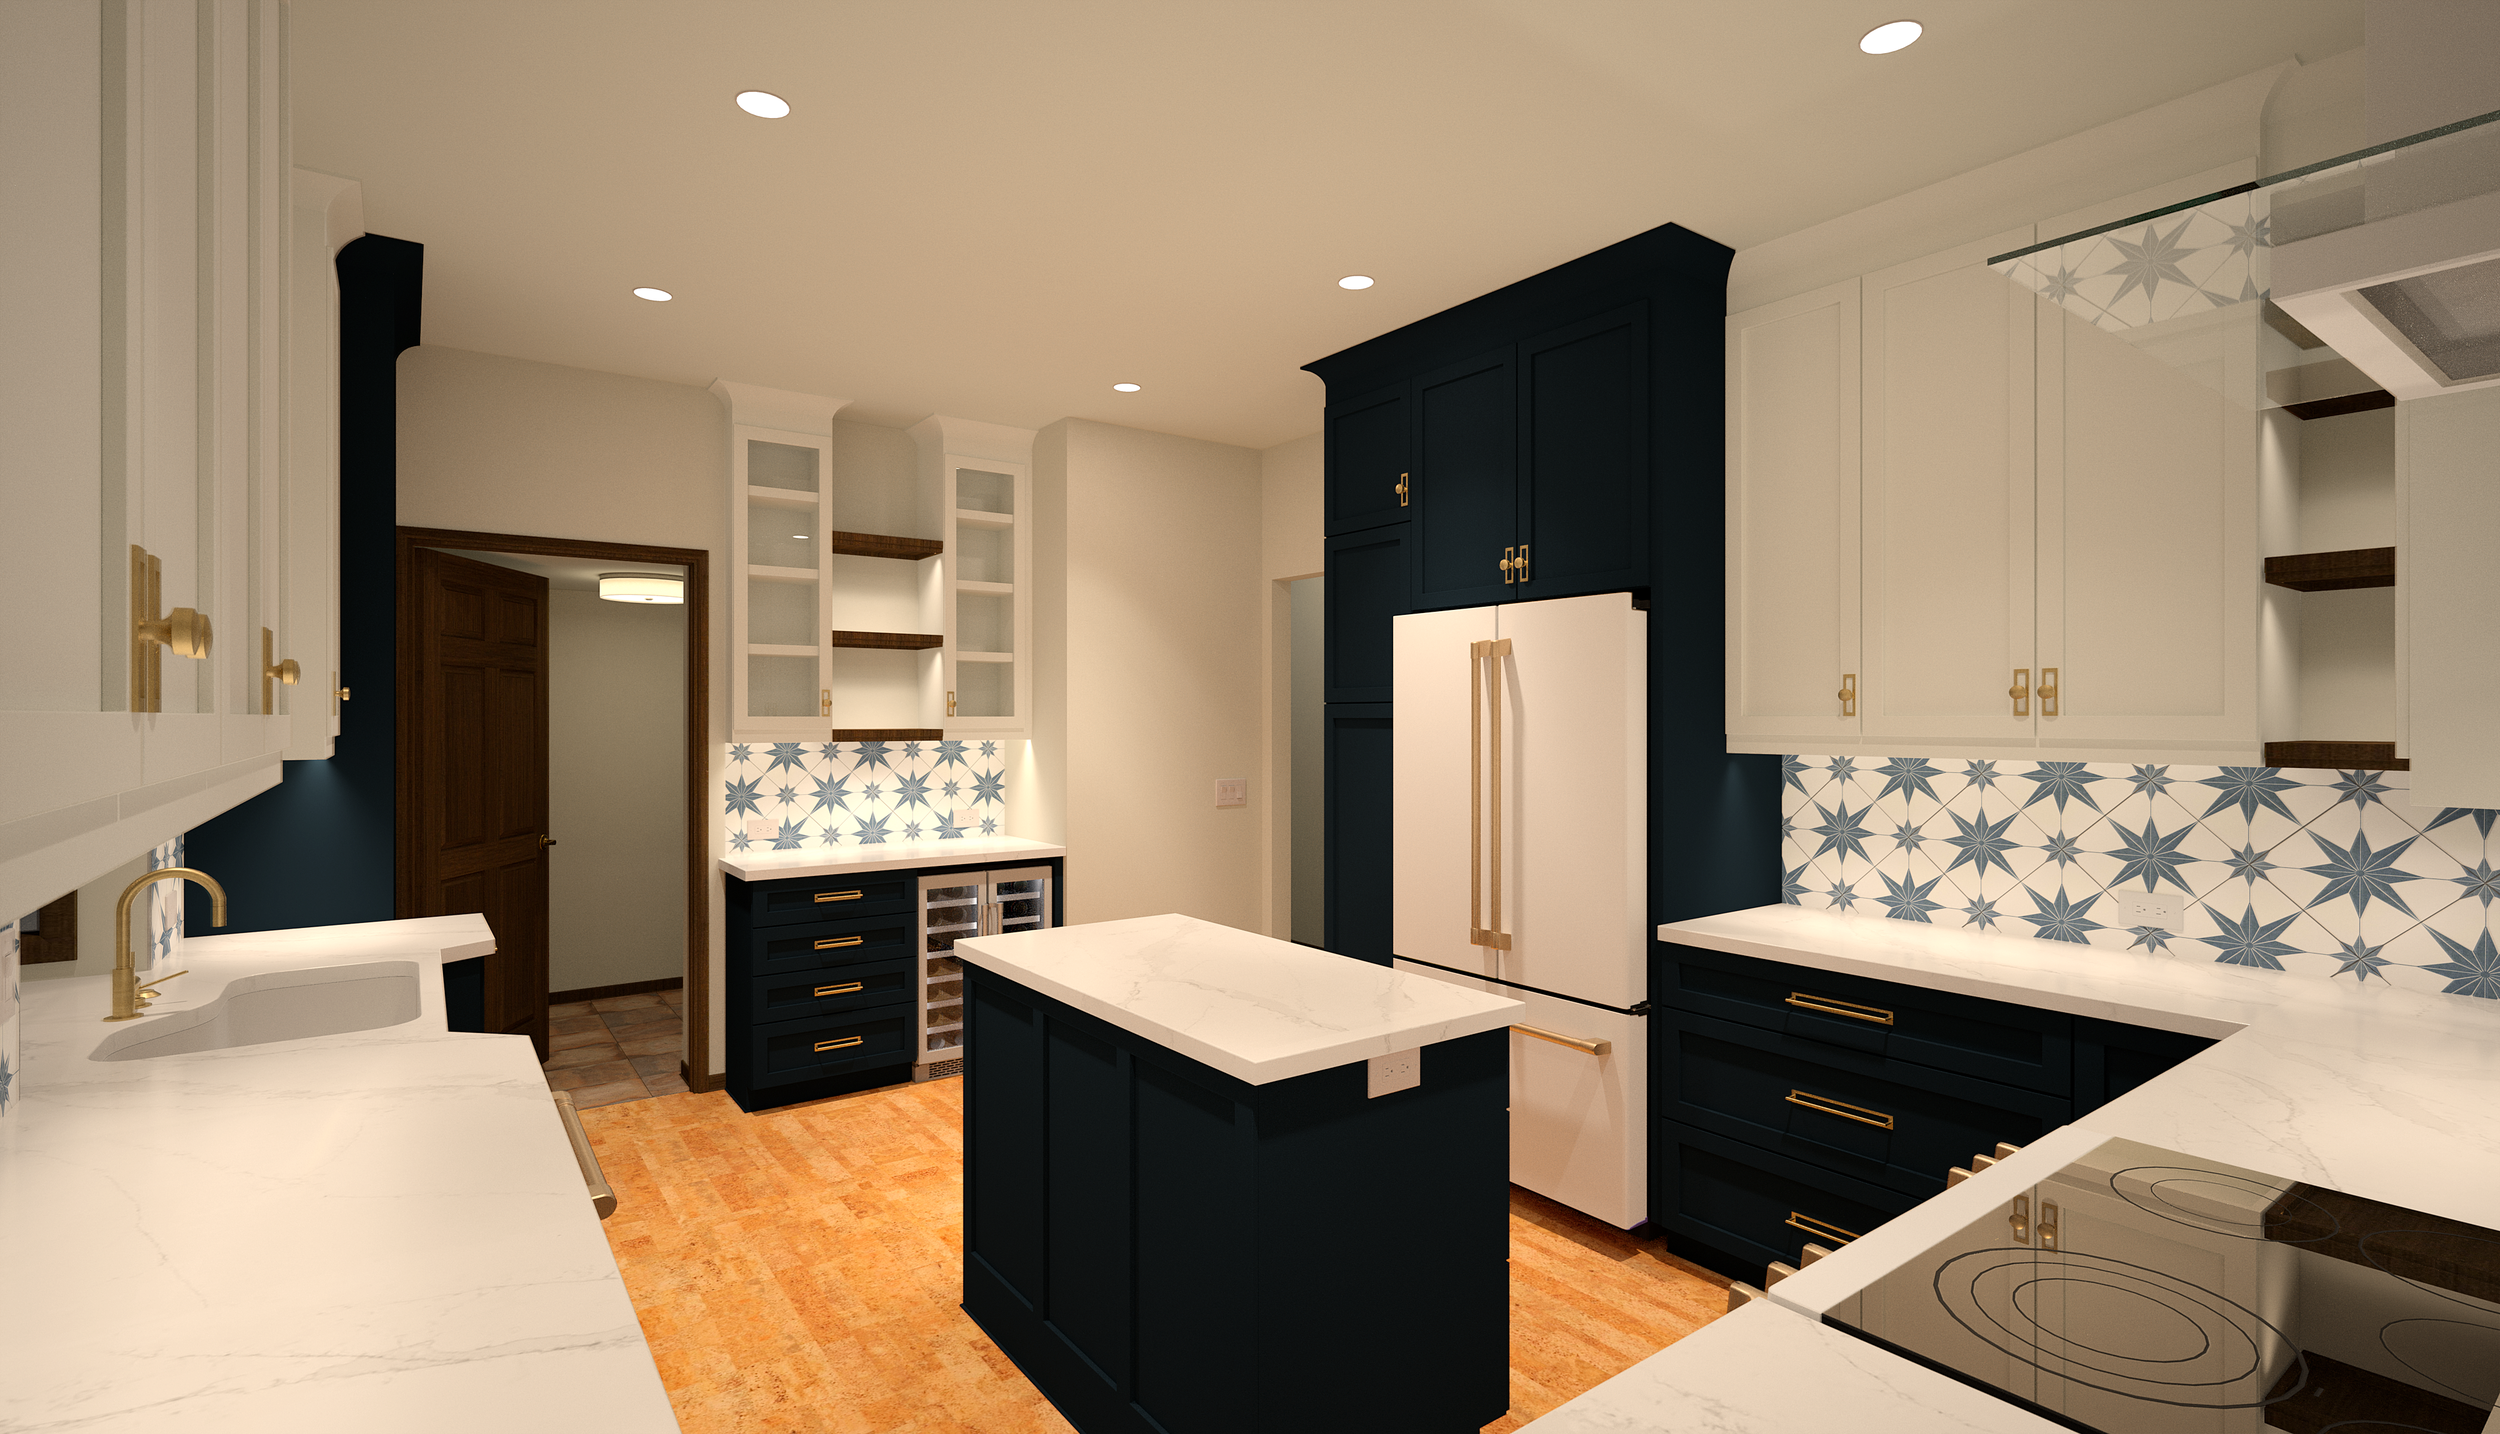
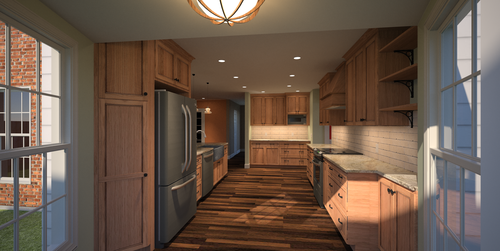
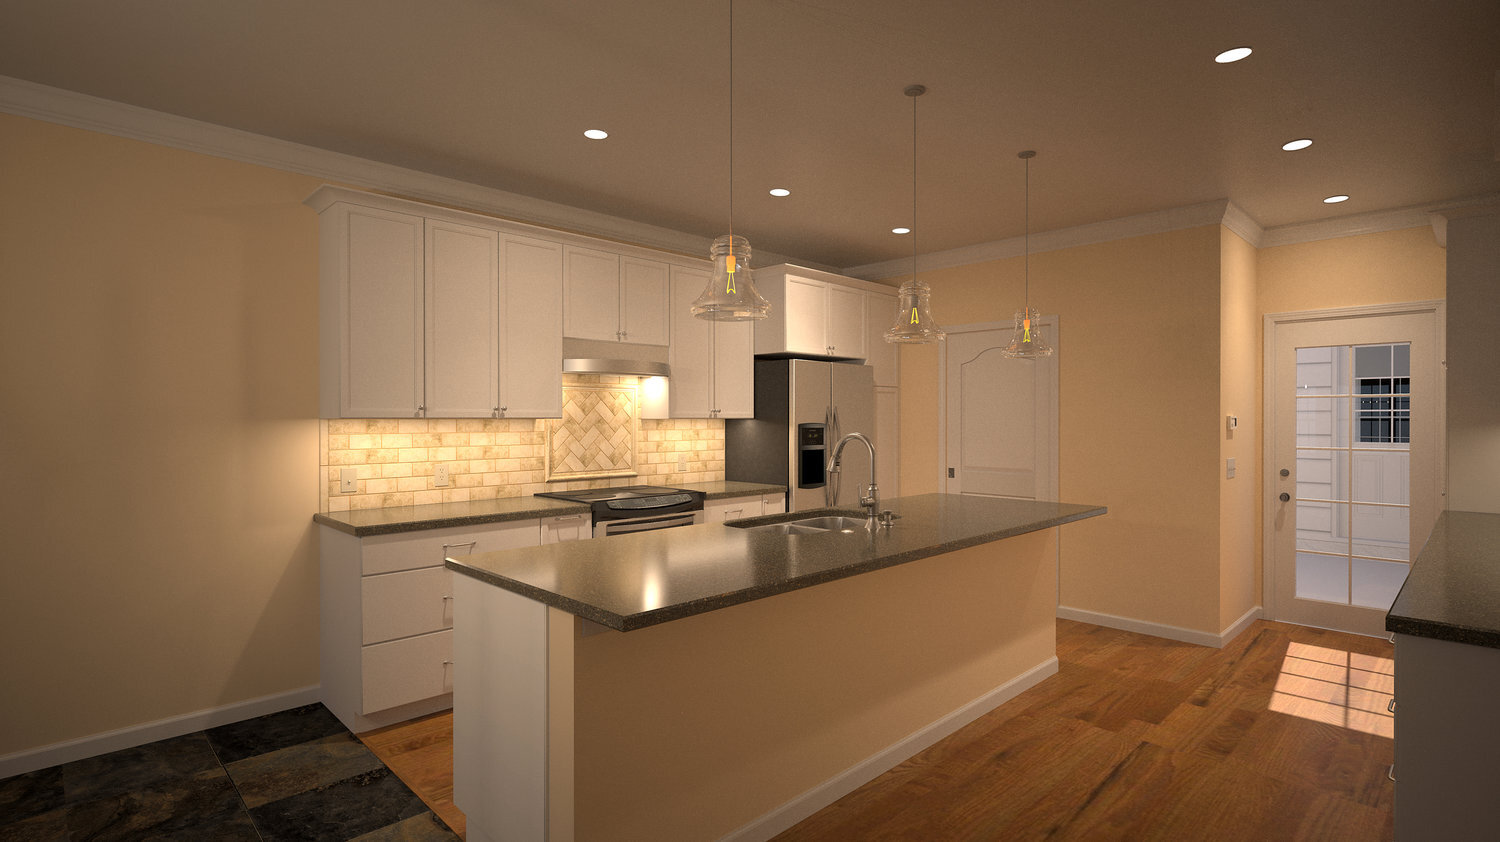
Kitchen 3D Renderings
In the design phase of the remodel, we created these realistic 3D renderings of the remodeled space so the homeowner could visualize the completed space and make any last changes to the design before construction even began.


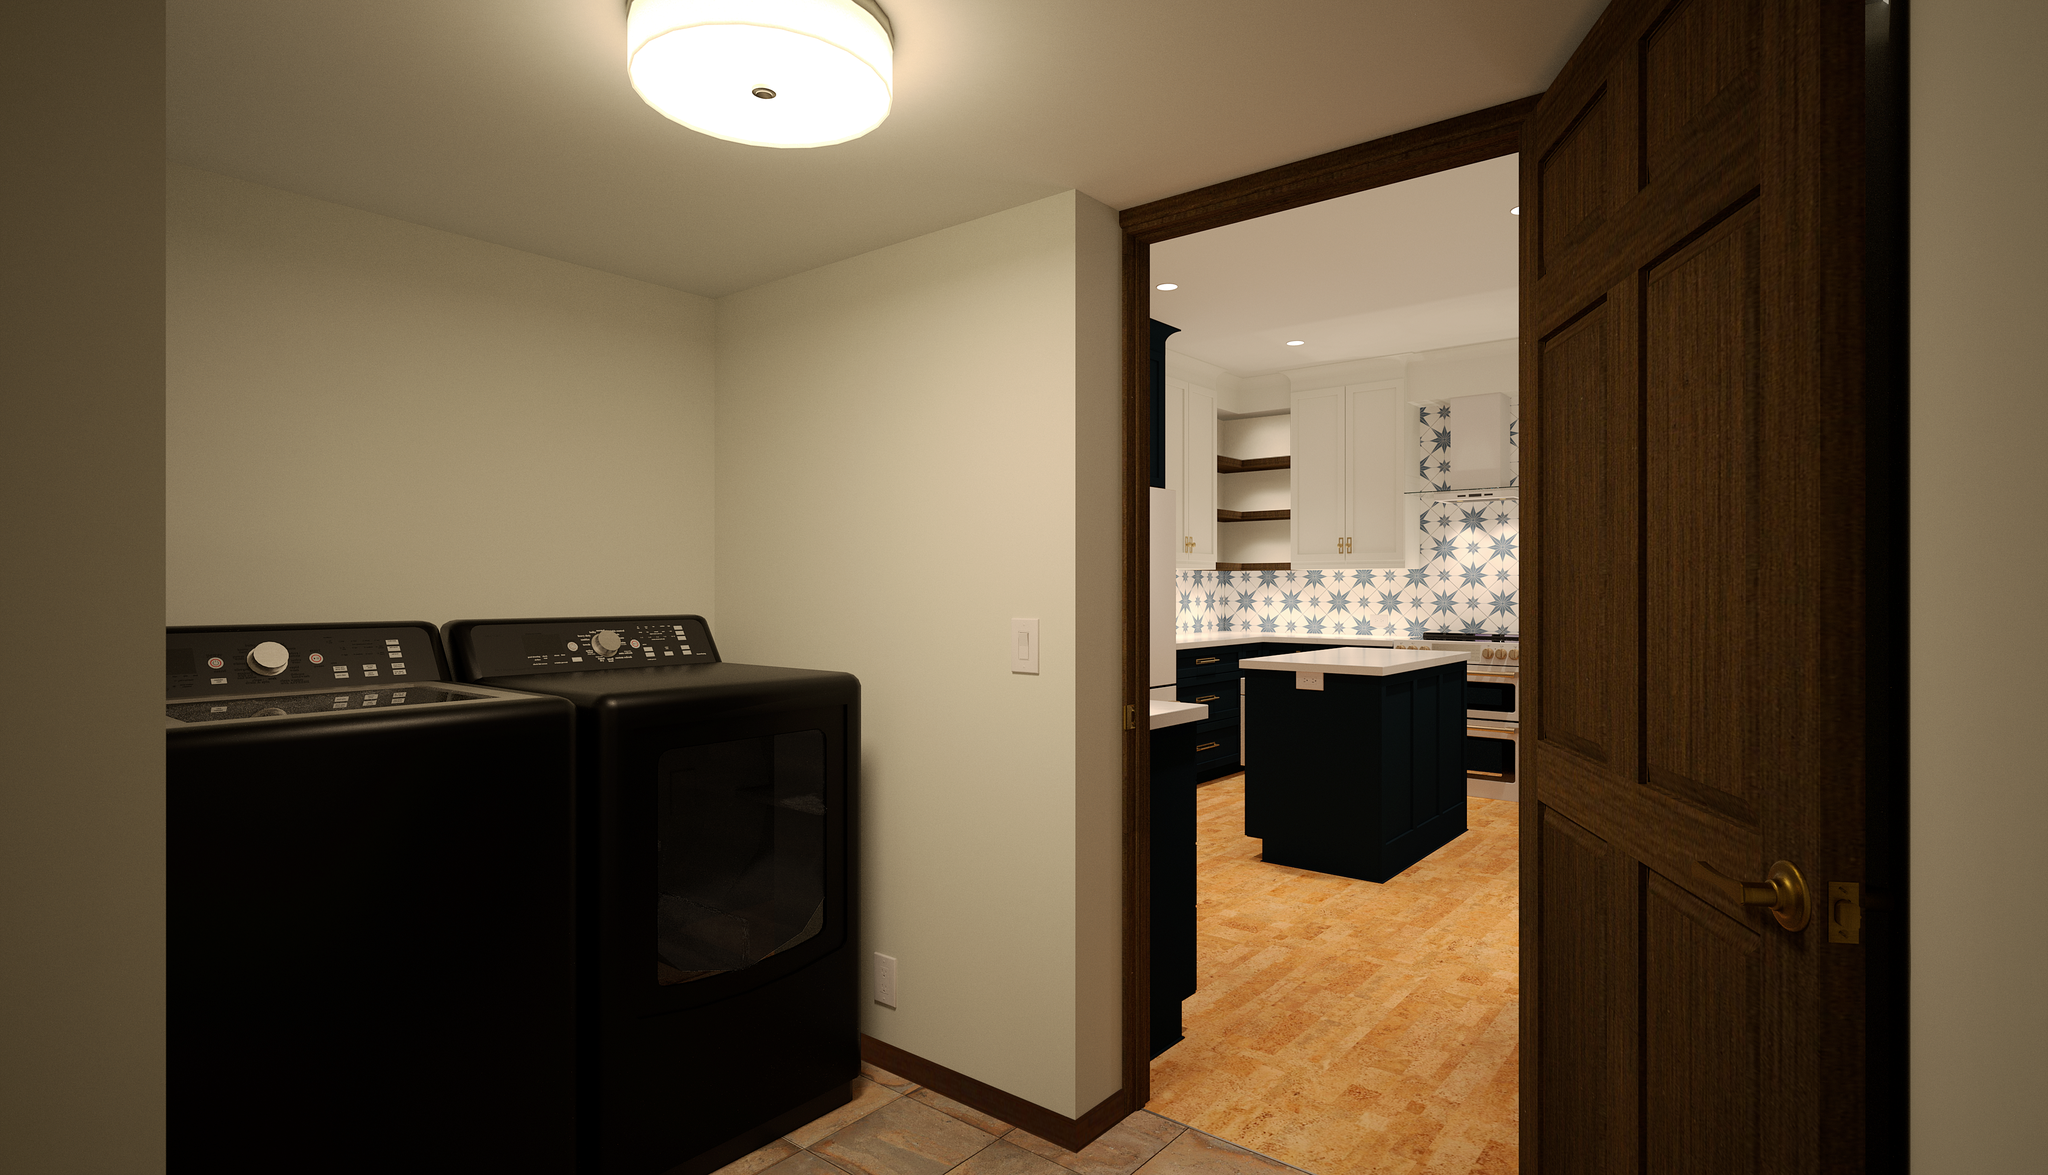
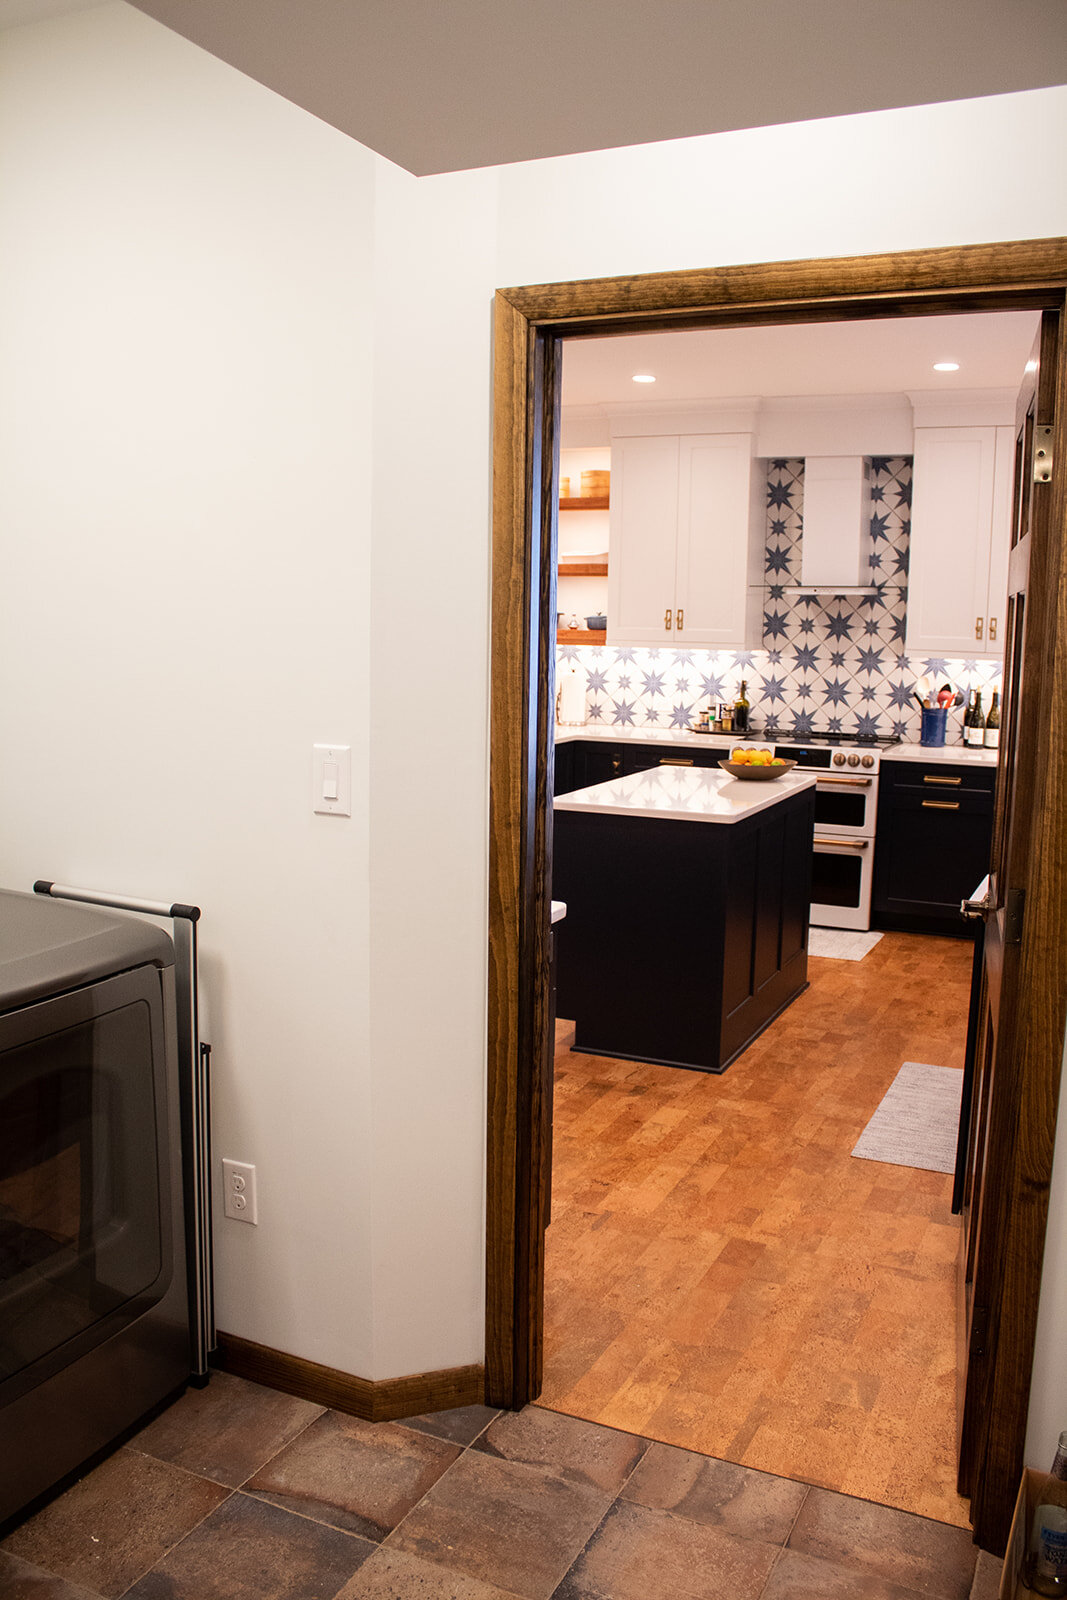
Laundry room right off the kitchen
The client knew what she wanted and didn’t shy away from bold patterns and colors. An avid cook and entertainer, she was looking to maximize the space in her kitchen while improving the flow and functionality.
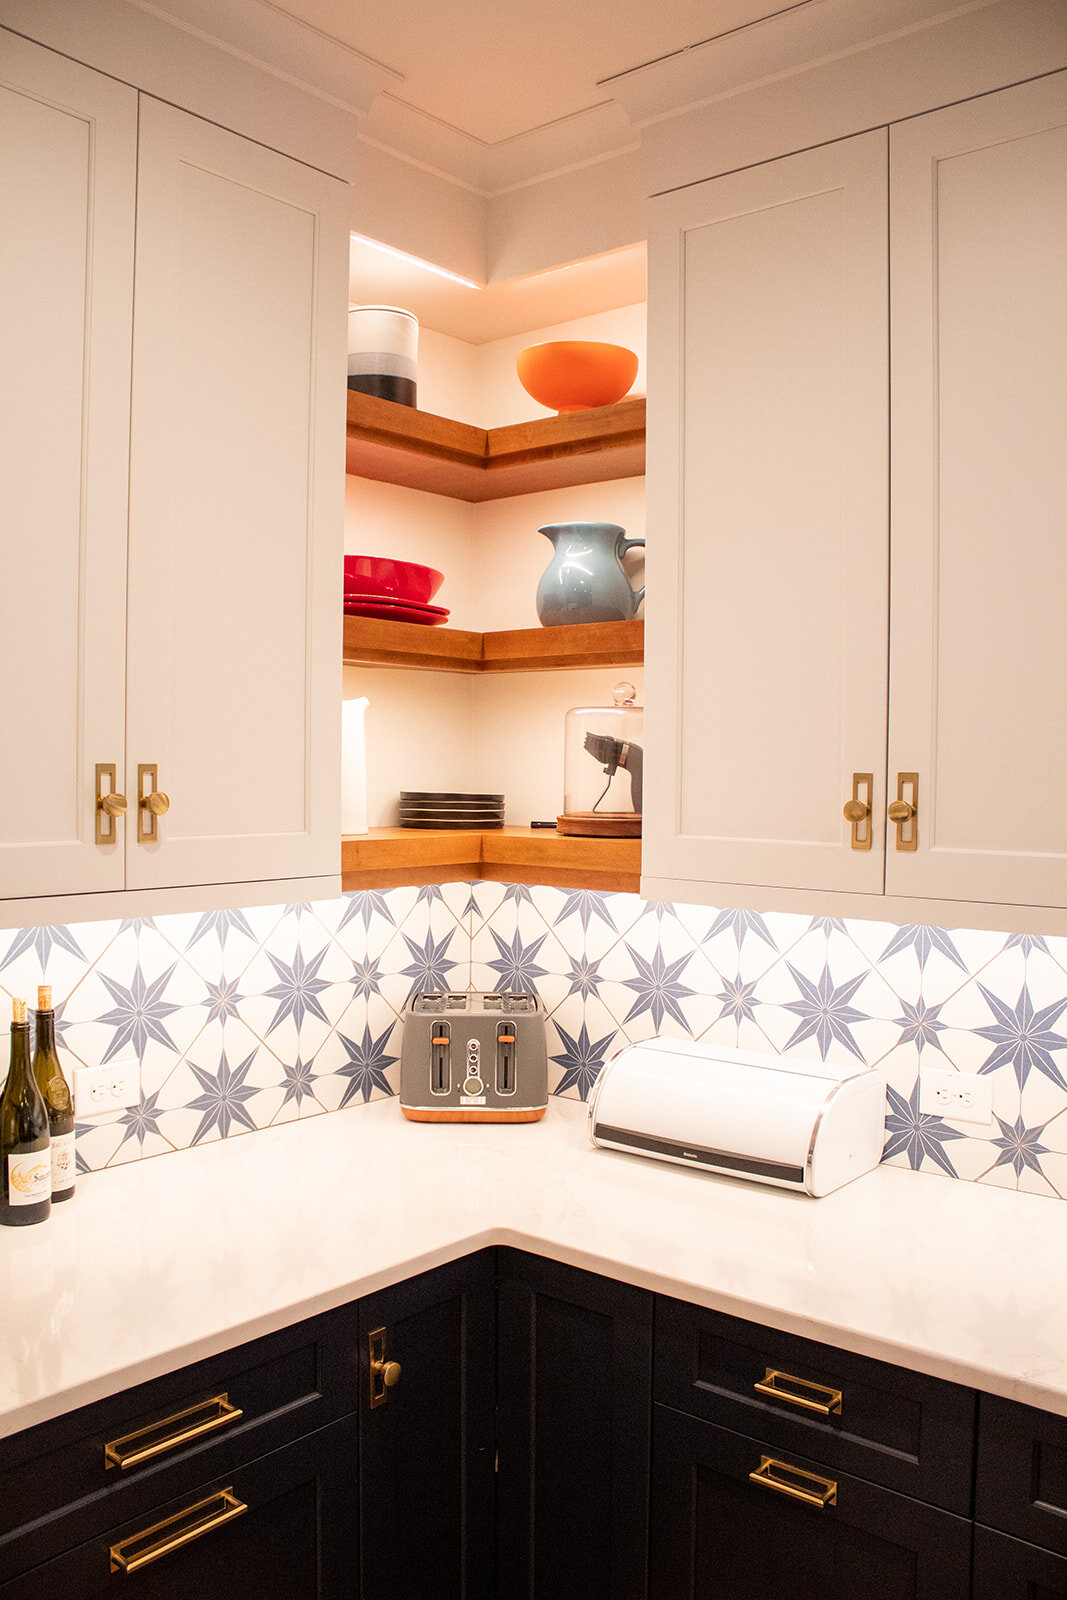
A few features we love about the new kitchen:
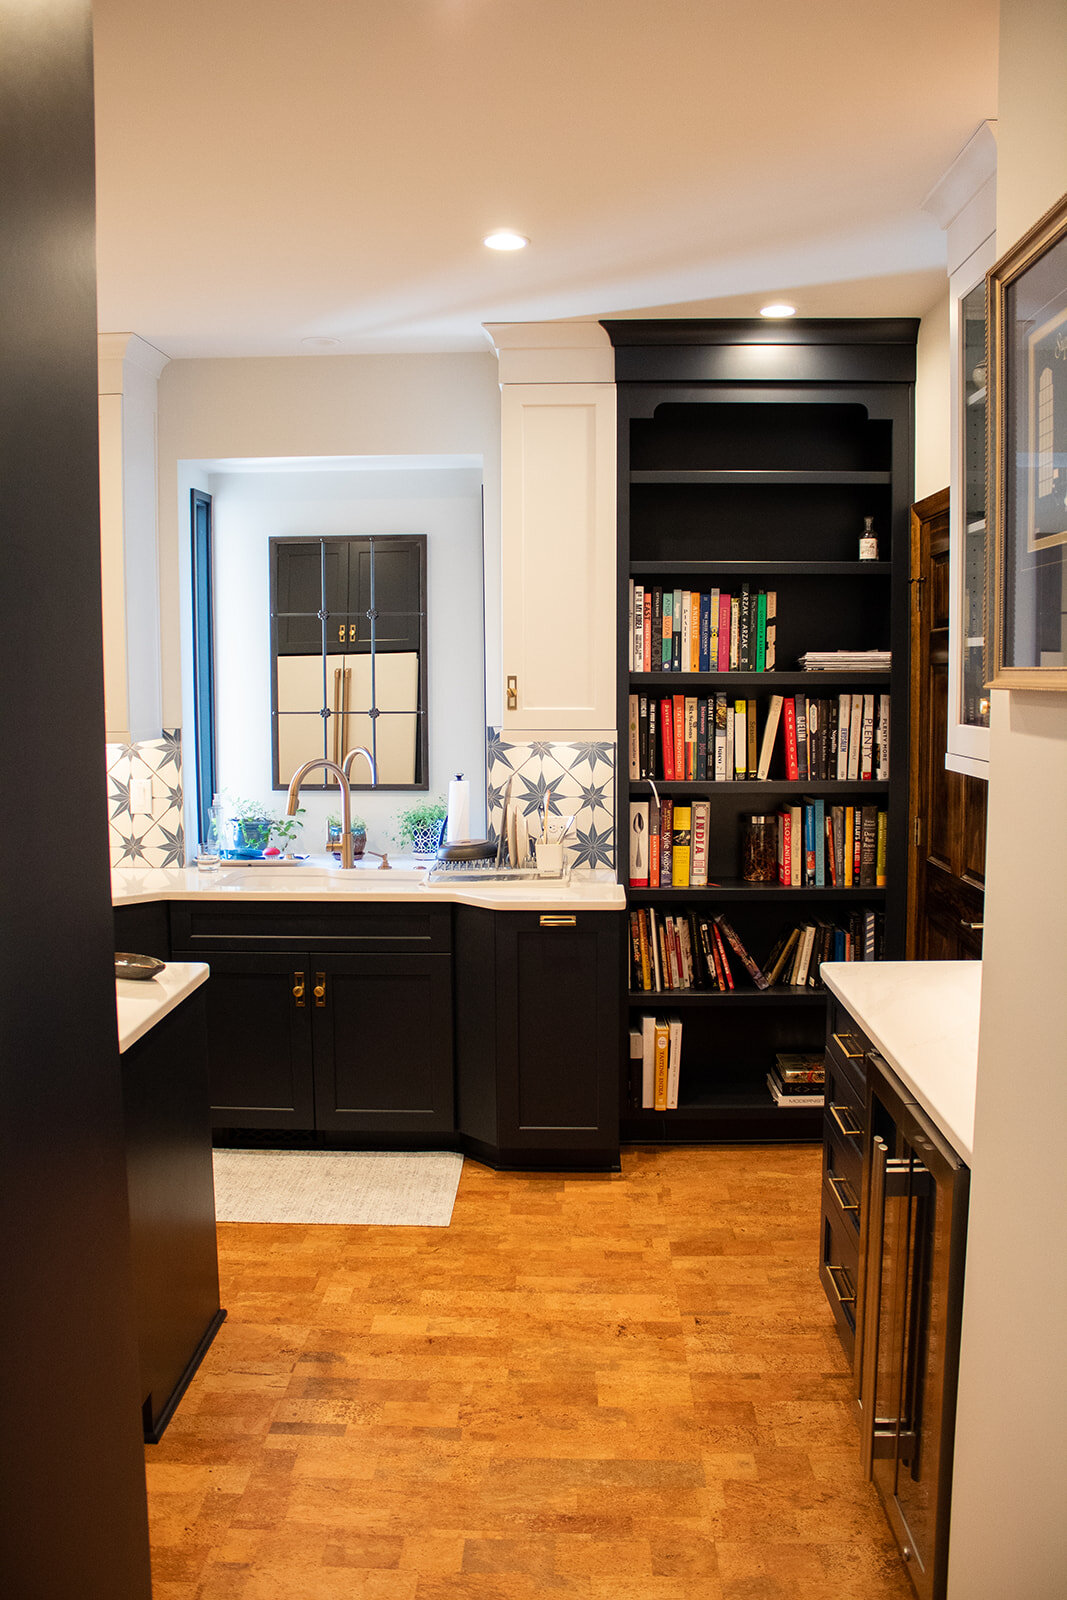
Cork flooring
Large bookshelf for cookbooks
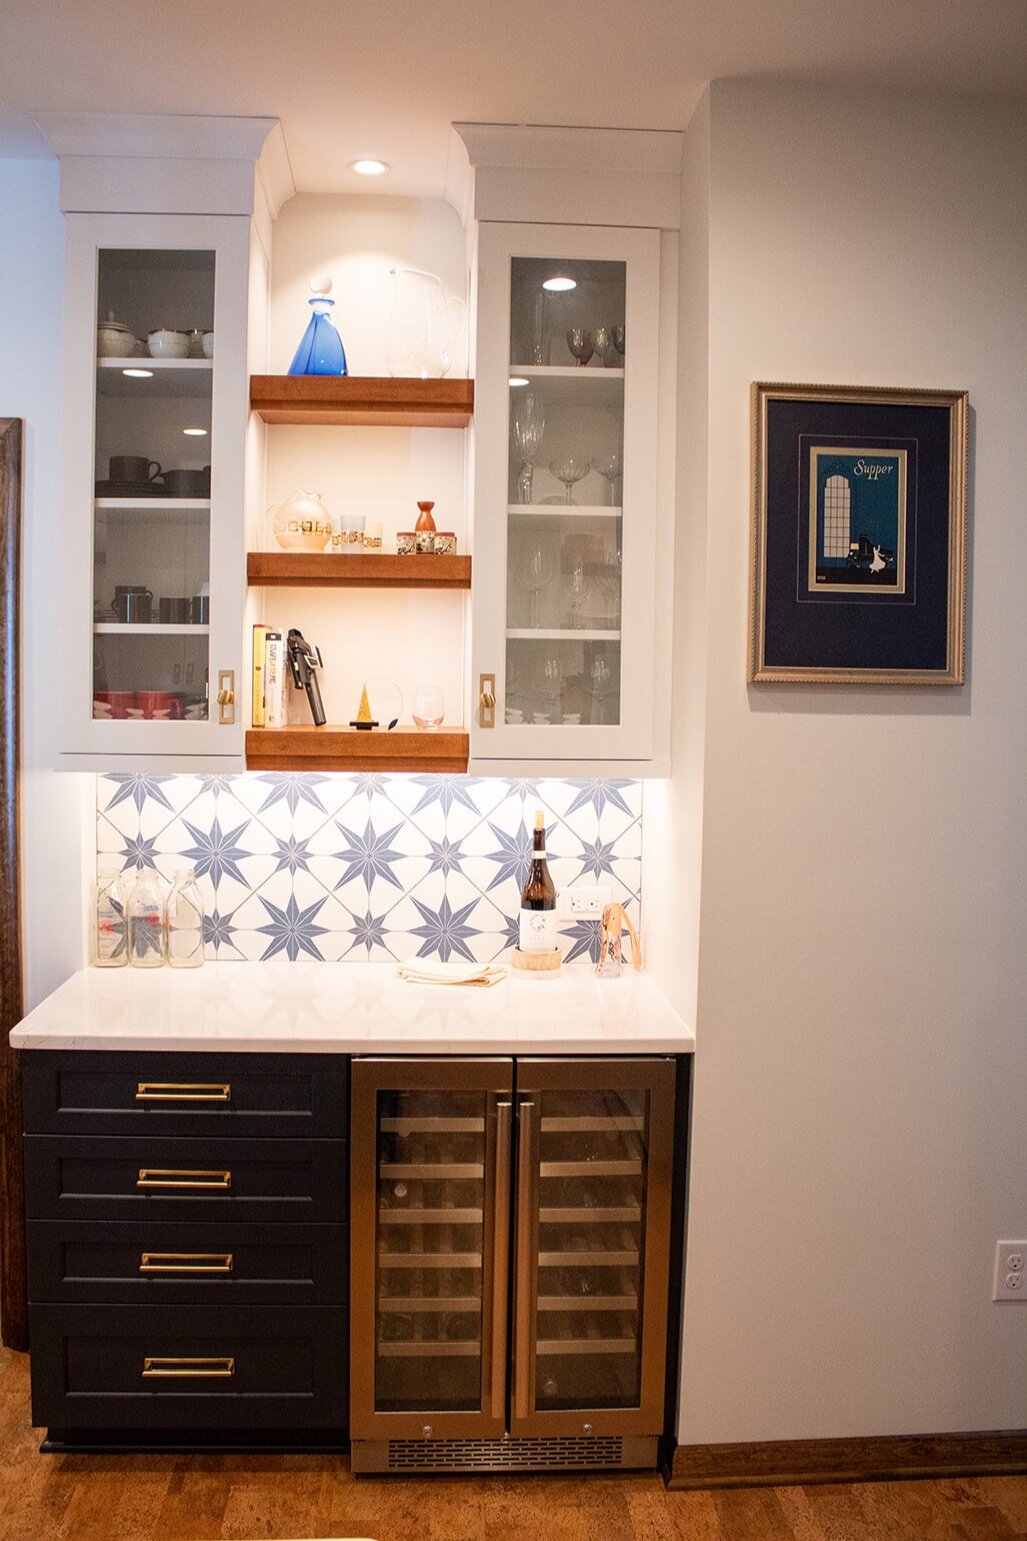
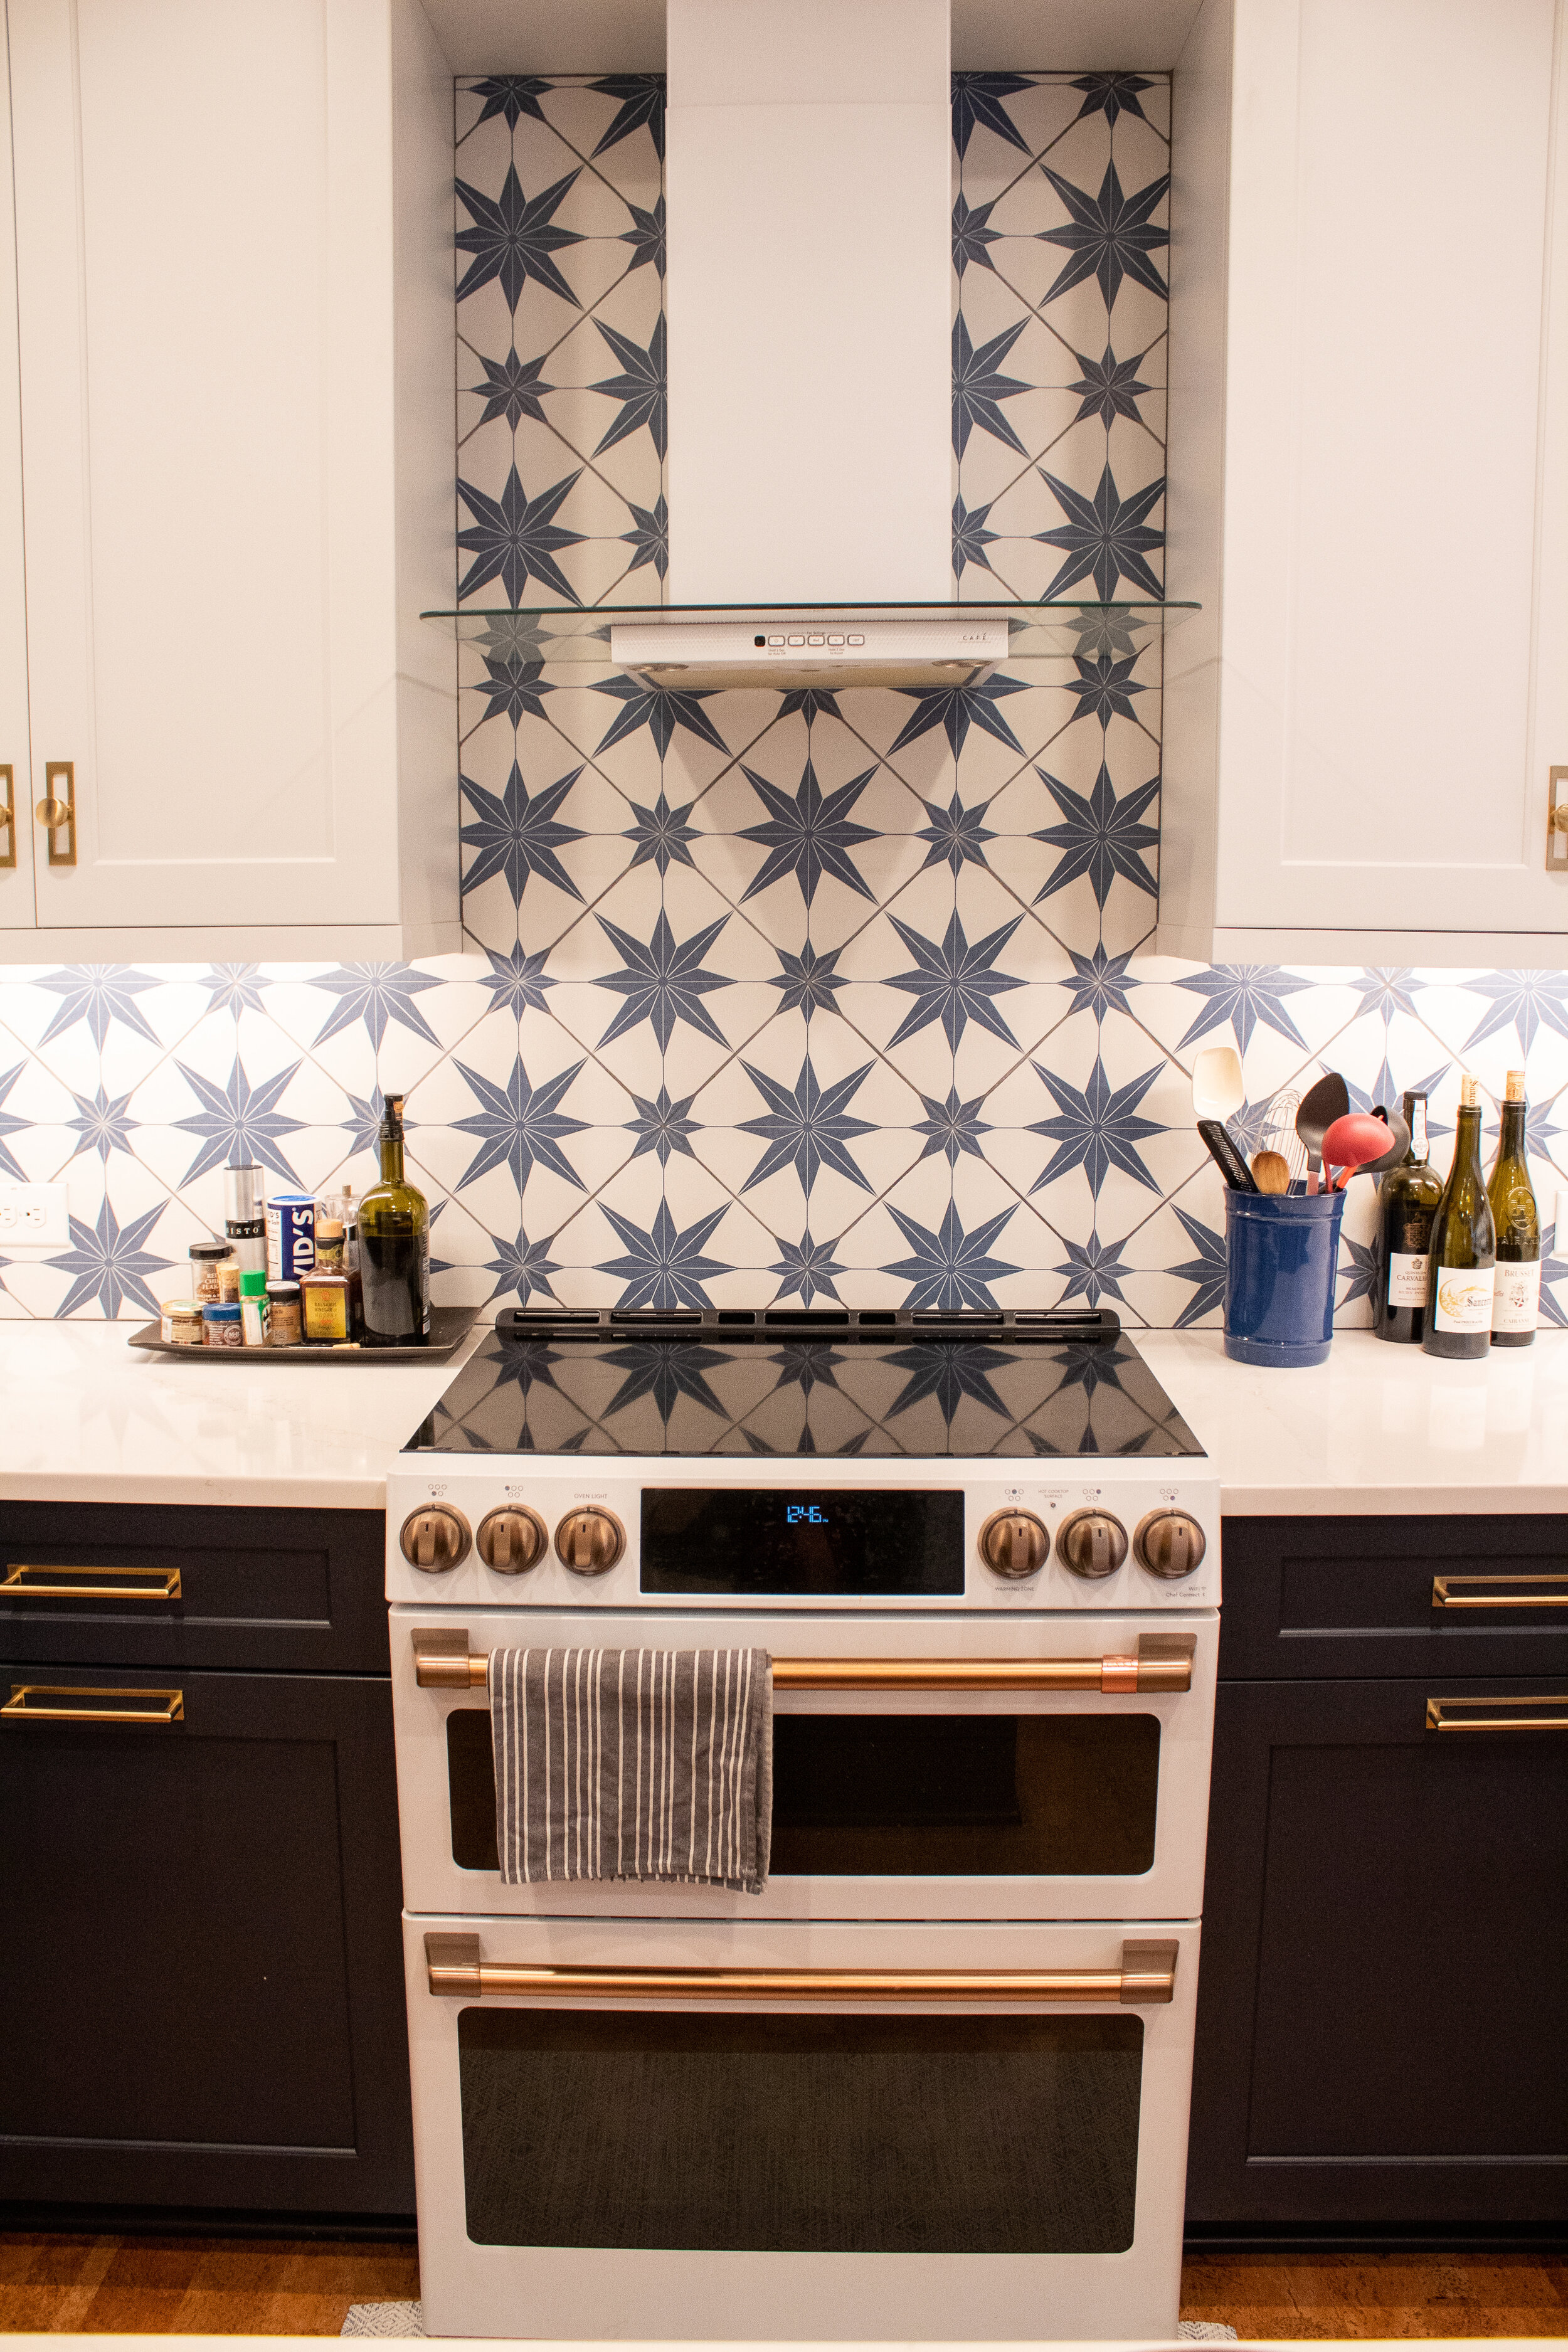
Tile backsplash with Moravian star pattern
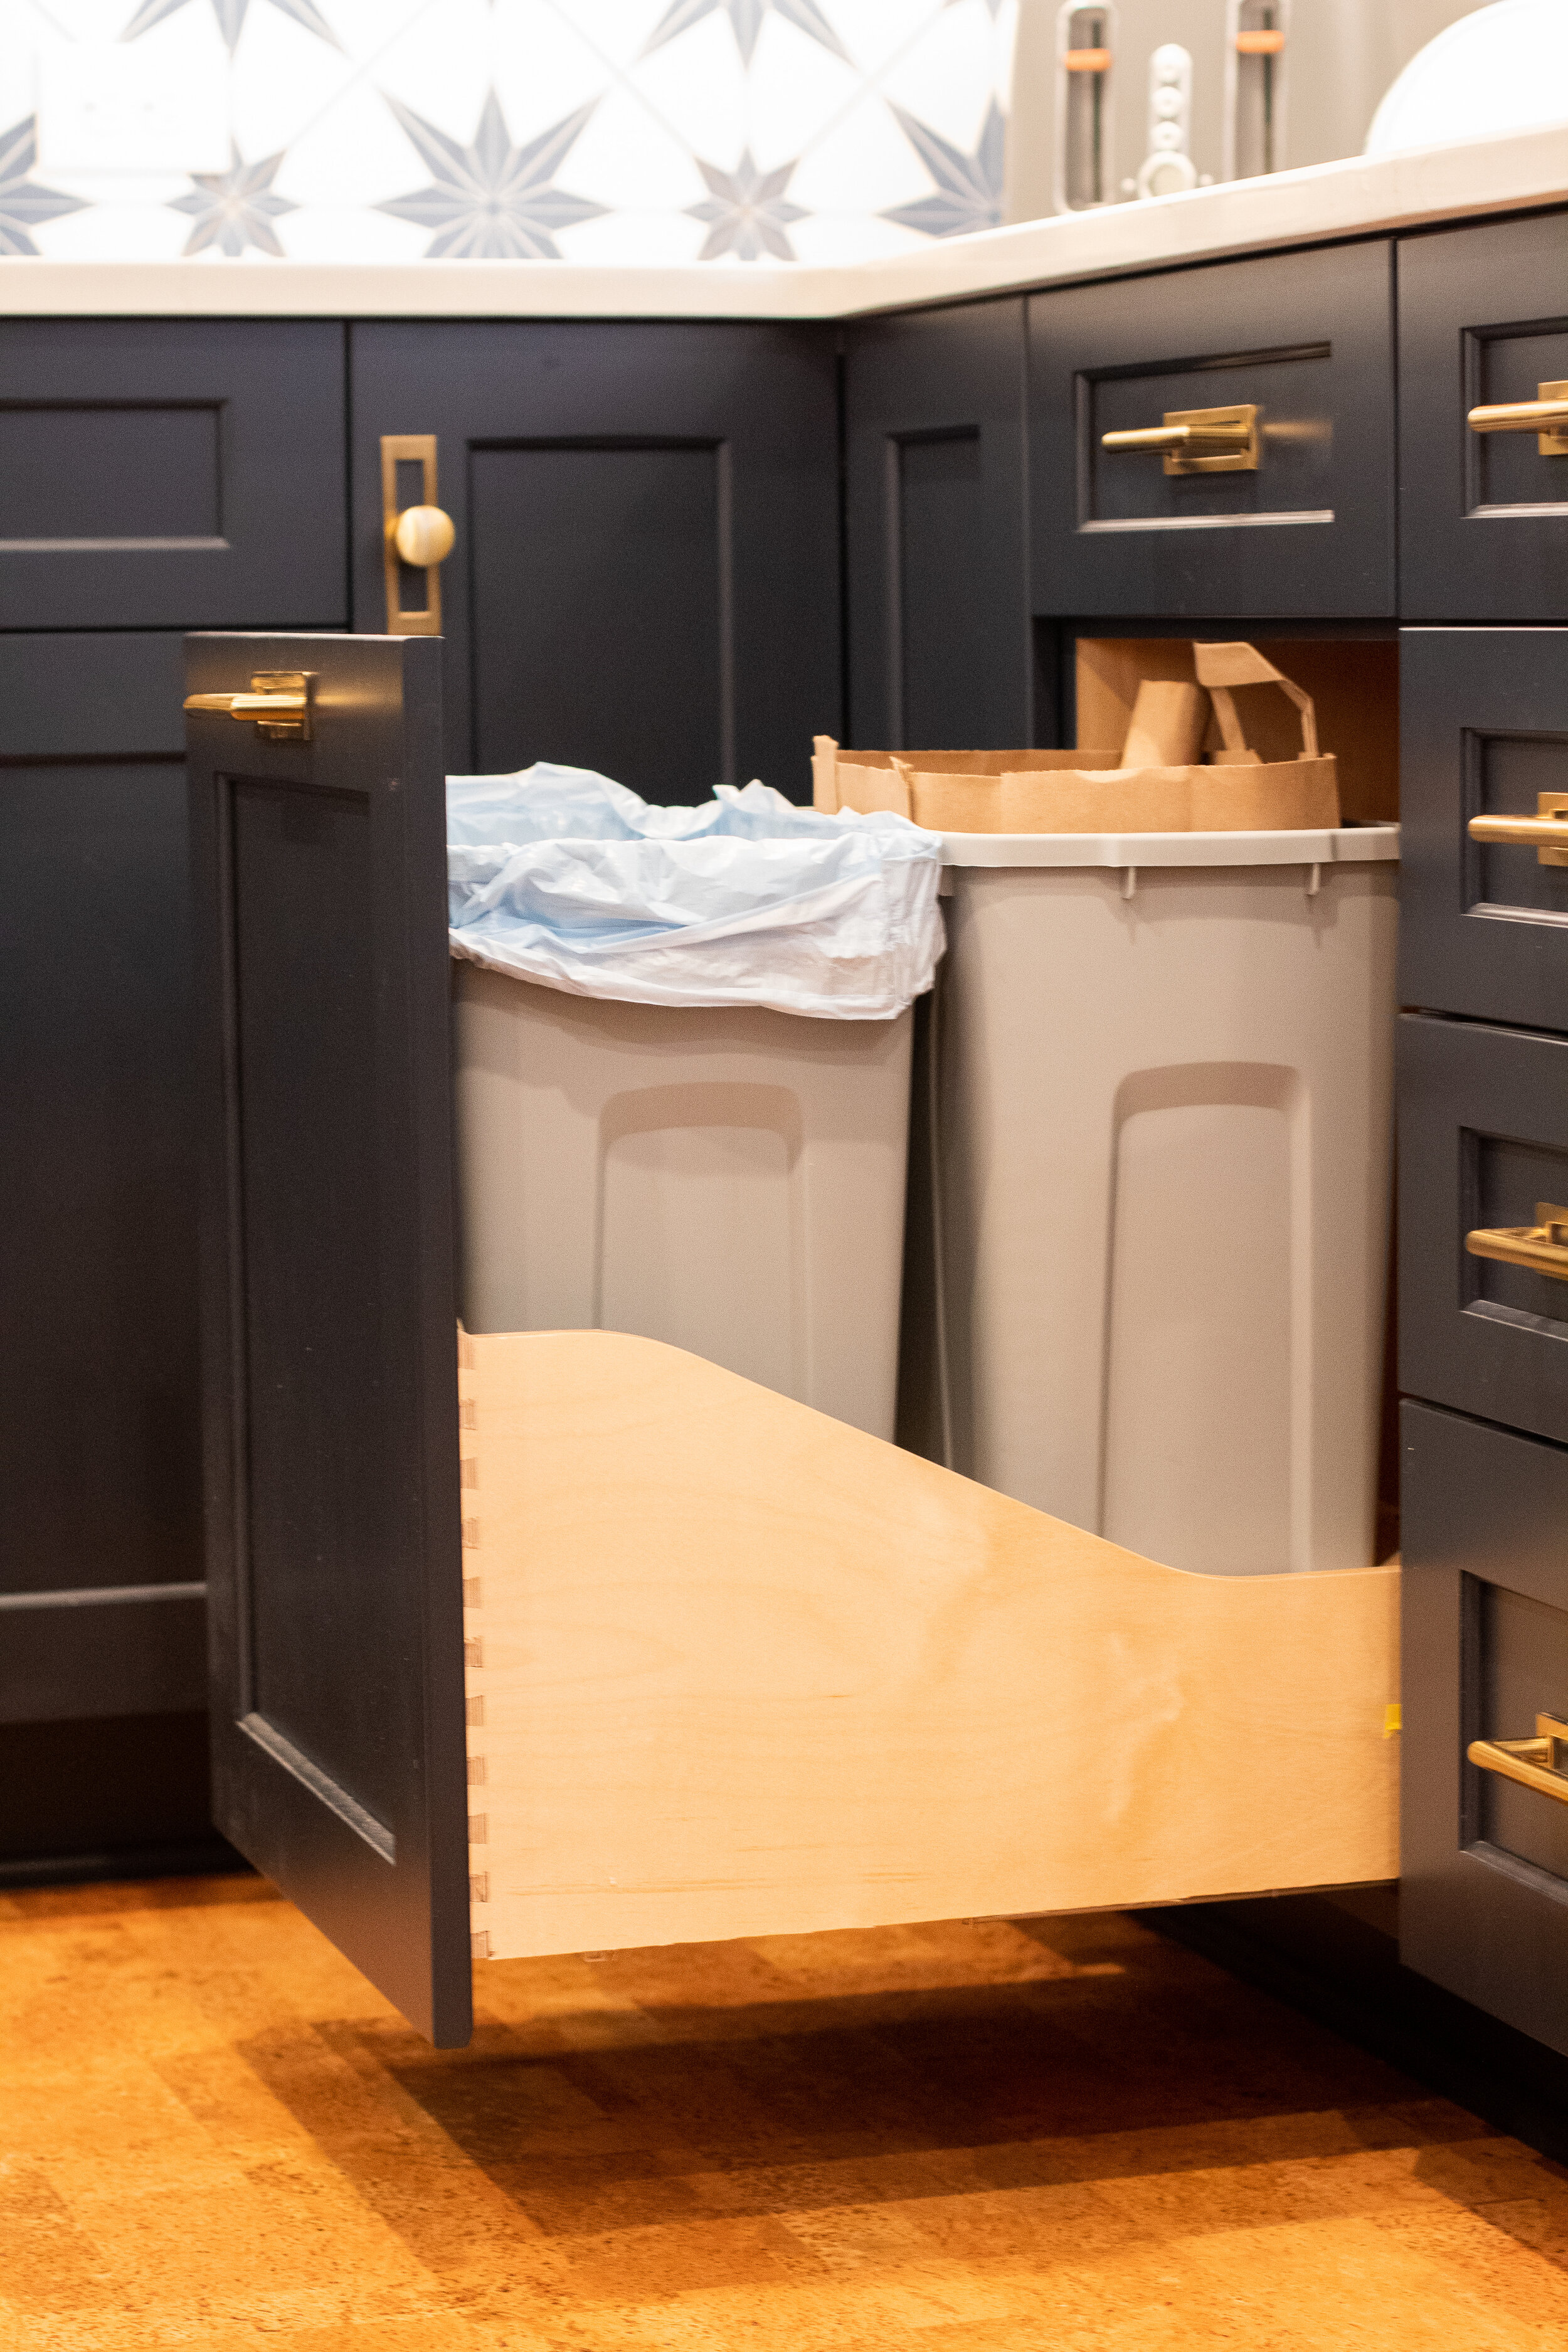
Pull out trashcan system
Under counter microwave drawer
Wine fridge
Recessed LED can lighting, under counter and shelf lighting that create a bright space
Kitchen After

“My favorite part would have to be the counterspace. I am shocked by how much there is! I cook often and having the extra room is so nice.”


FUN FACT: Did you know the same material that is used as a stopper in your wine bottle has been used in construction material for more than a hundred years? Cork is great for flooring because it is:
Considered “green” as only the bark from a tree is used
Sound absorbent
Hypoallergenic, anti-microbial, and non-toxic
Naturally repels insects
Resists fire and water
Elastic & compressible making it comfortable to walk on and hard to dent
If taken care of, can last for generations
Cork is a premium material that can be finished in many different ways and its color ranges from dark walnut to light honey color. The denser the cork the better it is for flooring.

Because her home is only a few feet from her neighbor’s home, the side windows by the sink bring in natural light while a mirror was added where a window would traditionally go to provide privacy.

These functional, yet beautiful, tall drawers by Coastal Cabinets were added for easy access to trash bins and cleaning supplies.

We went with a microwave pull out drawer to save the homeowner valuable counter space. Some other benefits of having a microwave pull out drawer versus a traditional countertop microwave include:
Easy to clean
Modern aesthetic
Functional! Left handed? Short? Have a hard time lifting heavy items out of a countertop microwave? A pull out drawer can help.
Child safety locks

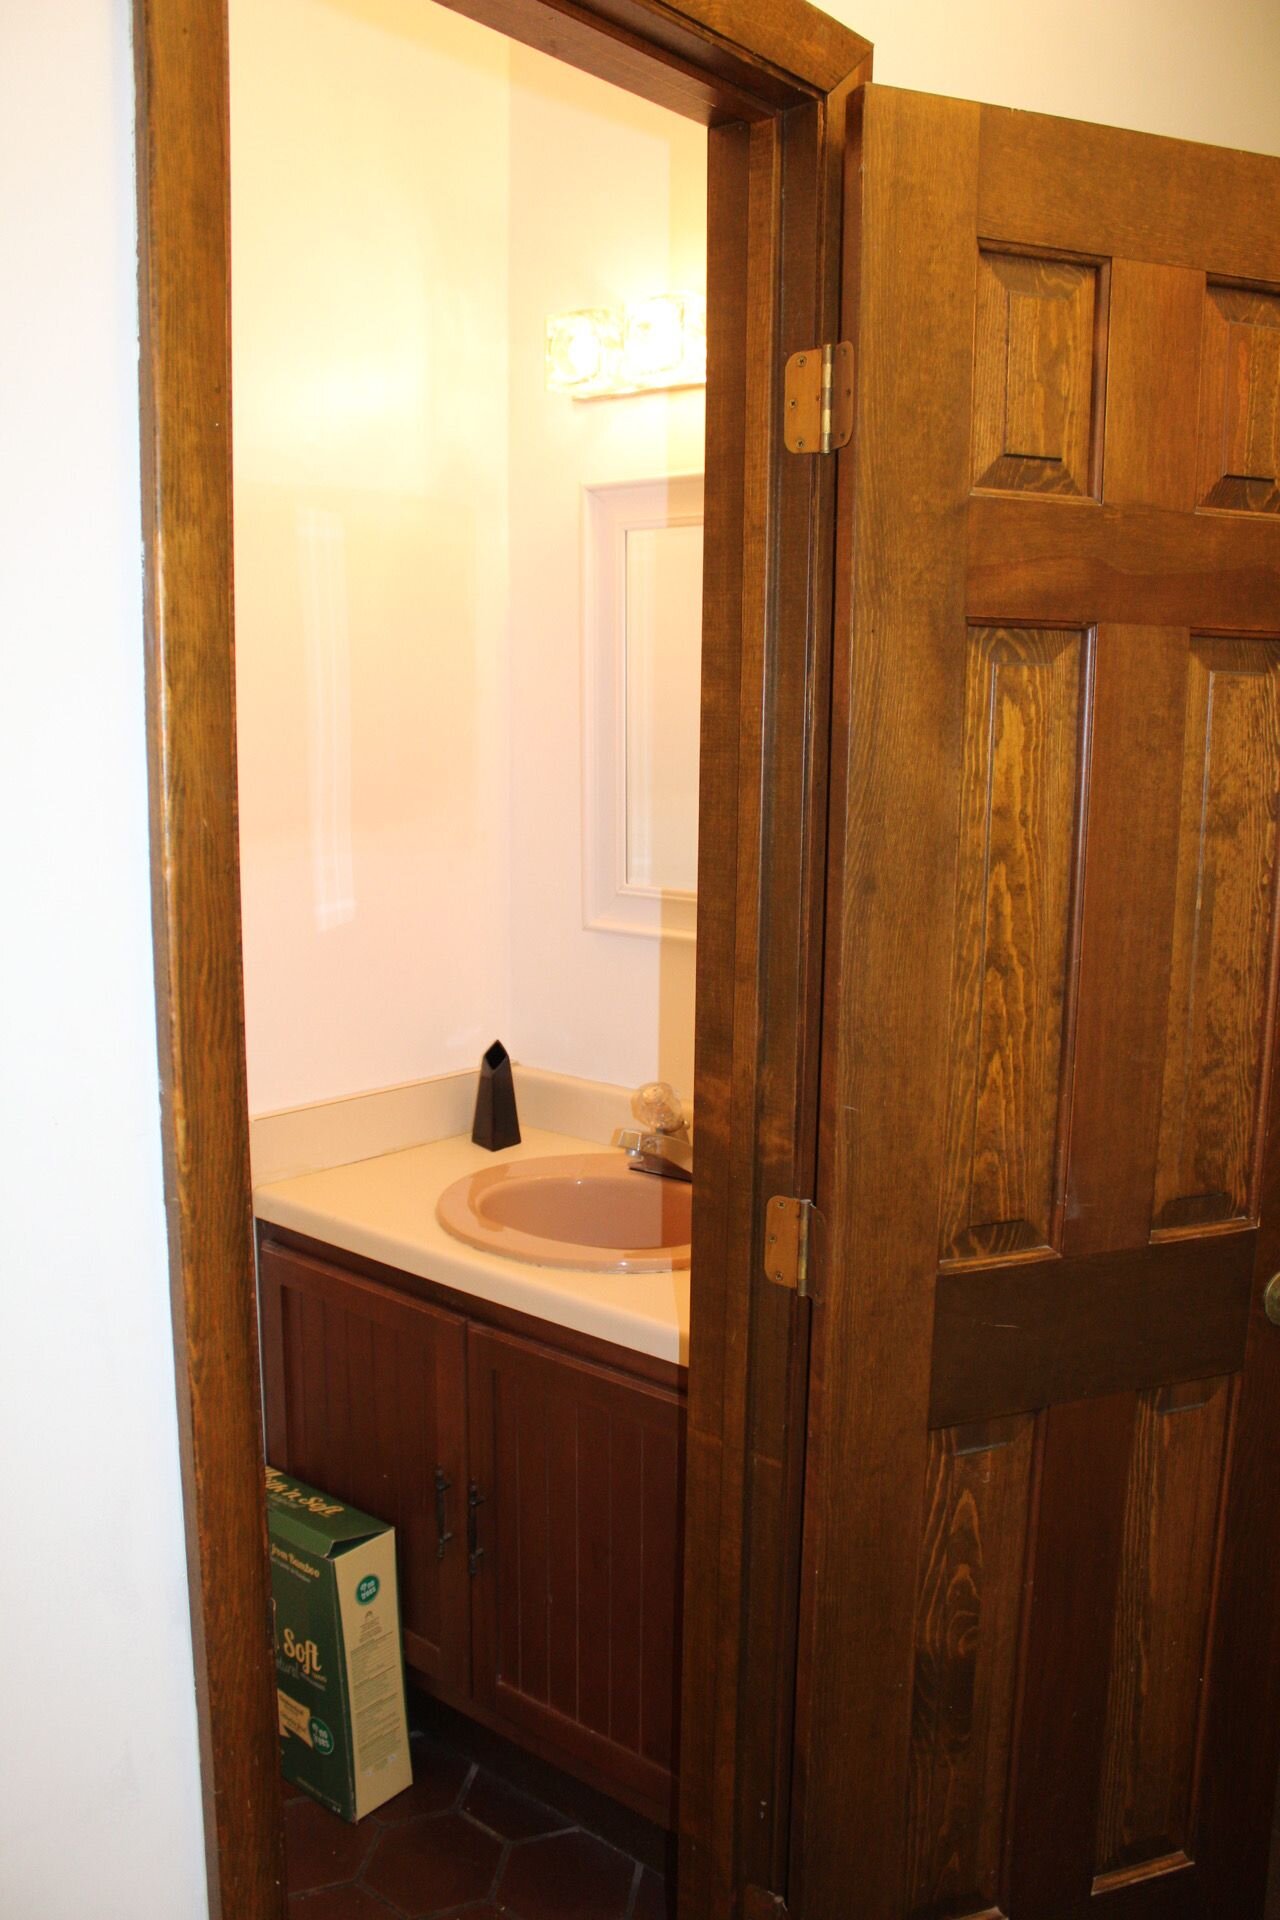
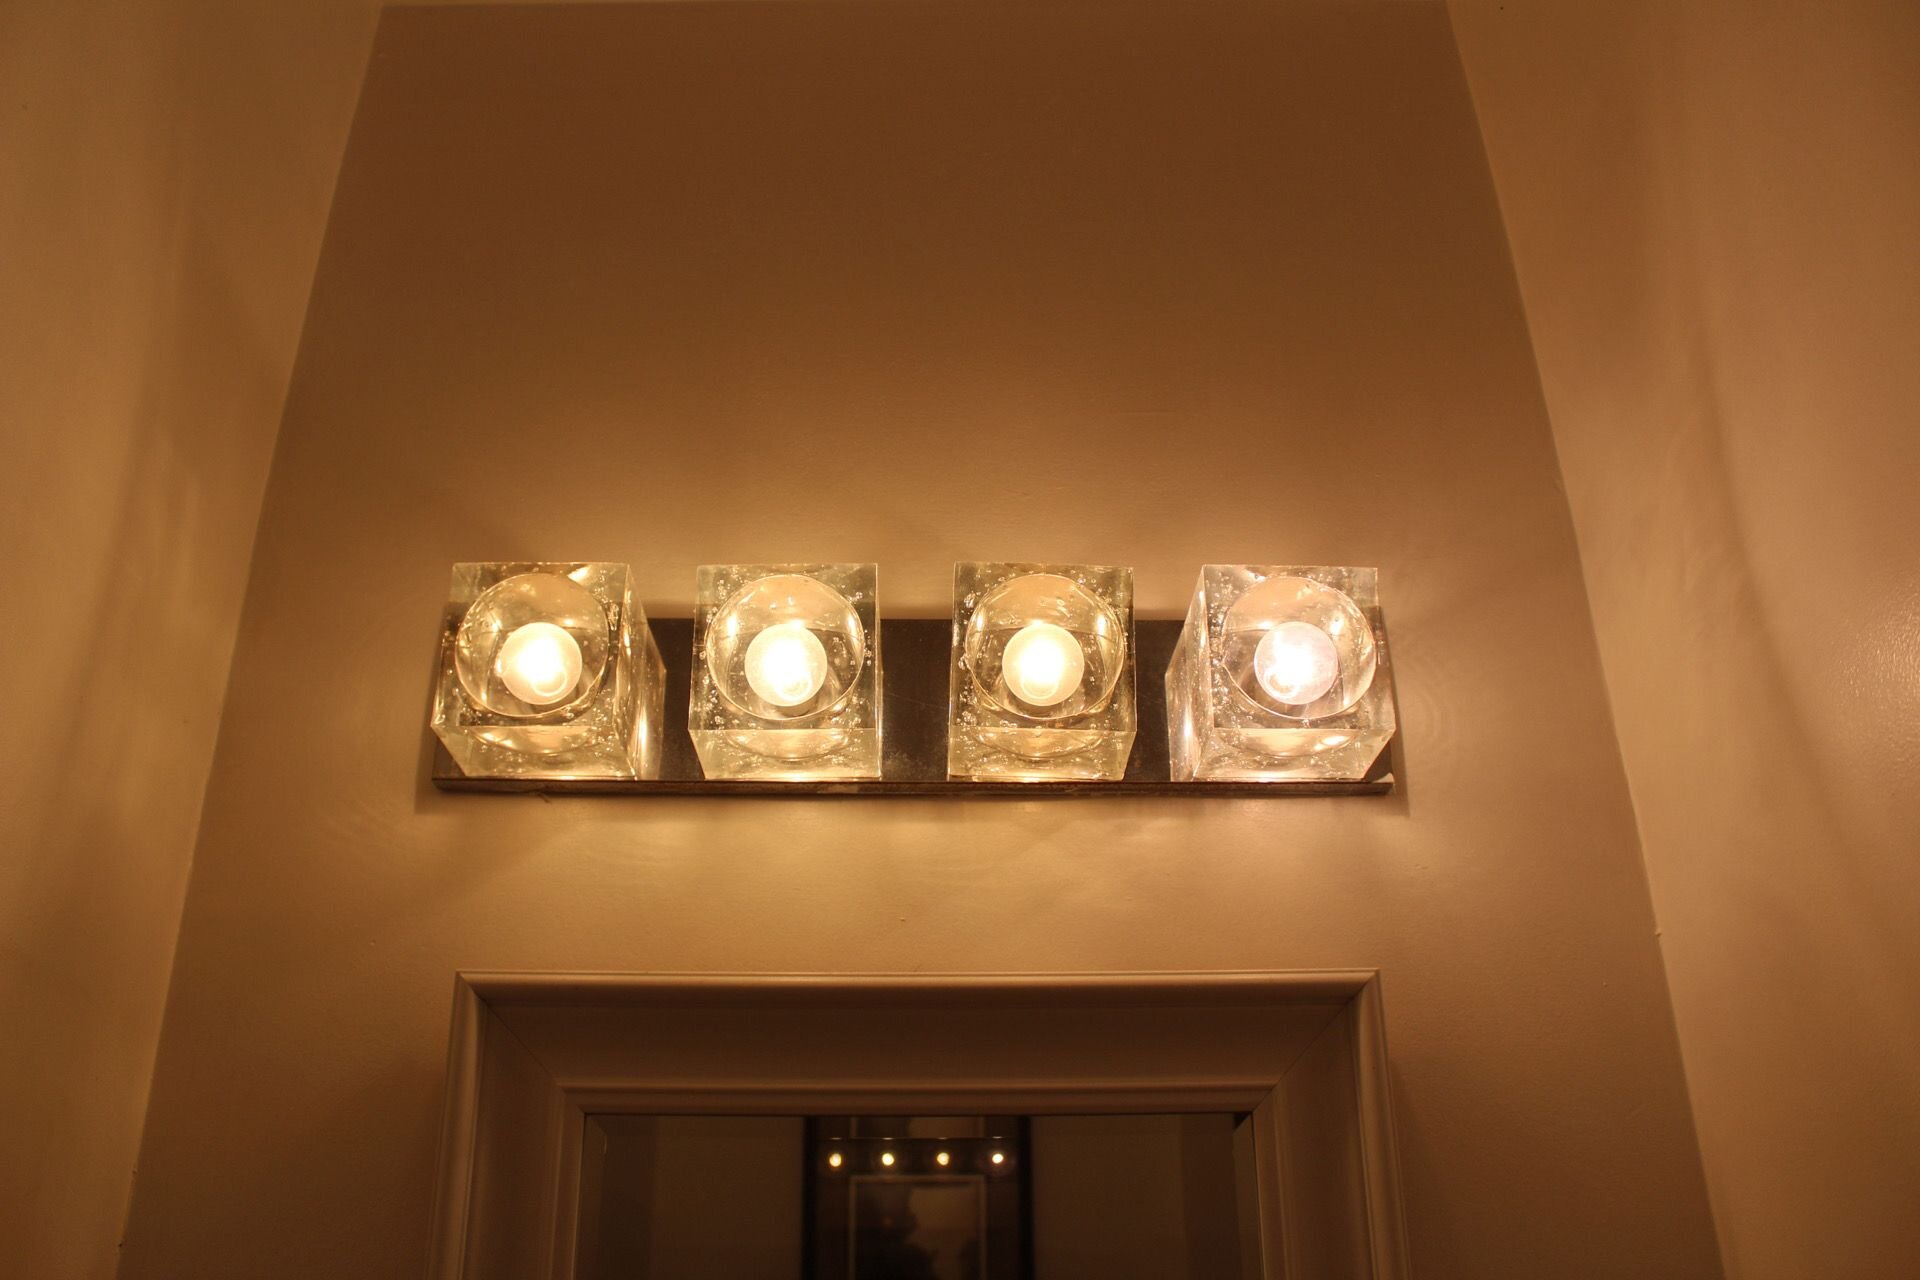
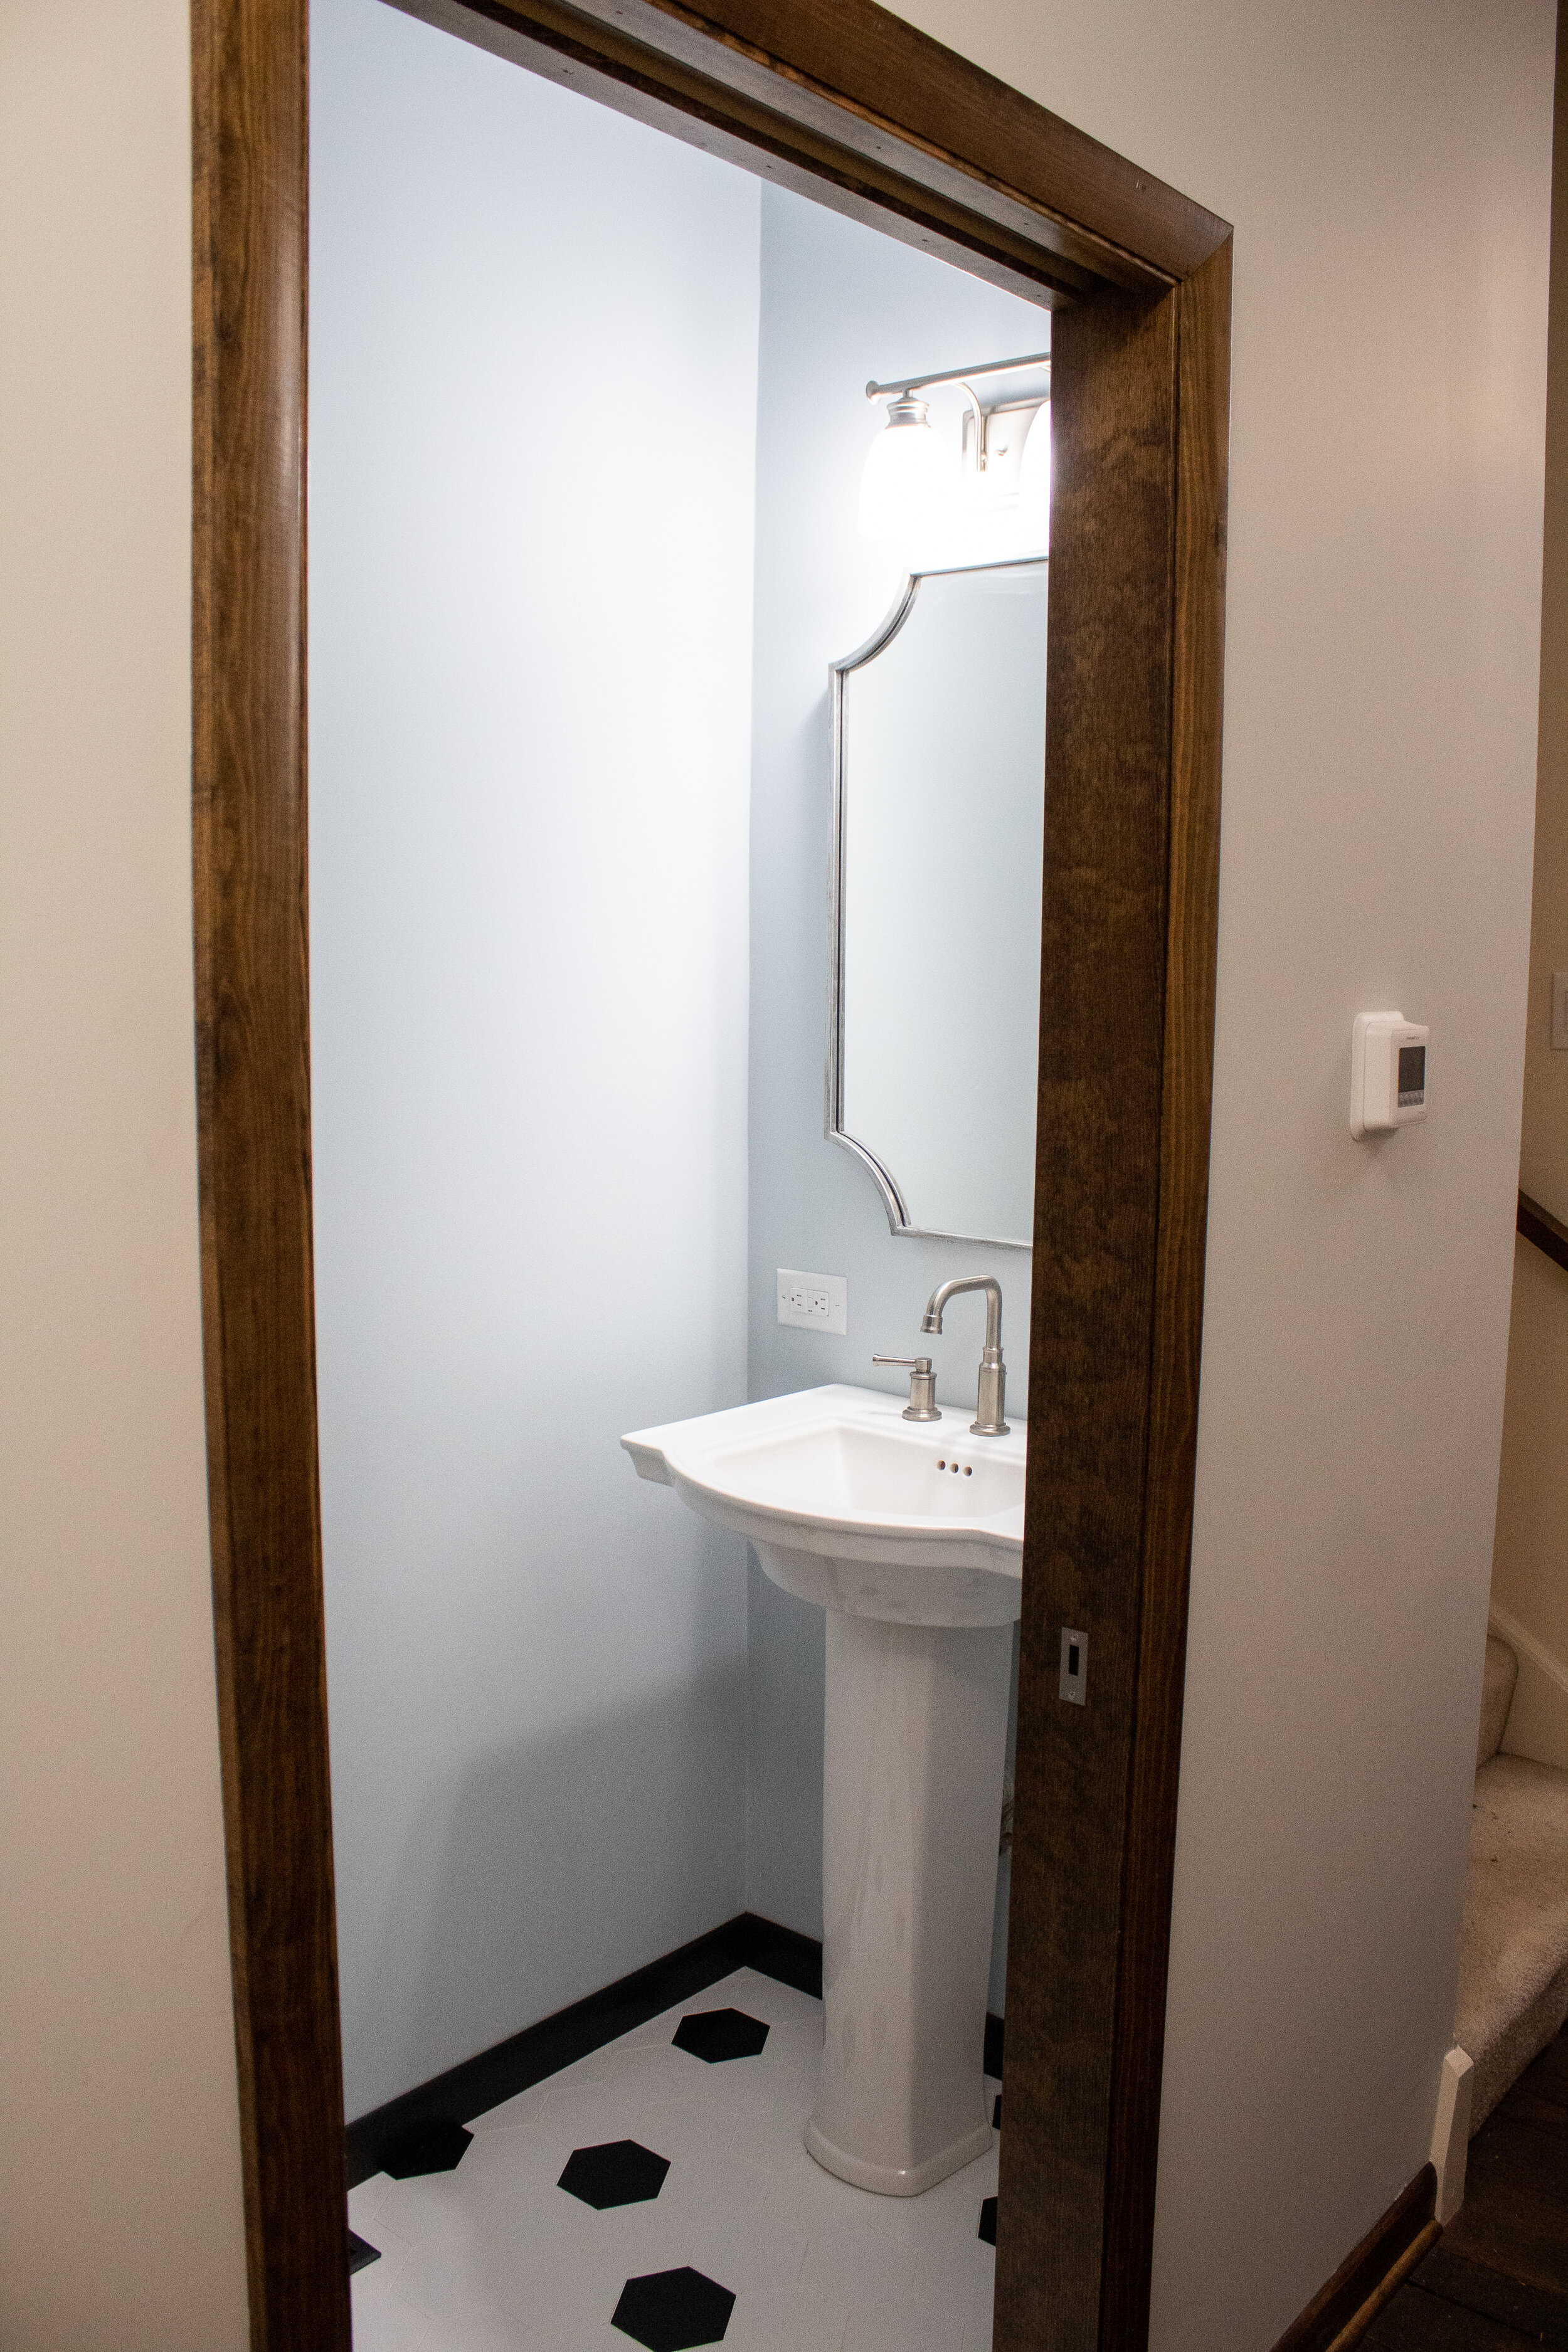
The Powder Bathroom
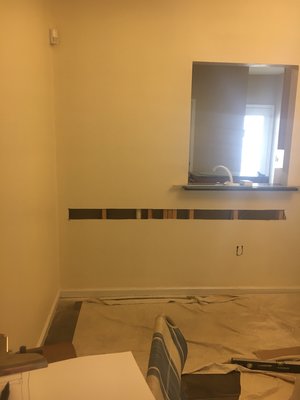
Right off the kitchen is a powder bathroom that needed to be renovated. The homeowner wanted a modern, simple design that would update the bathroom used by her guests.
Bathroom Before


Bathroom 3D Rendering

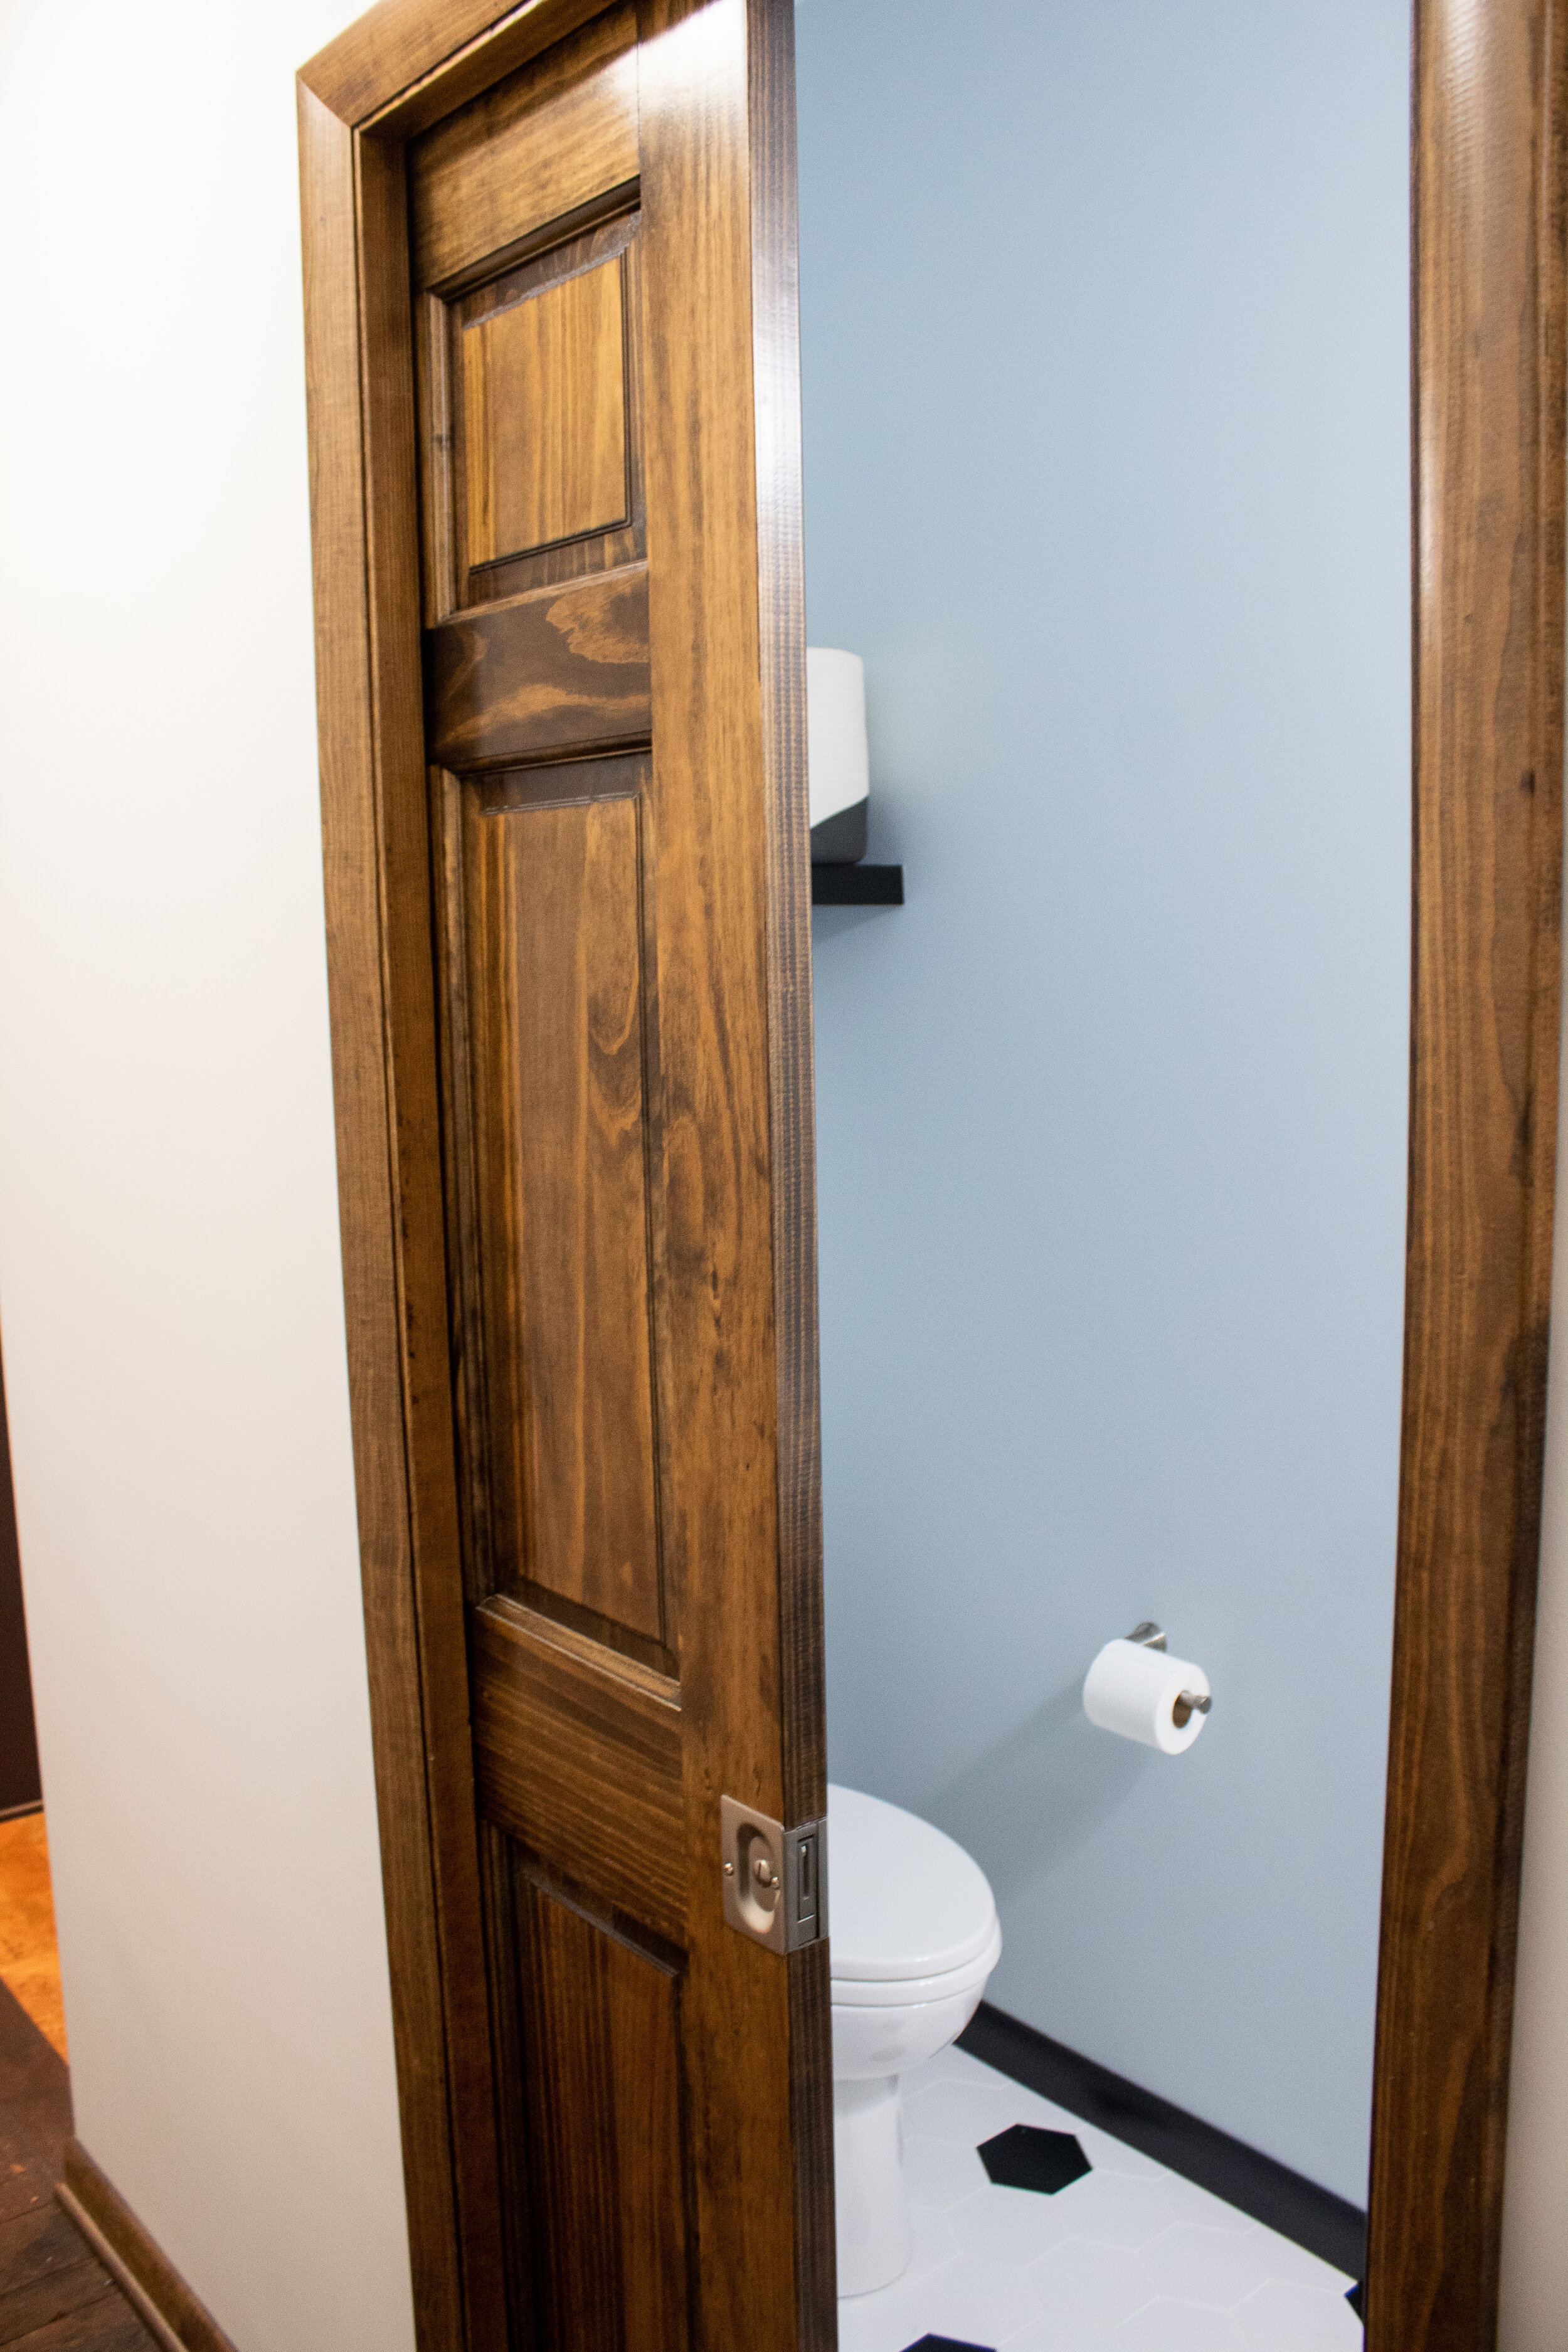
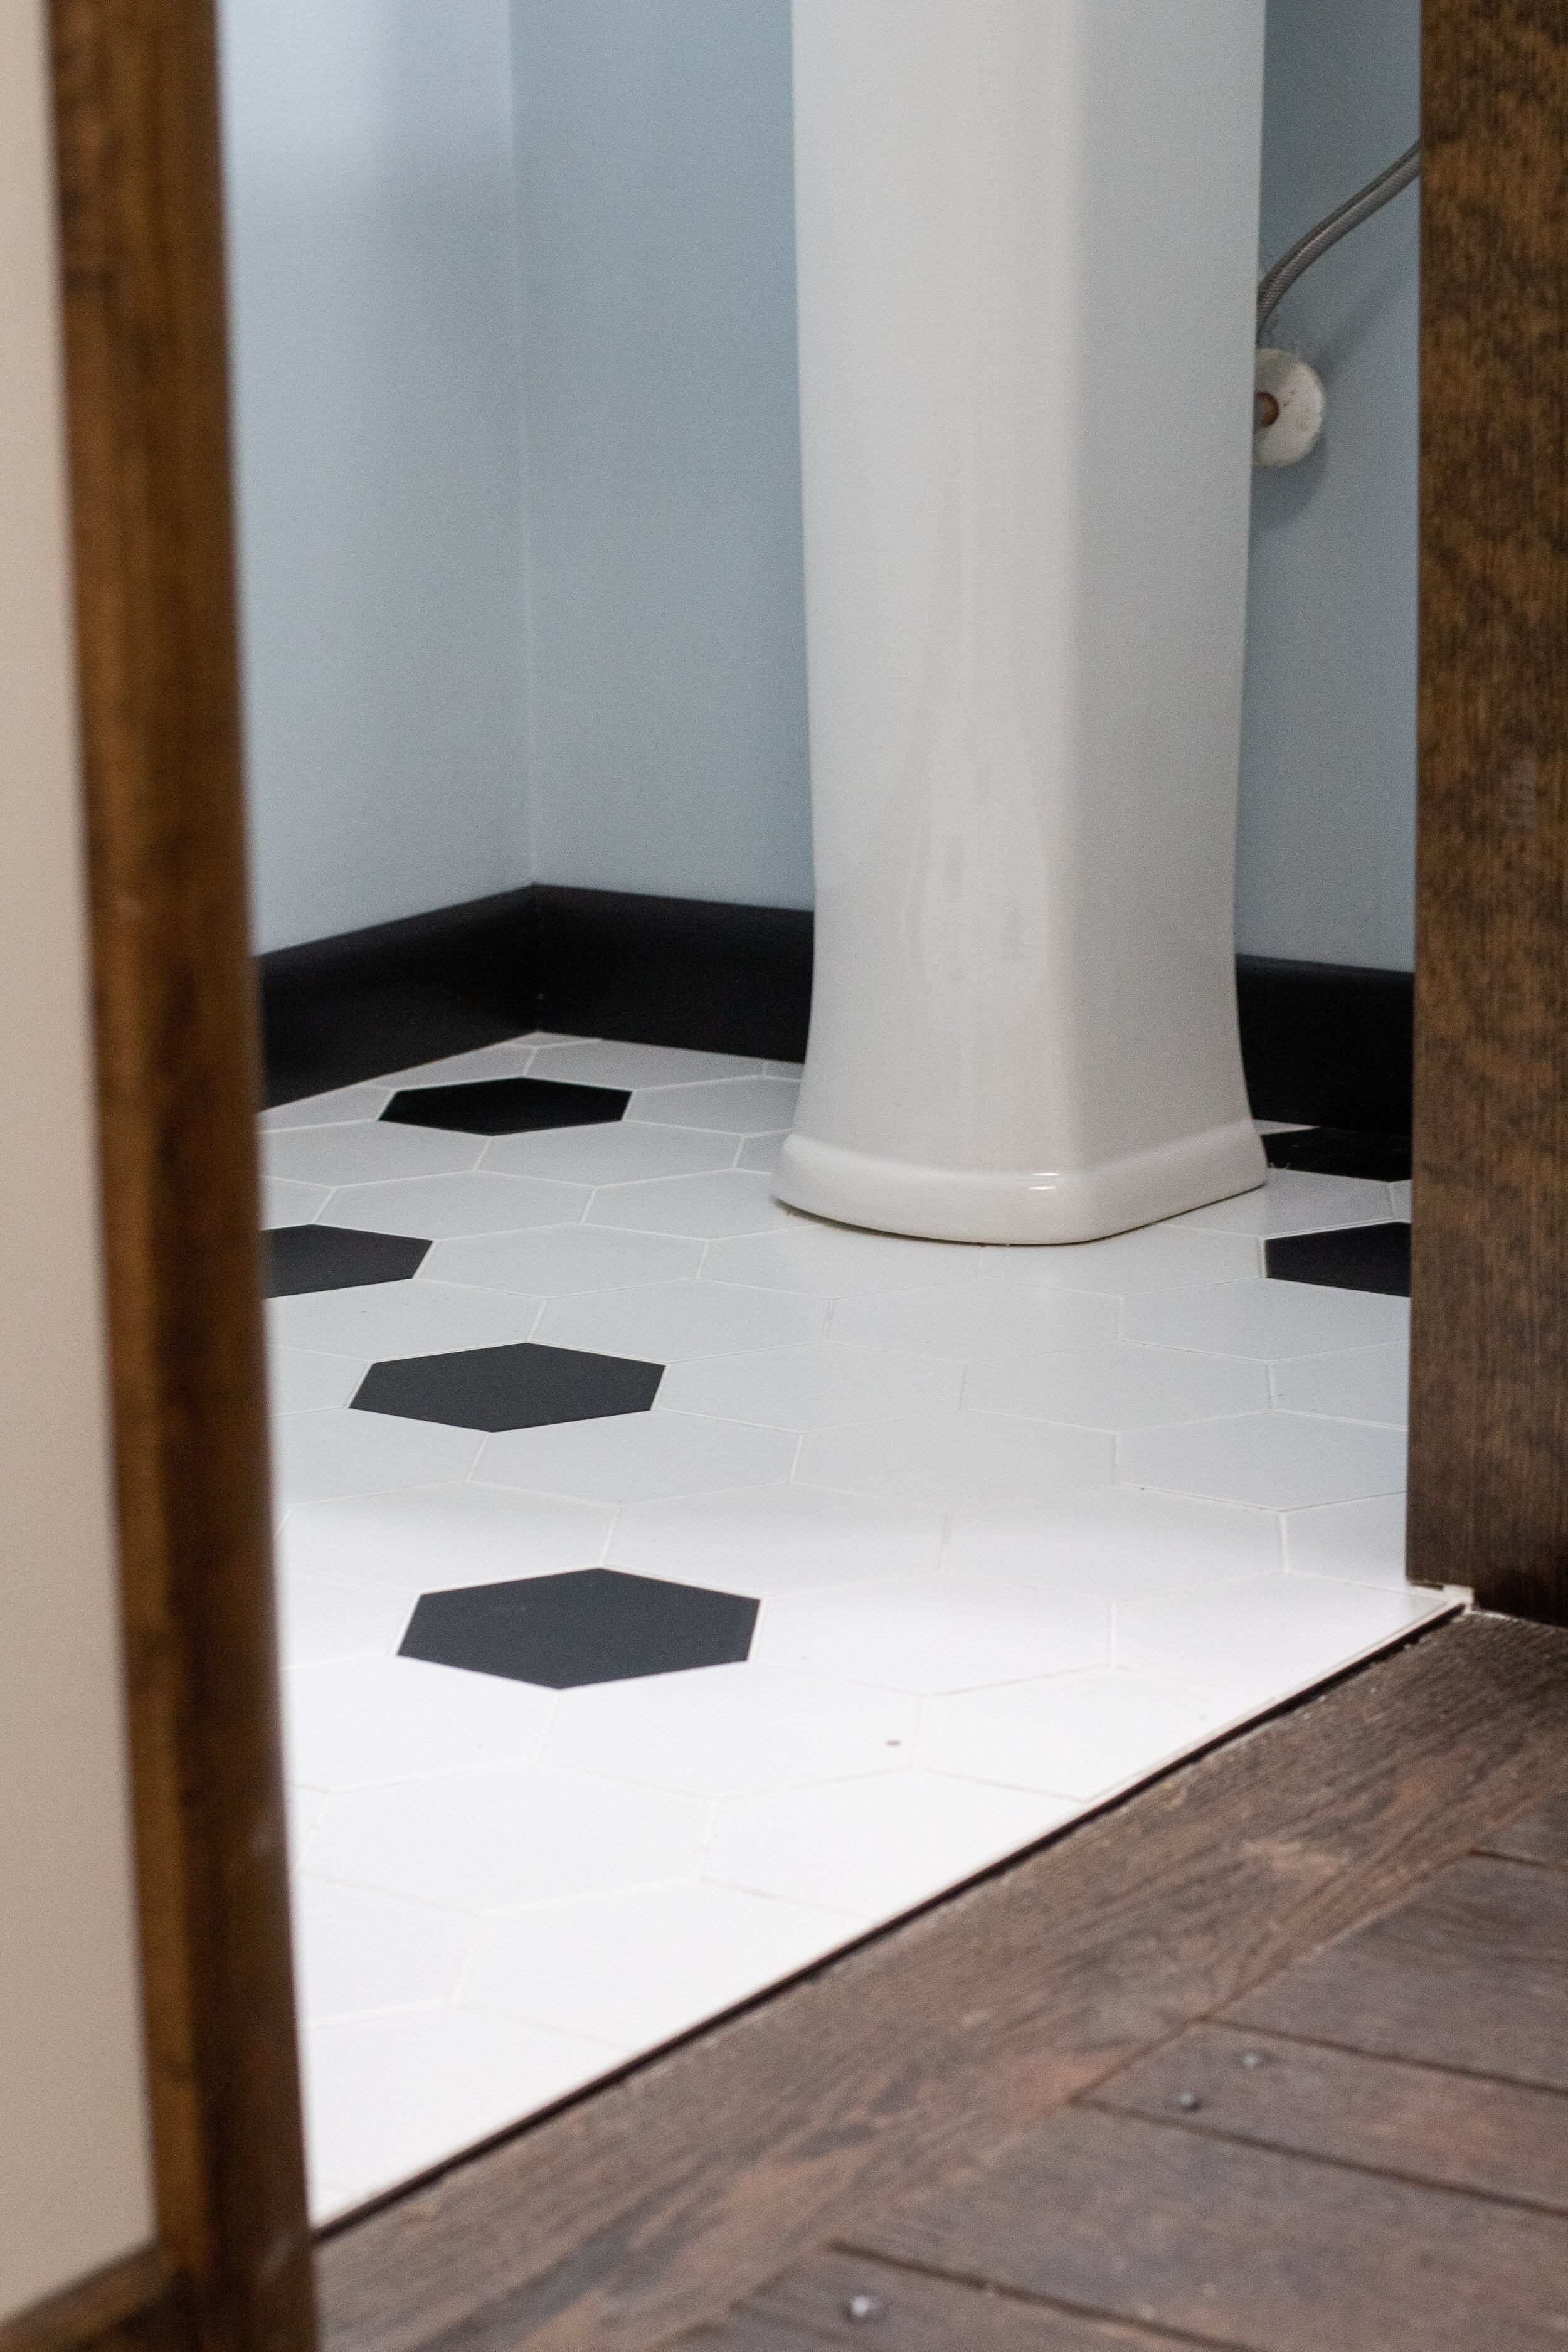
Bathroom After
Light blue walls, bright white sink and toilet, and white and black hexagonal floor tiling all came together to transform this bathroom.

The remodel compliments this charming older home and the homeowner loves the finished space! Read what she has to say about it on Houzz.
Are you ready to love your home? Learn more about our process here or contact us!

Custom Details Bring Our Client's Vision To Life
Every homeowner has a vision of his or her perfect home. Some dream of a warm and traditional room featuring dark woods and lots of texture. Others see softer colors and shiny finishes creating the canvas for their remodeled space. In some cases, the owners of a home may have two distinctly different visions for their home and wonder if there is a way to meld the two together harmoniously. We are happy to say that yes, it can be done! You can see how we were able to accomplish it for recent clients by creating custom details in nearly every room of their house.
Our clients reached out to us after they purchased a Cape Cod style home with the vision to completely remodel it and create a home where they could entertain their family comfortably, especially during the holidays. The husband and wife had their own specific style preferences, which were quite different. He preferred a rustic aesthetic featuring live edge wood accents. She loved spaces with a bit of glitz and glamour, with touches of her favorite colors like blue and purple.
Our design team spent time with the couple discussing their ideas and looking at inspiration photos. These discussions allowed us to develop custom elements within their remodeled spaces that echo both of their individual preferences, yet work well together to create a cohesive space that brings both of their visions to life.
HERE ARE SOME EXAMPLES OF THE CUSTOM DETAILS INCLUDED IN THEIR HOME:
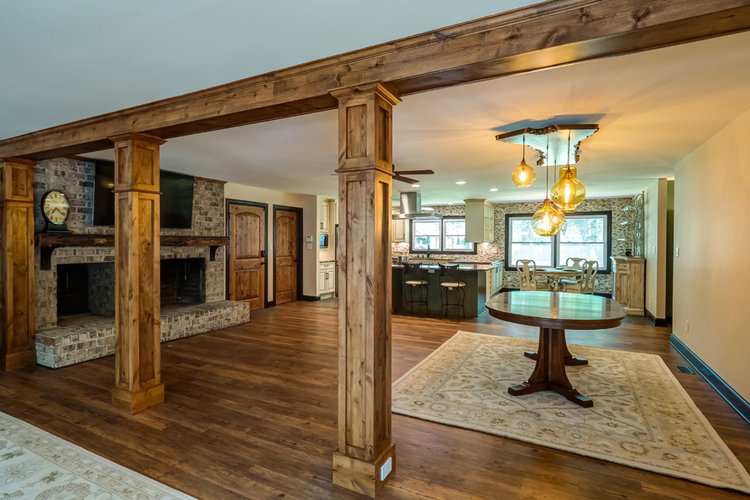
Custom pendant lighting fixture in the dining room. Our clients knew they wanted to use pendant lights in the dining room. We created a custom piece that would capture both of their preferences by selecting several glass pendants in a variety of shapes and sizes and hanging them at different lengths from a gorgeous piece of live edge wood. This became one of the focal points in their entertaining space.

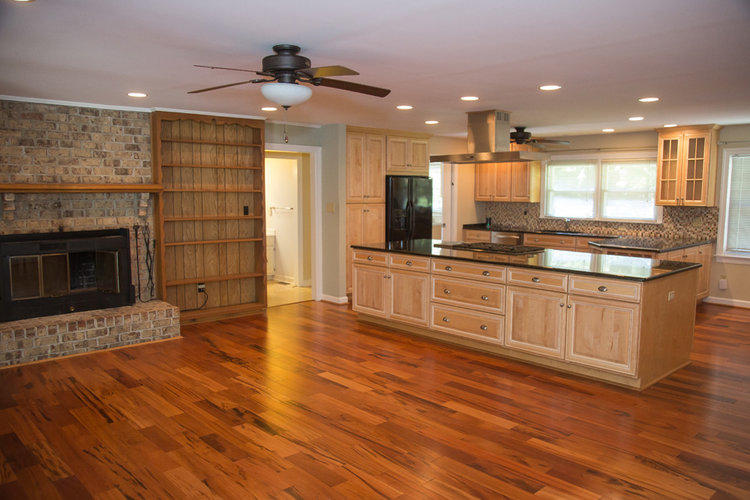
Knotty Alder Columns & Doors. After removing a wall to open the living room into the dining and kitchen areas, we selected Knotty Alder wood for the columns and doors to bring a warm and welcoming feel to the main entertaining area. The richness of the wood balances with the light, natural tones of the stacked stone backsplash, and cream and sage green cabinetry found in the kitchen.

BEFORE
AFTER

AFTER
Live Edge Fireplace Mantel. A beautiful piece of live edge wood was crafted to become the fireplace mantel, which also created another beautiful focal point.
BEFORE

AFTER
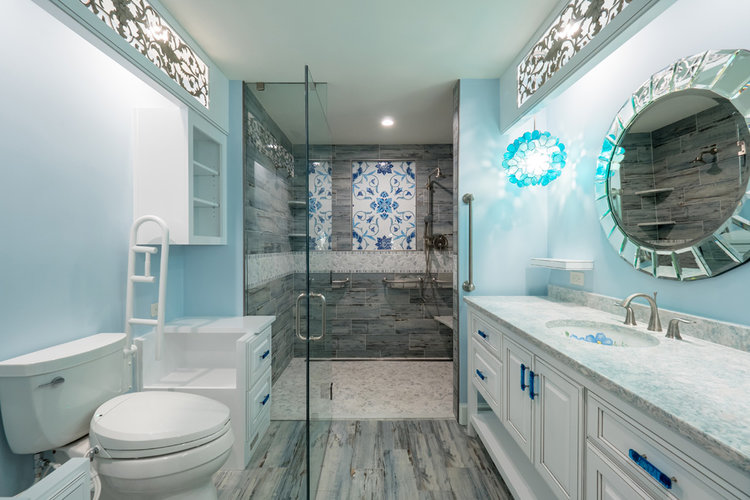
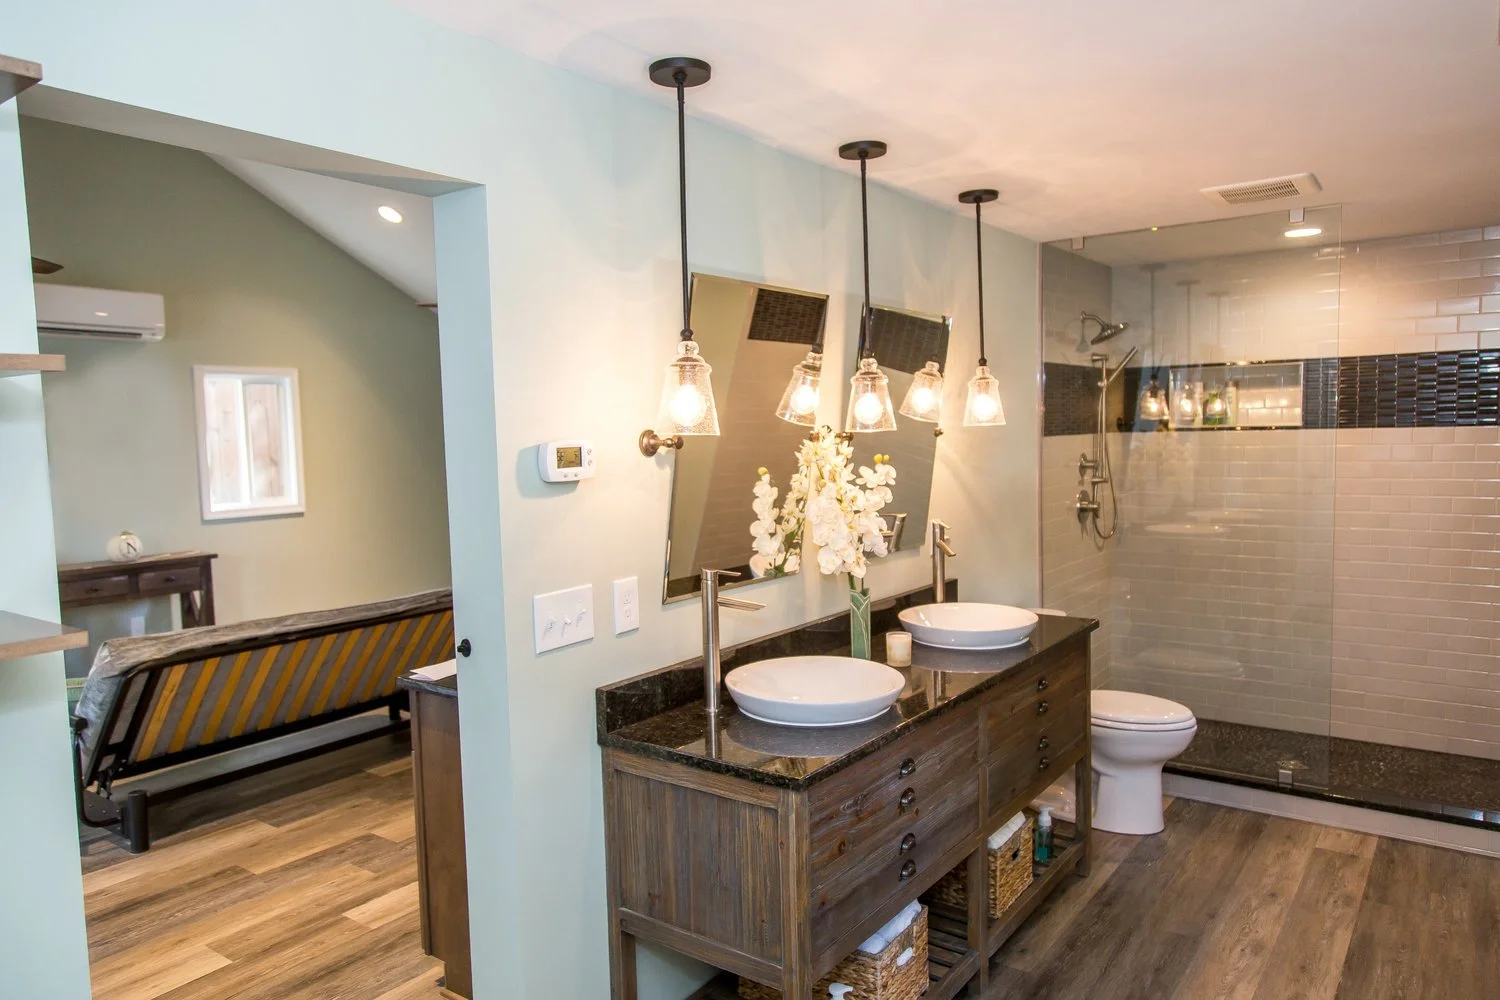
Iron Scroll Lighting Valances. (in the master bathroom and tub/sitting area) Our client asked for a light source that would not shine down into her eyes while using the bathroom. She found and fell in love with a metal scroll piece online and we used it to create a lighting valance by building a frame to house the metal piece. Behind it we installed lights on a dimmer to provide the soft light source our client requested.
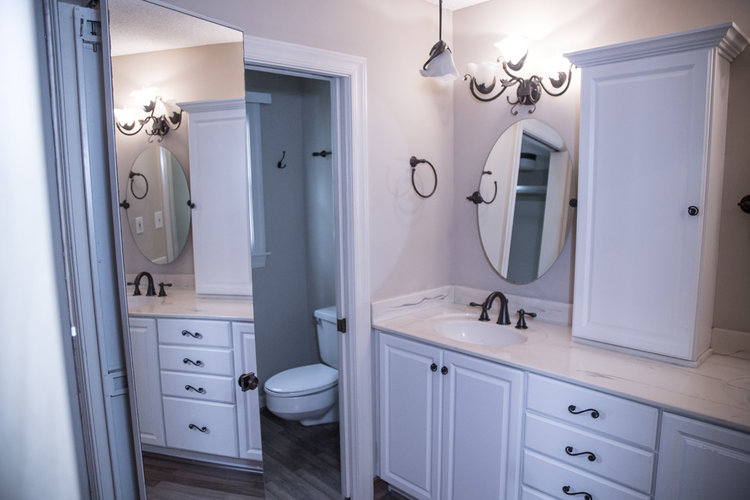
BEFORE MASTER BATH
AFTER MASTER BATH

BEFORE TUB / SITTING AREA

AFTER TUB / SITTING AREA
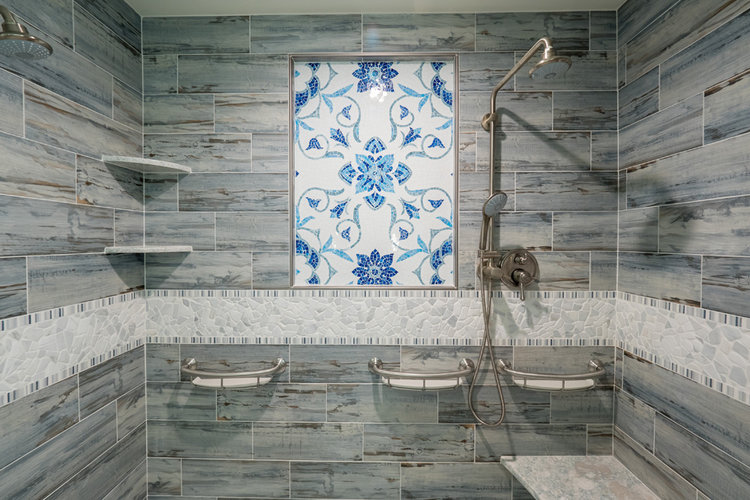
Custom Tile Design in Shower. We created a 100% custom tile design in the shower highlighting our client’s favorite colors. The shower floor and wall border are made of marble pieces designed to look like pebbles. Italian tile is used to edge the border and bring in some sparkle. The tile mosaic is a work of art featuring hand selected and hand assembled pieces that create a gorgeous focal point.

This home is a lovely combination of each of the homeowner’s individual tastes. He can enjoy the rustic touches of the live edge wood and knotty pine columns and doors in the living room and dining rooms, while she relaxes in the softly lit master bathroom and sitting room decorated with artful lighting and mosaic tile designs in her favorite colors. It was such a pleasure to create all of these wonderful custom details for our clients and we wish them many years of enjoyment in their remodeled home.
Are you ready to love your home again and remodel your home to improve your lifestyle? We specialize in doing just that for homeowners in Hampton Roads and invite you to reach out to our team to discuss your vision and how we can help bring it to life.
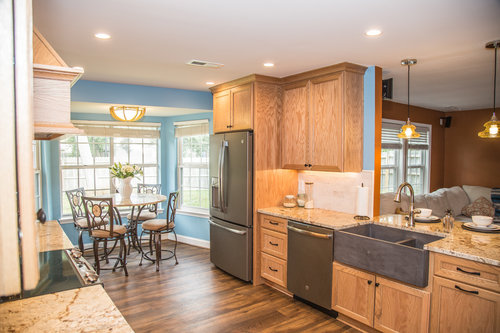
Smart Kitchen Design & Selections by Benson Homes
Kitchens are the focal point of most homes. It’s where you cook, entertain, and dine as a family and upending that space to remodel can be a headache. One of our recent projects was with a couple whose lifestyle included working nights and traveling often, so naturally they were hesitant to bring construction into their home. We are happy to say that not only were they thrilled with the results of transforming their outdated kitchen but they had minimal disruption to their lifestyle during the process.
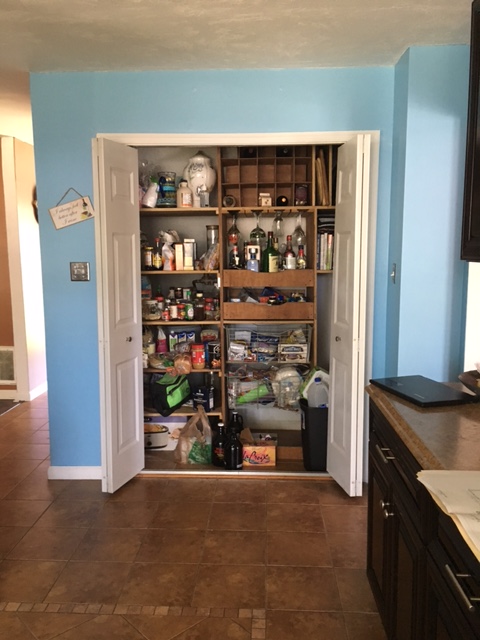
During the design phase, we worked closely with the homeowners to check everything off the list of their dream kitchen. From making the kitchen feel more connected to the other main level living spaces, to improving storage and redesigning the kitchen ventilation system to vent cooking smells outdoors, we were able to add all their requests into the final design.
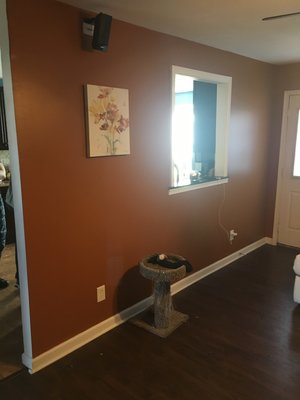
The clients had a galley style kitchen and, with the exception of a small pass-through window, the kitchen and adjacent family room were closed off from one another. The existing espresso stained cabinetry darkened and narrowed the kitchen and the brown tiled floor and bright blue walls gave the room an over-all outdated look.
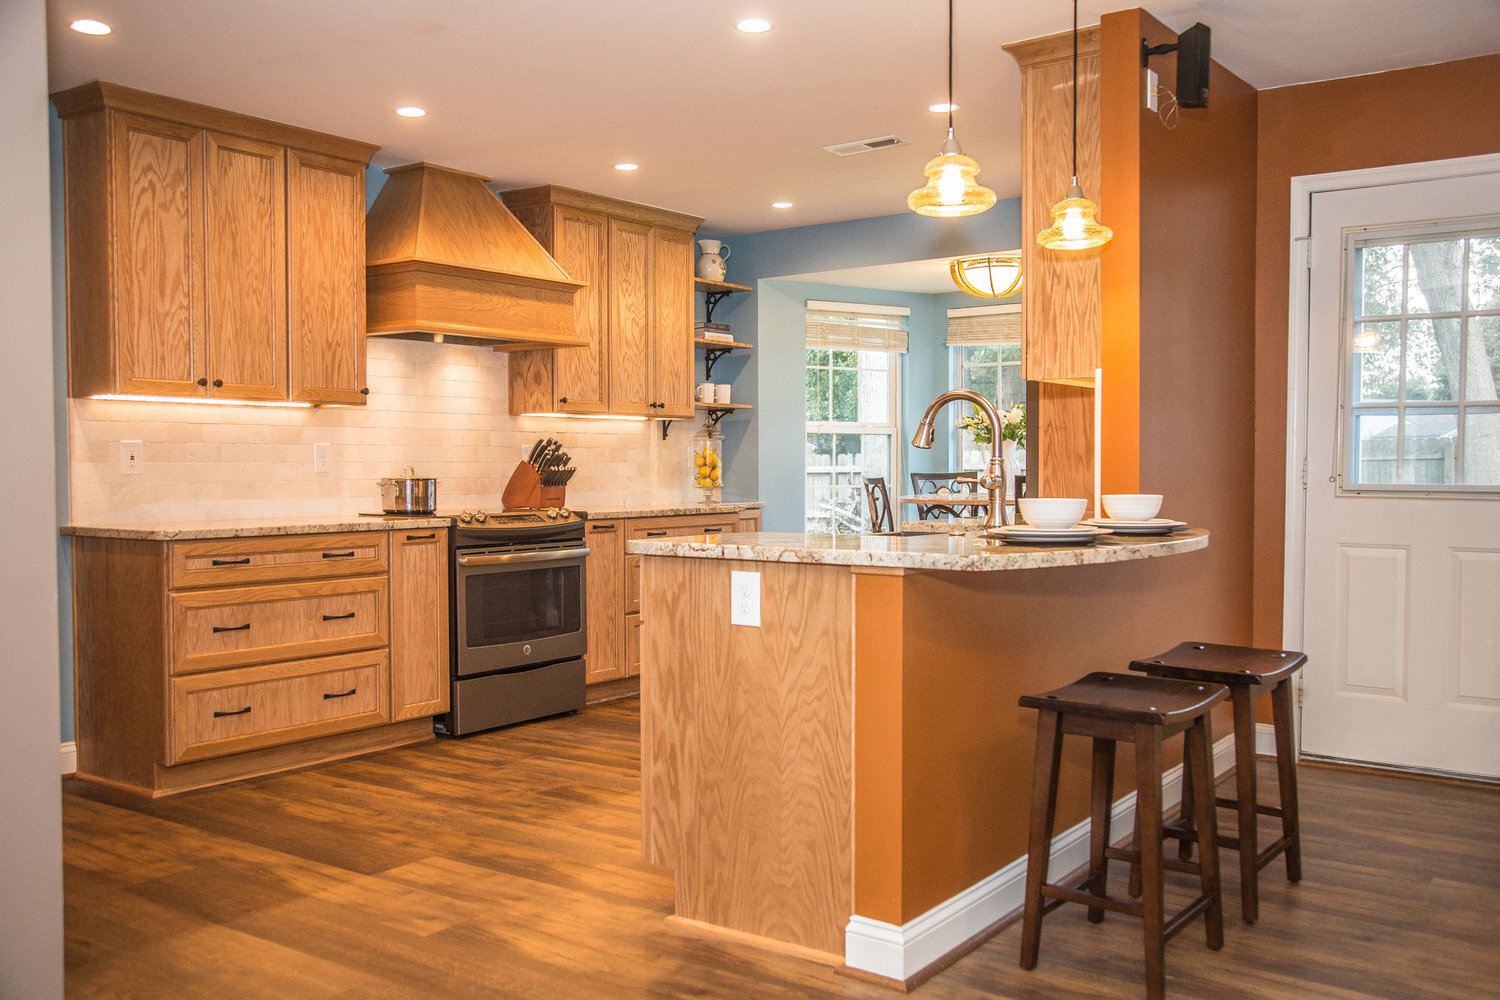
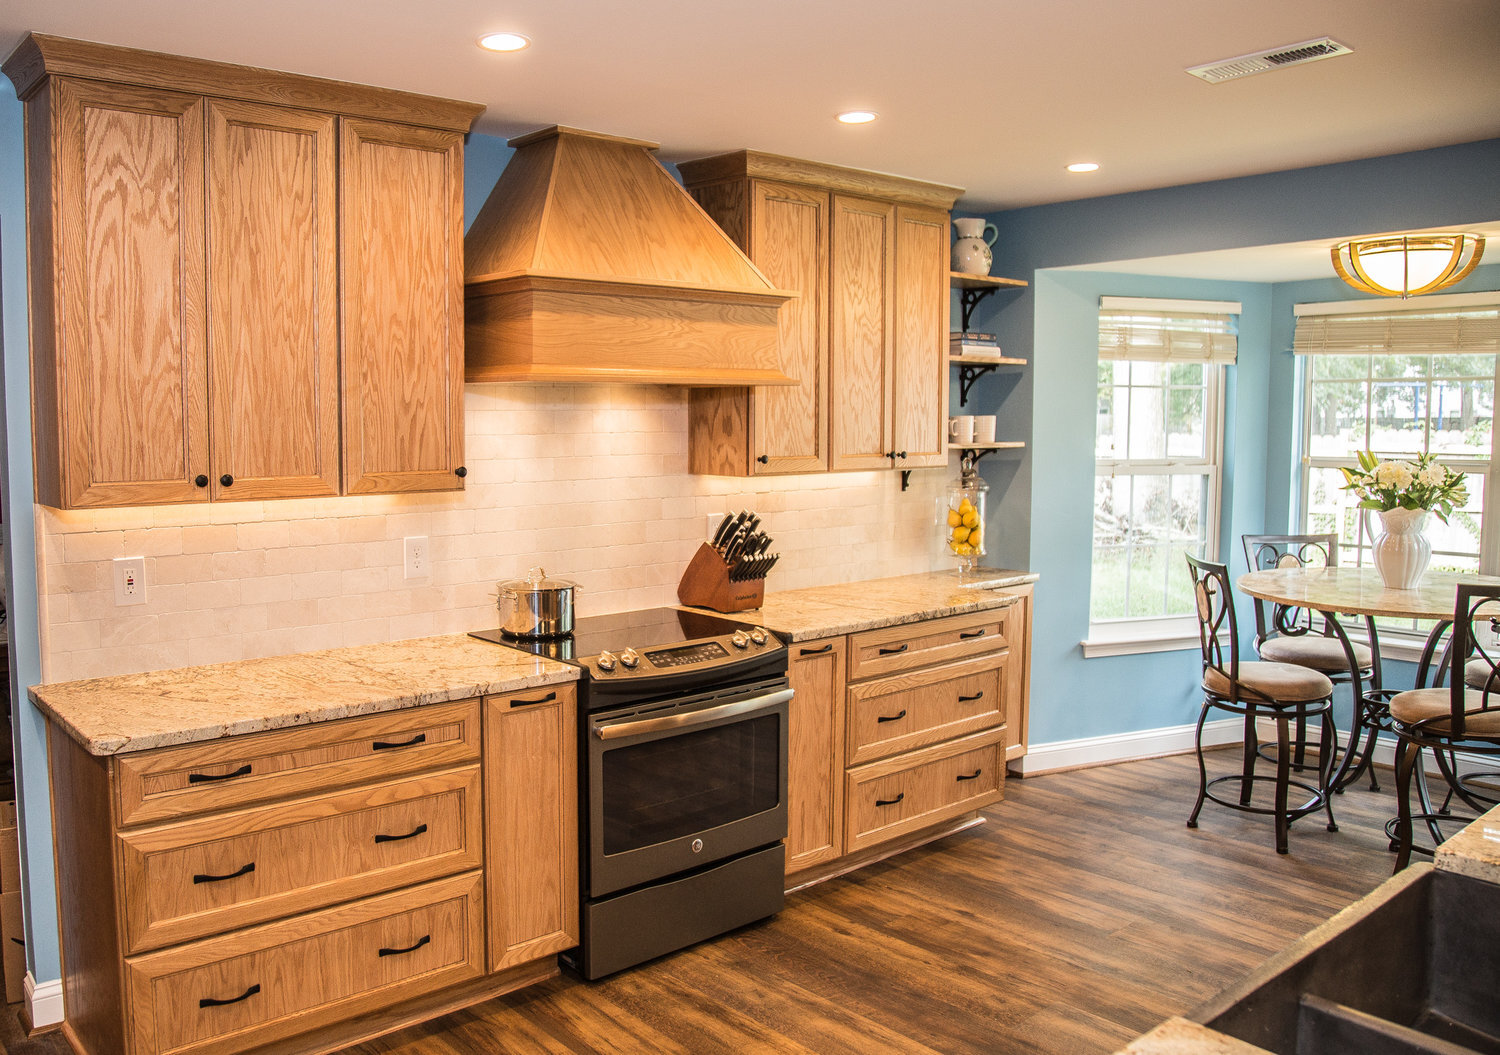
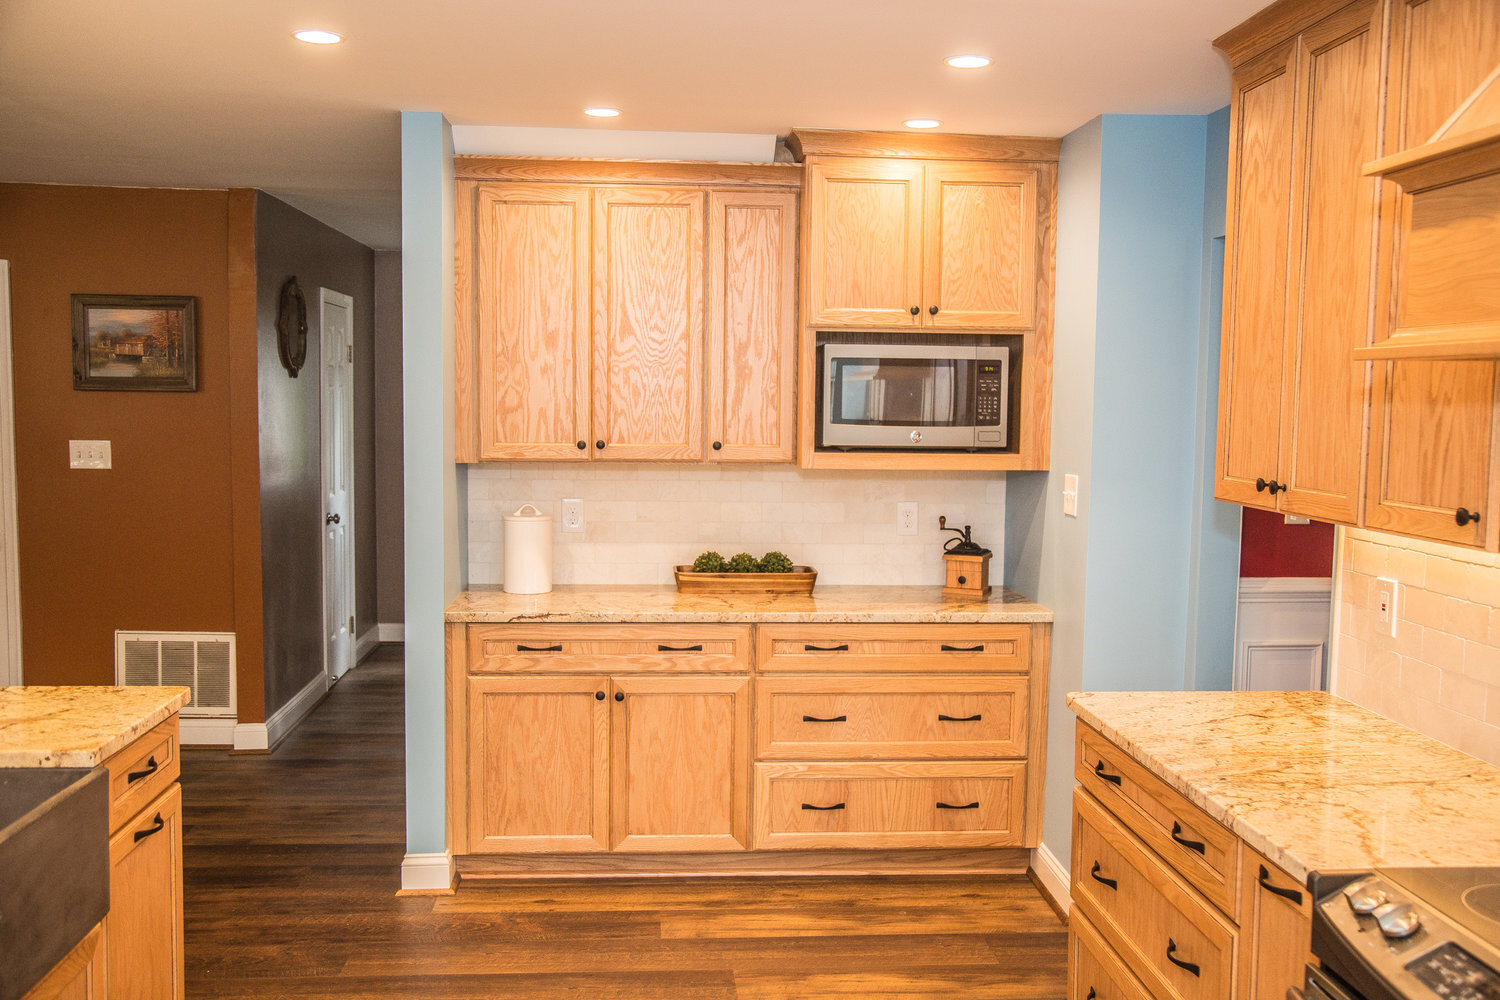
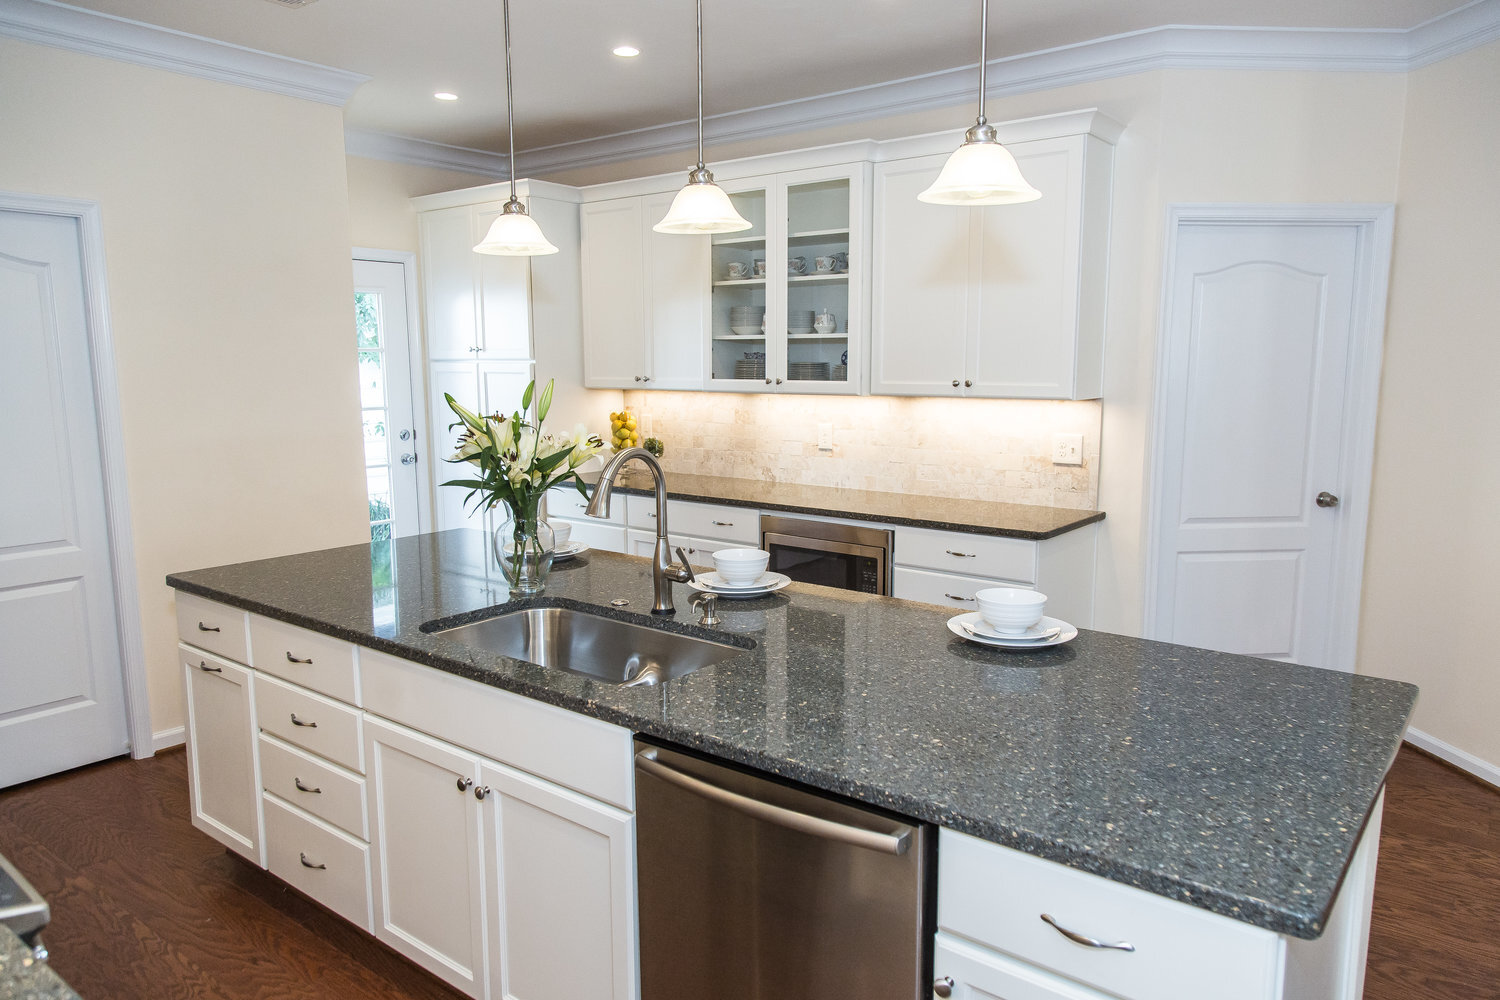
Our design involved removing a portion of wall between the kitchen and family room making the space feel larger, more open and bright. It also connected the kitchen to the living room and allowed the two spaces to flow freely into one another. Having a new open area allowed us to extend the granite countertop to create a bar with additional seating and adding new LED recessed lights, under-cabinet lighting, and pendant lights over the bar made the kitchen brighter.
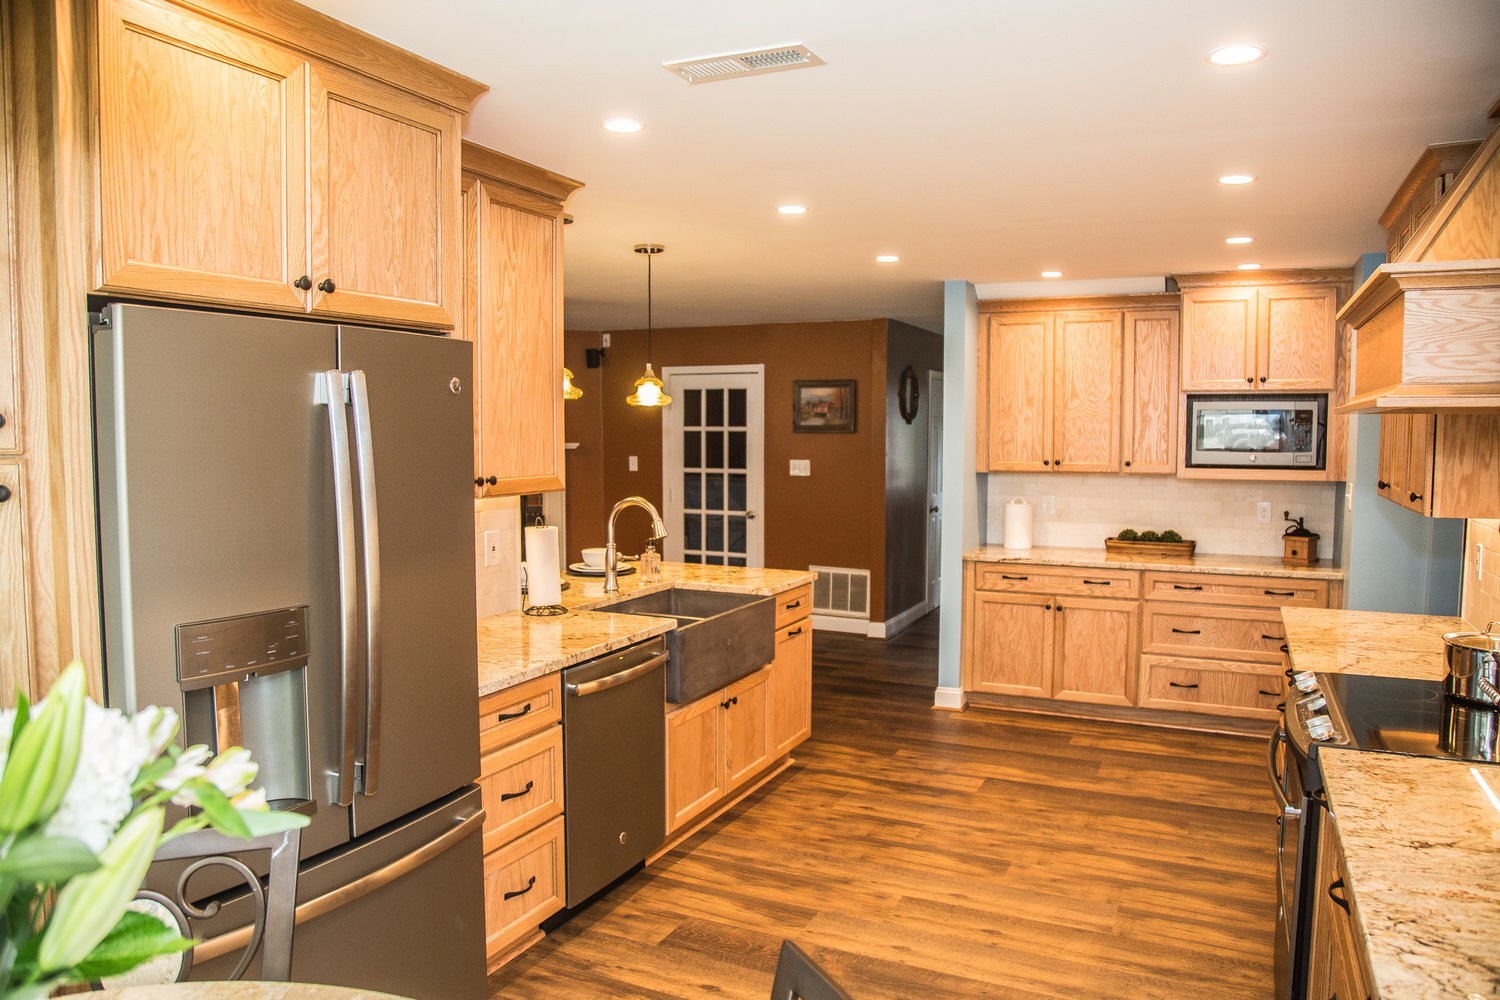
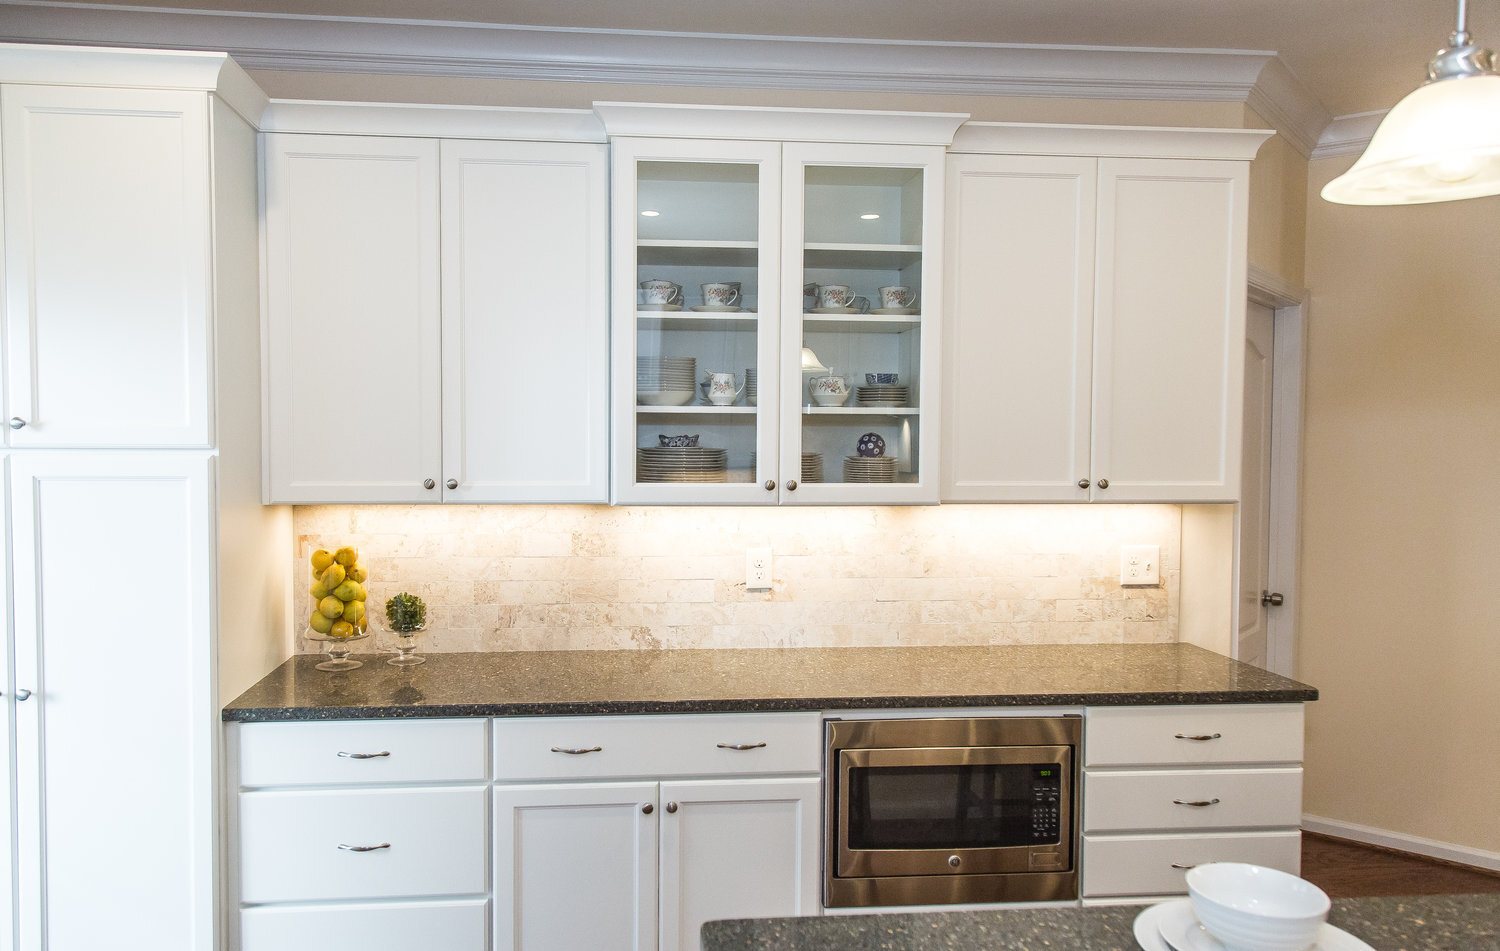
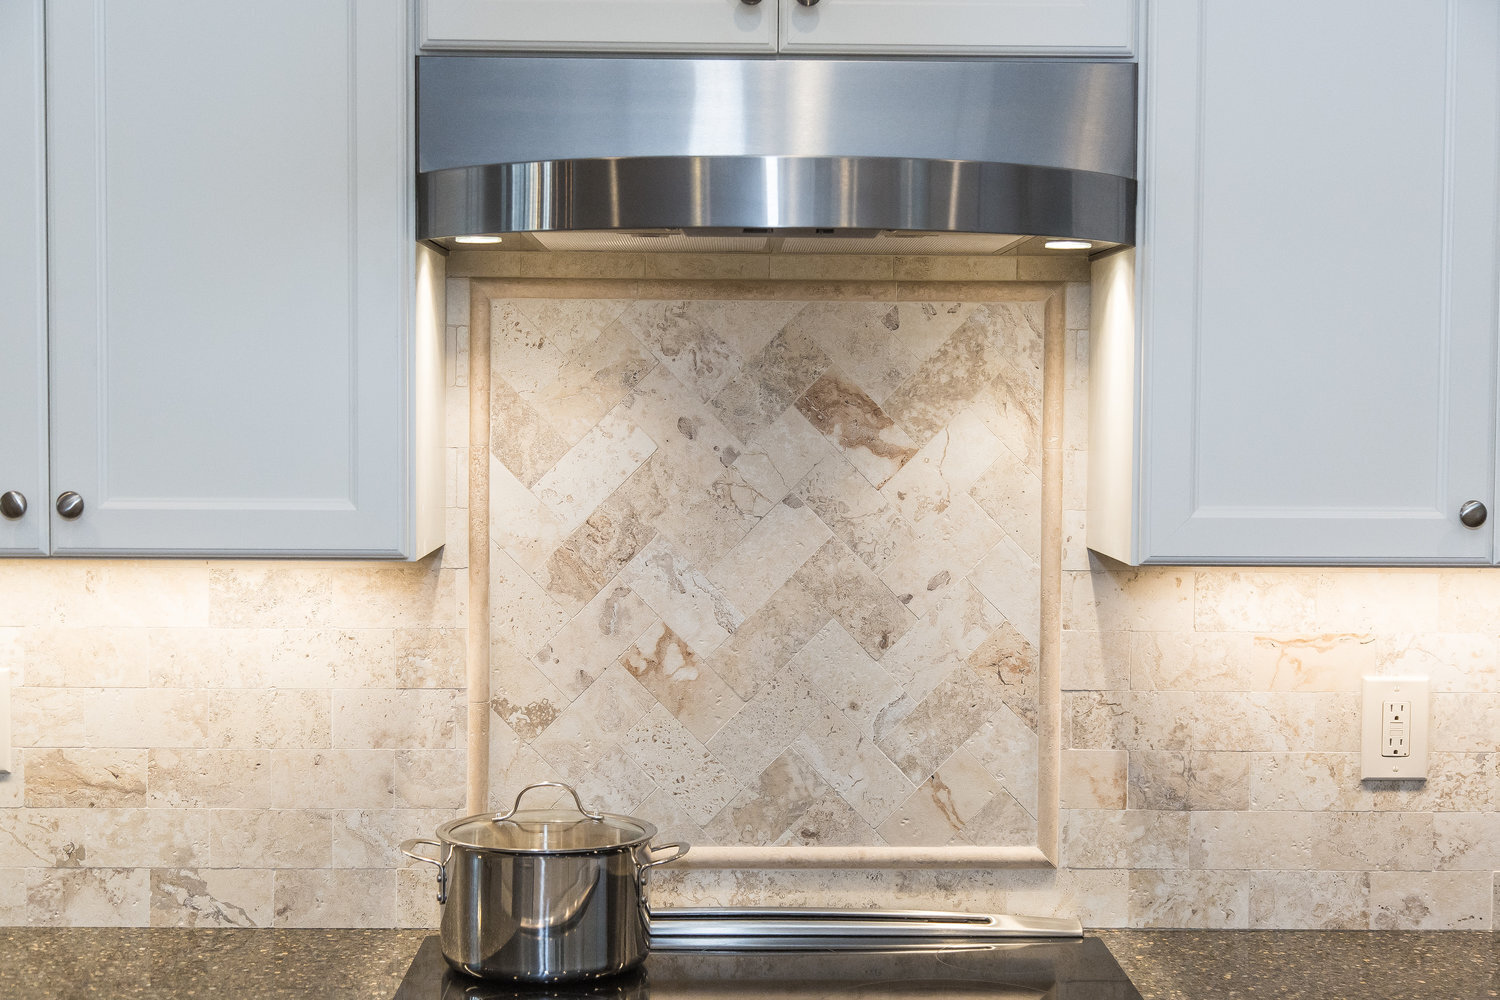
The material selections were integral in transforming the space into a personalized dream kitchen. Our clients chose a maple cabinetry with an oak stained tumbleweed finish and modern hardware paired with creamy granite countertops. The square tan colored tile along the walls were replaced with a pearl tumbled travertine backsplash in subway style. This change modernized the space and elongated the walls, giving it a streamlined and “unfussy” look. A few standout features that added character to the space include a set of floating shelves, concrete farmhouse sink, and mercury glass pendant lights. Flooring throughout the first level was updated to an easy-to-maintain synthetic wood floor.
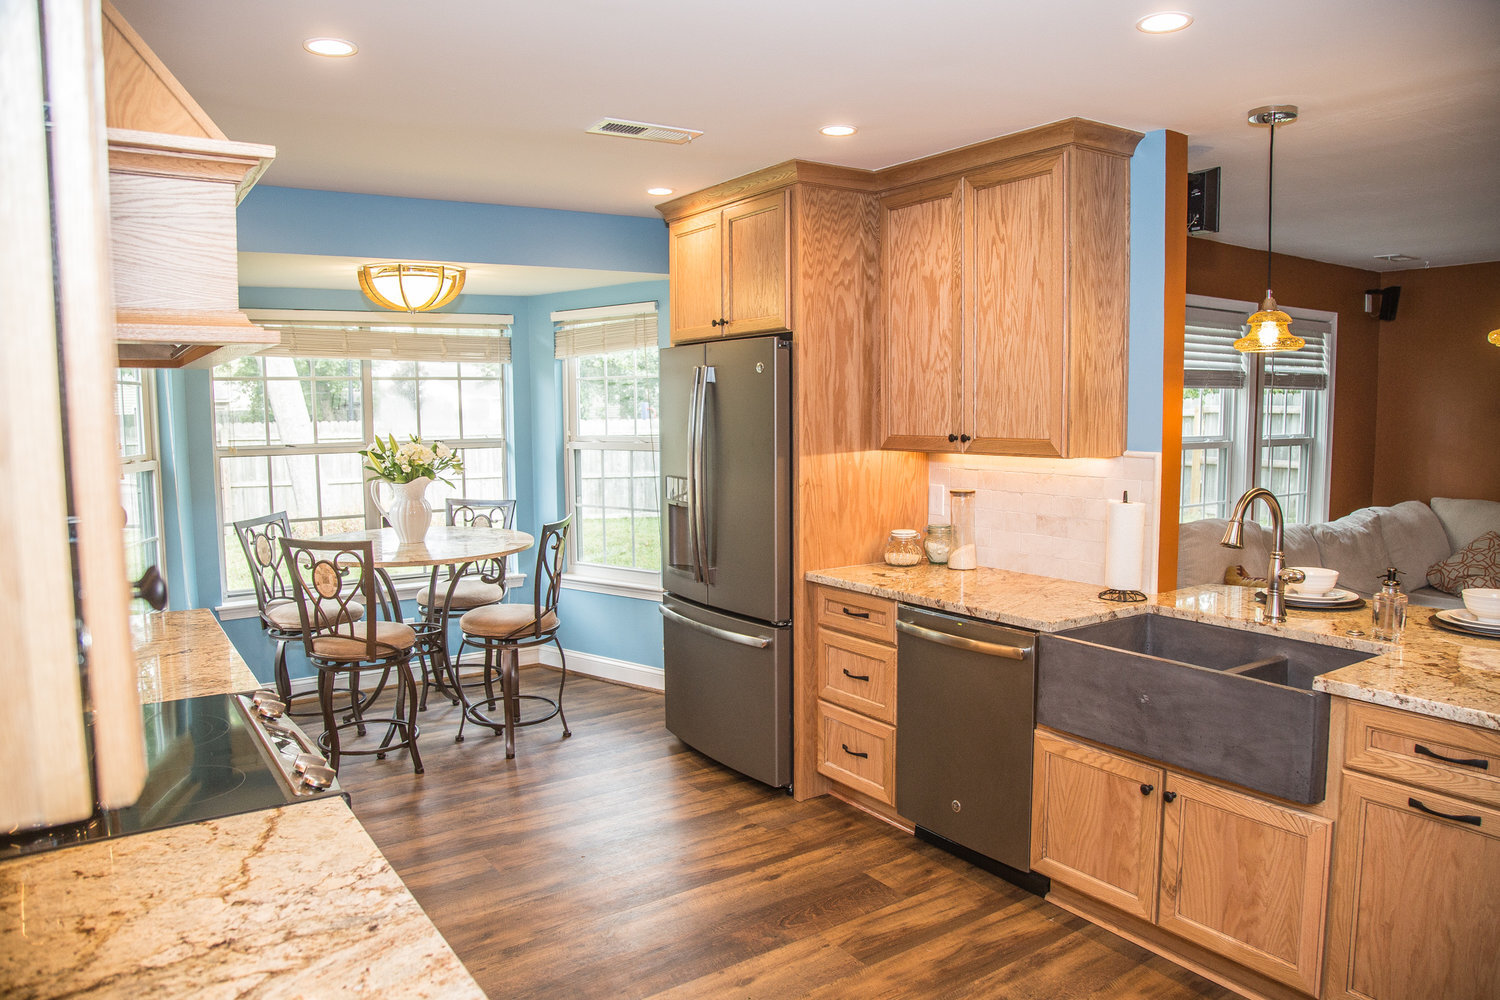
“I am in love with our kitchen every single day. It’s still hard to believe the transformation it went through, but the function is infinitely better, and the beauty and quality is incredible.”
The homeowners are happy that they can now cook, entertain and dine in a space that was designed specifically for their needs and that reflects their style! Are you ready to love your home again? We would love to talk with you.

Prepare For Your Remodel With These Five Steps

The journey to creating your dream home is an exciting and liberating experience! From design consultations and material selections, to the unveiling of your 3D renderings and the start of construction, the process of seeing your dream project come to life is unforgettable. But before your project crew shows up, you will want to spend some time getting your home and family ready for a smooth transition.
HERE ARE FIVE STEPS TO HELP YOU PREPARE FOR YOUR REMODEL:
1. Clean out all rooms and hallways that are being remodeled. Remove furniture, artwork from walls, and any other belongings. We recommend removing items hanging on walls in common traffic areas and walls adjacent to those involved in your remodel project as well. Store these items in an unaffected area of your home or in a storage unit temporarily.
2. Designate alternate areas for family activities. Identify new locations for activities that typically take place in the room(s) you are remodeling. This will minimize the disruption to your daily routine. Relocate any necessities to the new temporary spaces, such as computers, televisions, homework tables, etc.
3. Clear your driveway and make room in your garage for deliveries. Remove stationary items from your driveway such as basketball nets, trash receptacles, or storage containers. Ask your remodeler if access to your garage would be helpful for delivering and storing materials. They should be able to provide you with a schedule of deliveries.
4. Prepare your pets. Pets tend to be more prone to disruption of their regular routine than people. That’s why it’s important to get your pets set up with a place for them to relax and eat that is away from any construction areas. Start this new routine a few days before the remodeling starts to allow them some time to adjust. Be sure to let the crew know how many pets you have and where they are within your home.
5. Kitchen & Bath Prep. If you are remodeling a kitchen or bathroom we recommend the following:
a. Pack cabinets one by one and label the contents of each box. This will make unpacking so much easier.
b. Compile essentials and relocate them to your alternate eating space or bathroom.
c. Purchase disposable items such as plates, bowls, cups, plastic utensils, and paper towels.
d. Move your refrigerator and microwave to the garage, basement or other appropriate spot where you can have easy access. Consider purchasing a hot plate.
e. Prepare and freeze meals ahead of time.
We hope that these tips will make the transition into construction easy for you and your family. At Benson Homes, we provide you with a detailed project schedule and have weekly on-site meetings to discuss your project’s progress. It’s our goal to make the remodeling process as stress-free as possible for you and your family!

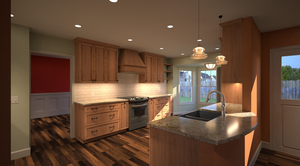
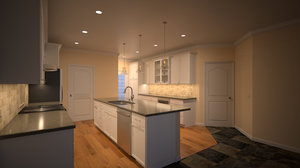
Bringing Designs to Life with 3D Renderings by Benson Homes

Wouldn’t it be exciting to be able to see what your remodel is going to look like well before the work has started? After spending time with our design team tweaking plans and shopping for cabinets, flooring, and other finishes, you might still be unsure of exactly what it will look like. We often hear “I’m not good at visualizing”. When you work with Benson Homes, you can see exactly what it will look like! We create 3D renderings that bring your project to life, allowing you a virtual view of your future remodeled space.
With our sophisticated photo realistic 3D renderings you can see the amazing way all your finishes and selections blend into a symphony of colors and textures transforming your home into an exciting new space.
The meeting where we unveil our 3D renderings to our clients is one of the most exciting parts of the remodeling process. We love to watch their expressions of awe and excitement. It can sometimes leave them momentarily speechless while they absorb the fullness and beauty of the transformation to their home they have been hoping and dreaming about, in some cases for years. It’s fantastic to see our clients fall in love with their homes again!
To demonstrate just how effective they are in providing an accurate representation of the end product, take a look at some of our renderings shown side-by-side with the photography taken after the renovations were completed. We think you’ll be amazed too!
Click on the thumbnails below to expand images.


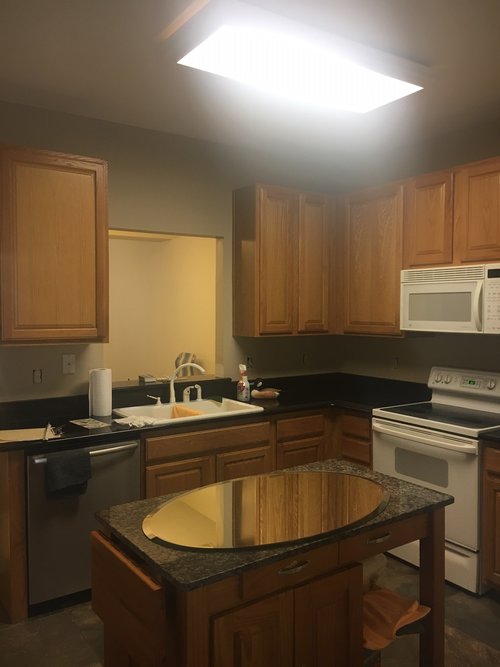
Entertainment-Ready Kitchen Remodel by Benson Homes
This remodeling story is a wonderful example of how removing and shifting walls can have an amazing impact on the functionality and visual appeal of an entire level of a home. When our clients reached out to us, they were looking to create an open concept Kitchen that would allow for easy entertaining. The couple had recently purchased this townhome so his mother could be closer to the family.
Watch the transformation video!
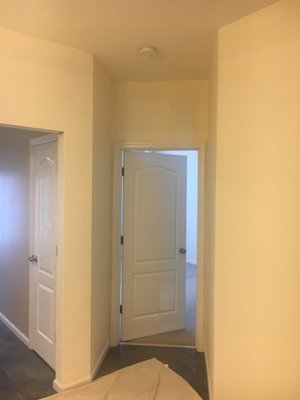
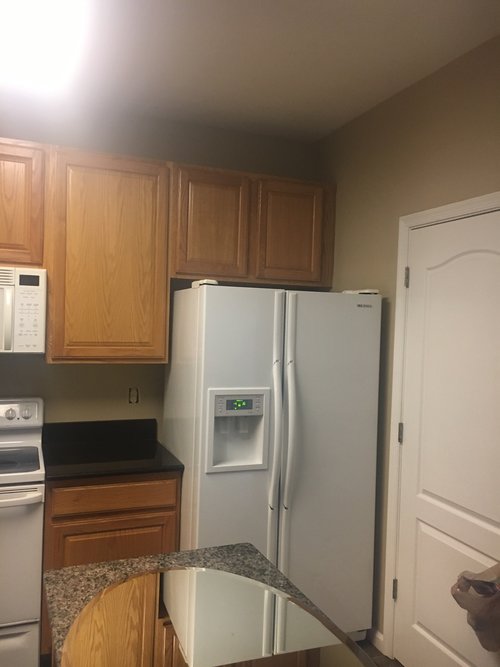
The existing floorplan offered first floor living, but the Kitchen was tucked in the back and was separated from the rest of the living space by a full wall with a small pass through into the Dining Room. Our design involved removing the dividing wall between the Dining Room and Kitchen as well as the fake columns and beam that separated the Dining Room and Living Room. The entire space was opened up to allow for easy flow and view throughout the first floor living space. The wall shared by the Kitchen and large Master Bedroom was shifted back just enough to provide a full wall of additional cabinetry including a much-needed large double Pantry cabinet. Now that we had opened up the Kitchen area we could focus on the cabinetry layout and selections.
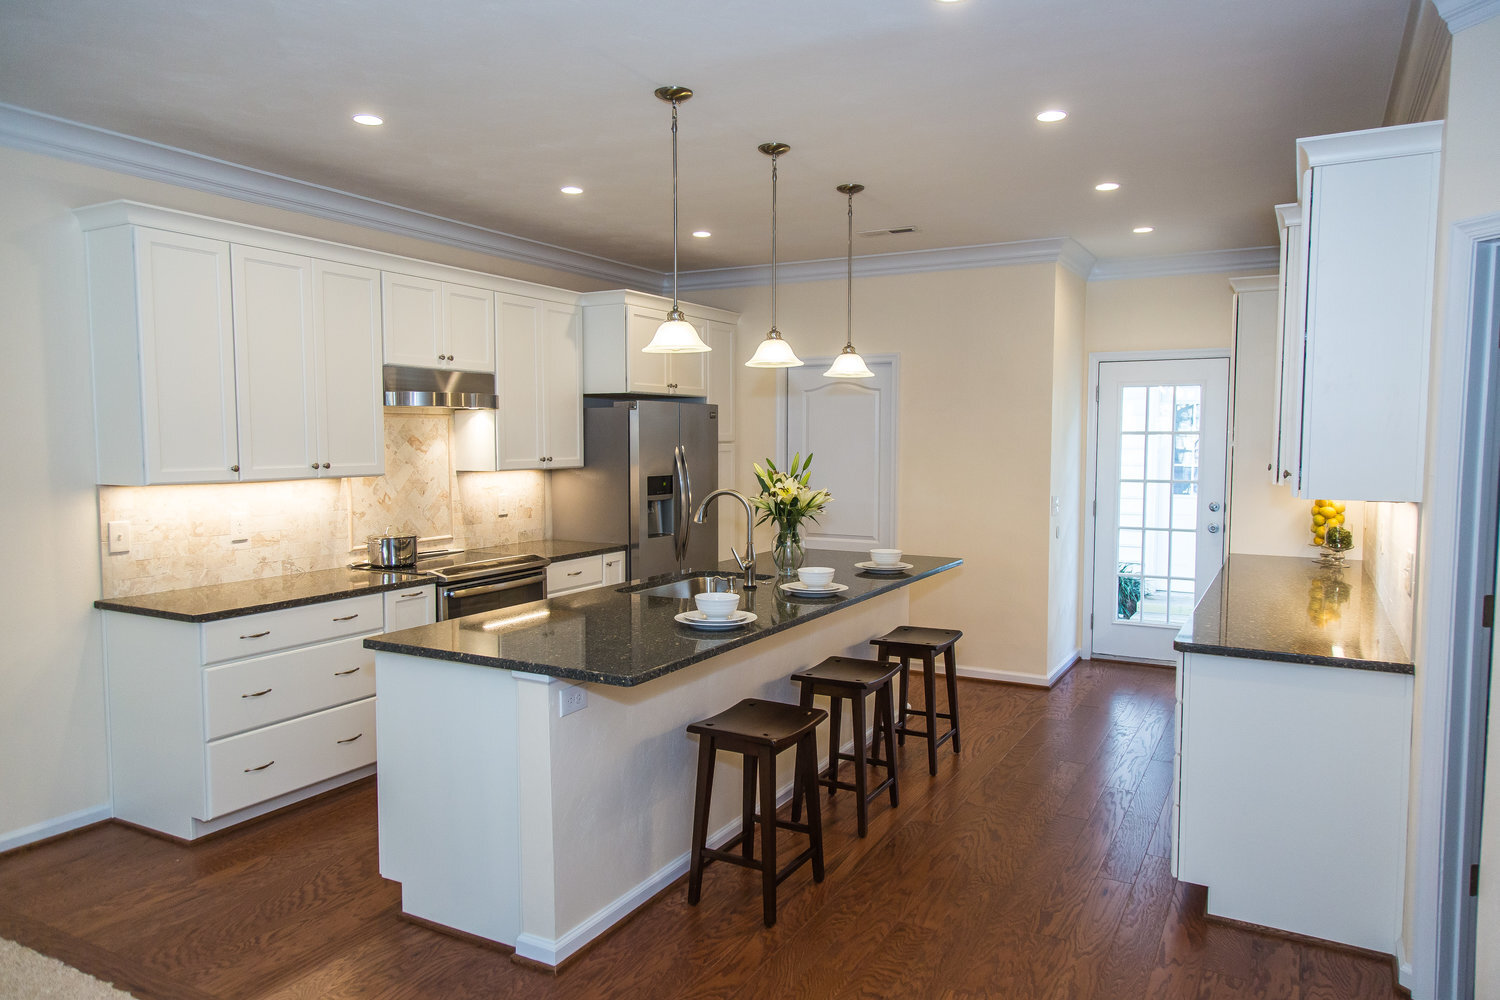
The existing wood toned cabinets were replaced with white with a crown molding to match with the rest of the home. The larger, open space allowed for more cabinetry and the addition of an island with seating for the grandkids. We were able to repurpose the old cabinets above the washer and dryer in the adjoining laundry room and swapped out the existing swing door for a pocket door. The slate-look ceramic tile was replaced an engineered wood flooring that creates a sense of warmth and is very easy to clean. A dark Cambria countertop compliments the tile found in the dining and living area and a natural field tile backsplash offsets the cabinets beautifully.
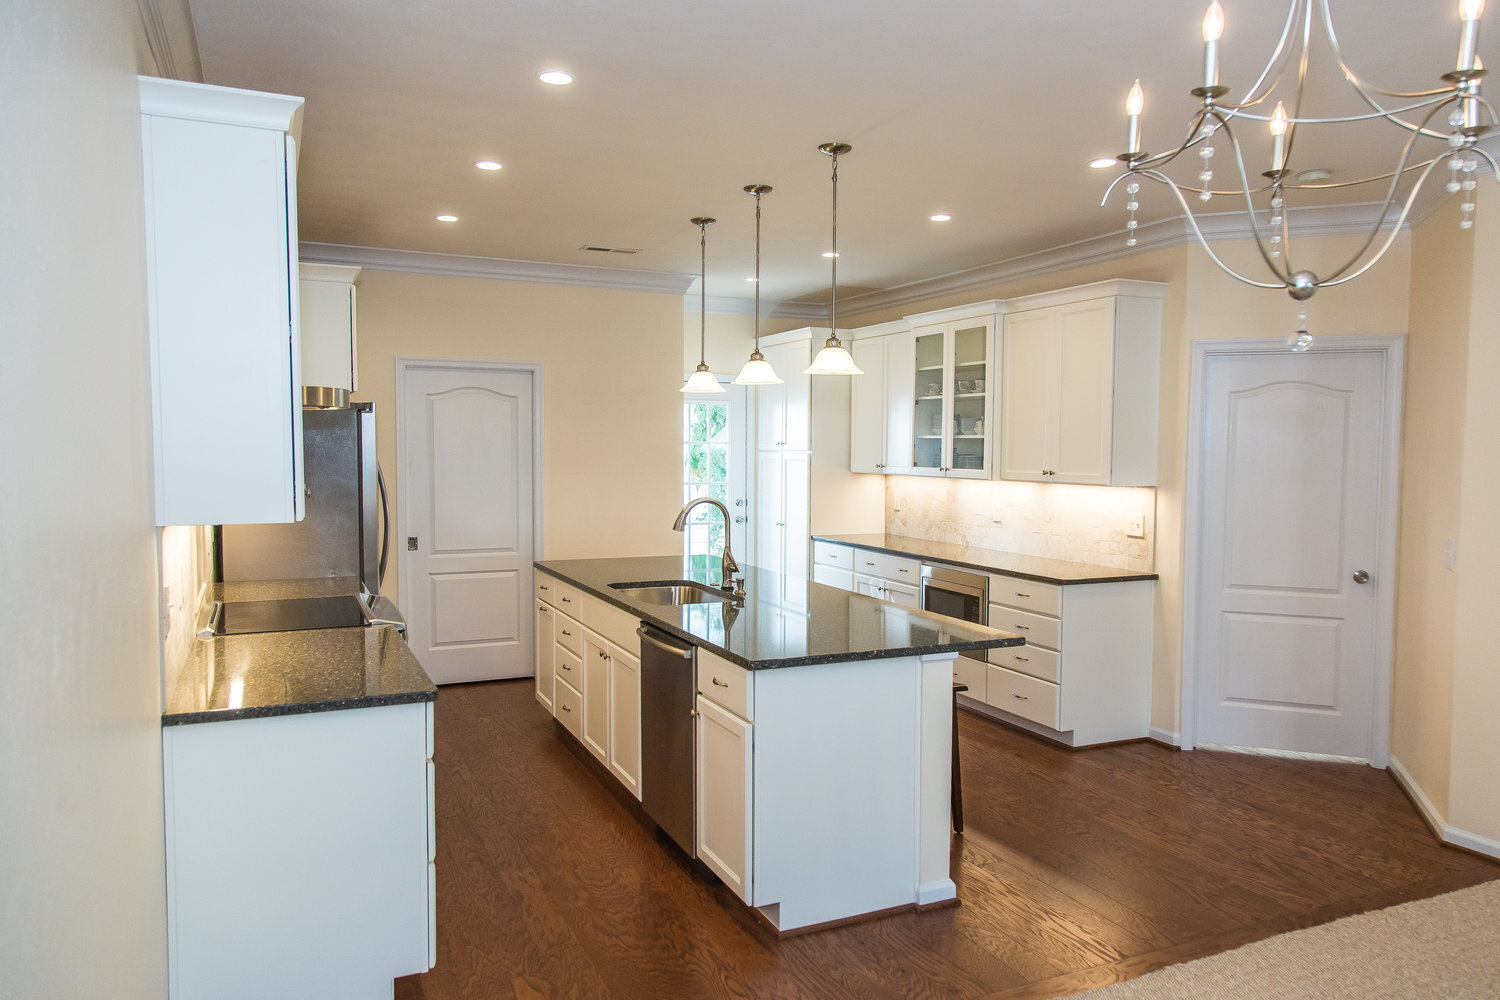
The single fluorescent ceiling light was outdated and did not provide adequate lighting for the new Kitchen. The new lighting plan was carefully thought out to provide general illumination through well placed recessed lighting; task lighting through pendant lighting over the island and under cabinet lighting; and aesthetic fluidity with an eye-catching chandelier for the Dining Room table. Special details include a touch faucet, under counter microwave and glass front cabinetry for displaying dishes.
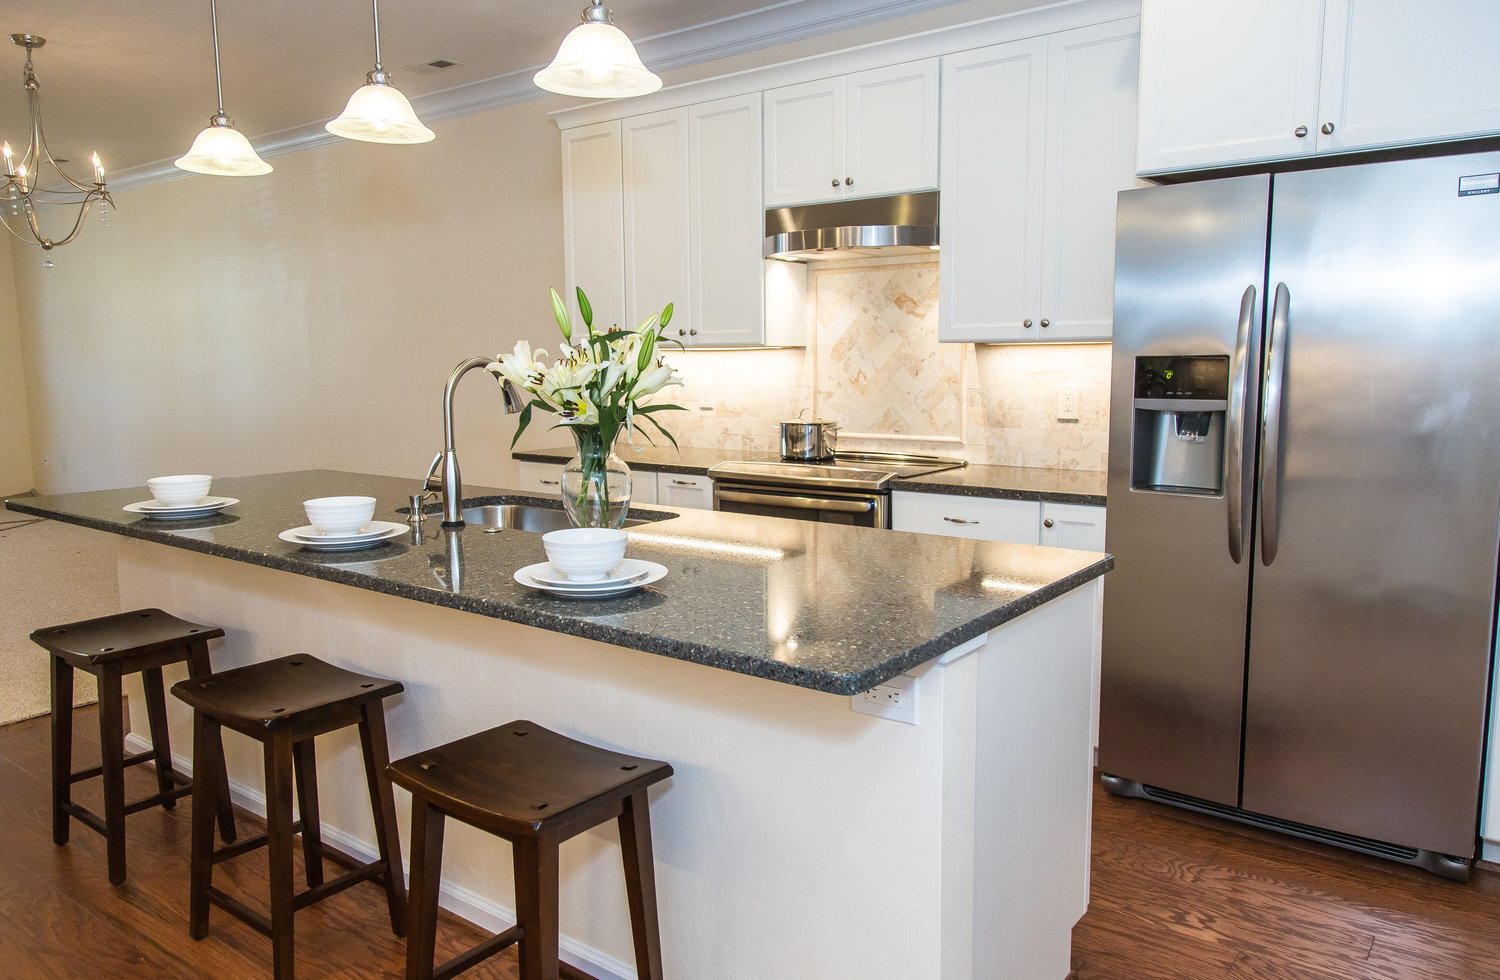
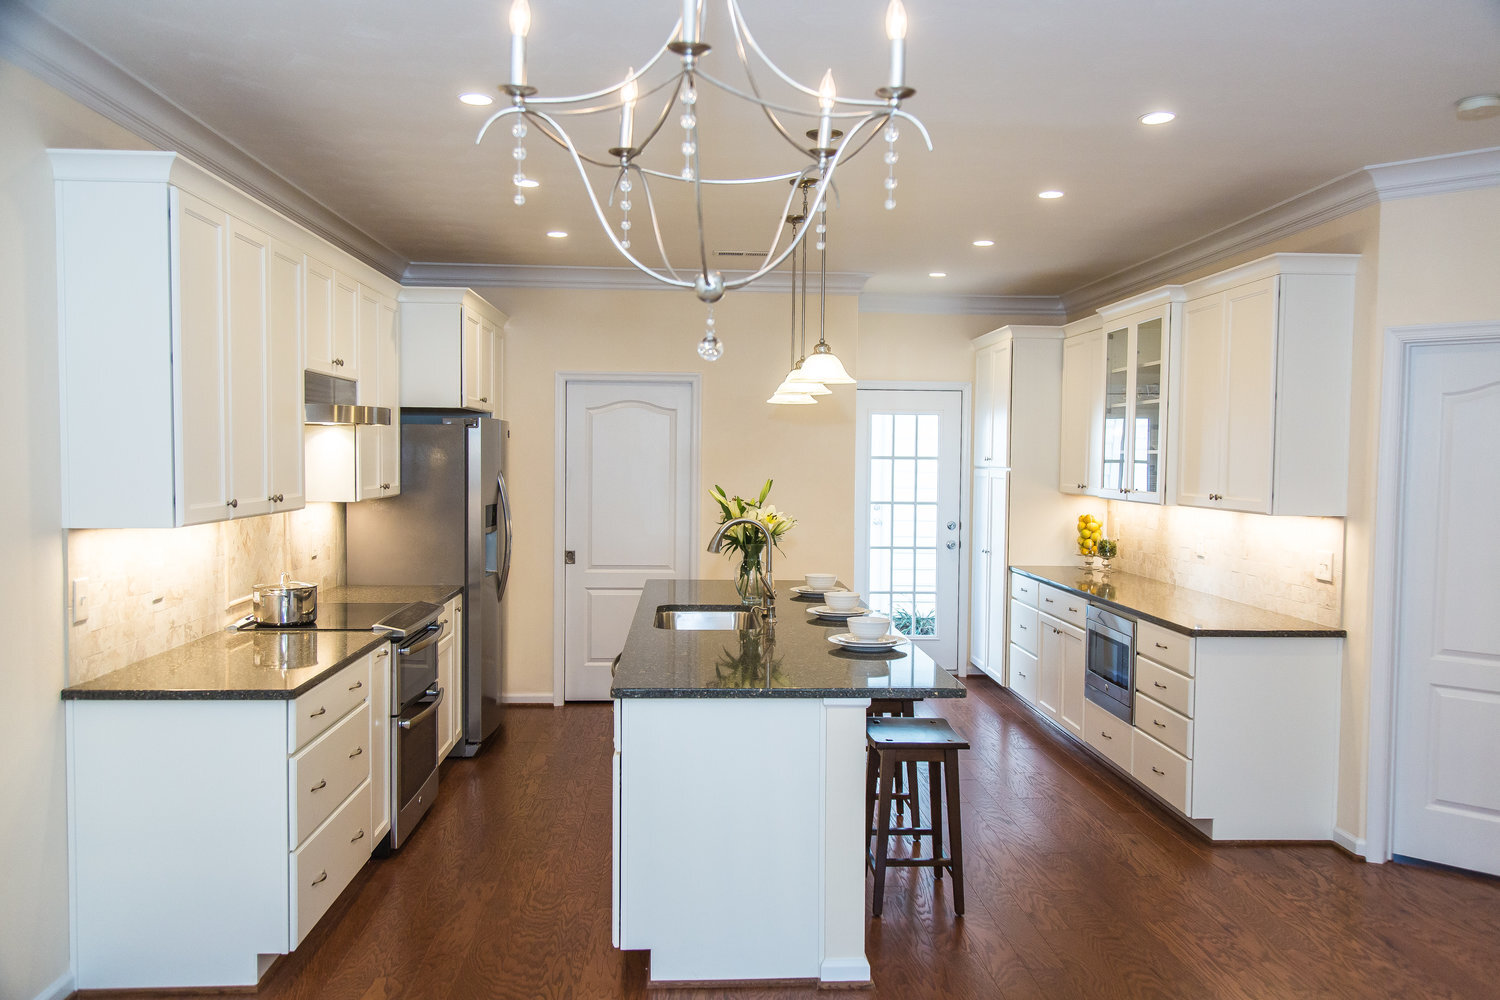

By removing and shifting walls, we improved the entire flow of the first floor visually as well as functionally and created a beautiful, light-filled space for cooking and entertaining. Grandma can easily prepare meals in her new Kitchen and still chat with her guests and grandchildren who love to sit at the island as well as in the adjoining Dining Room and Living Room.
The Benson Homes team really enjoyed creating this space for this family and we hope they will enjoy spending time with friends and family for years to come.